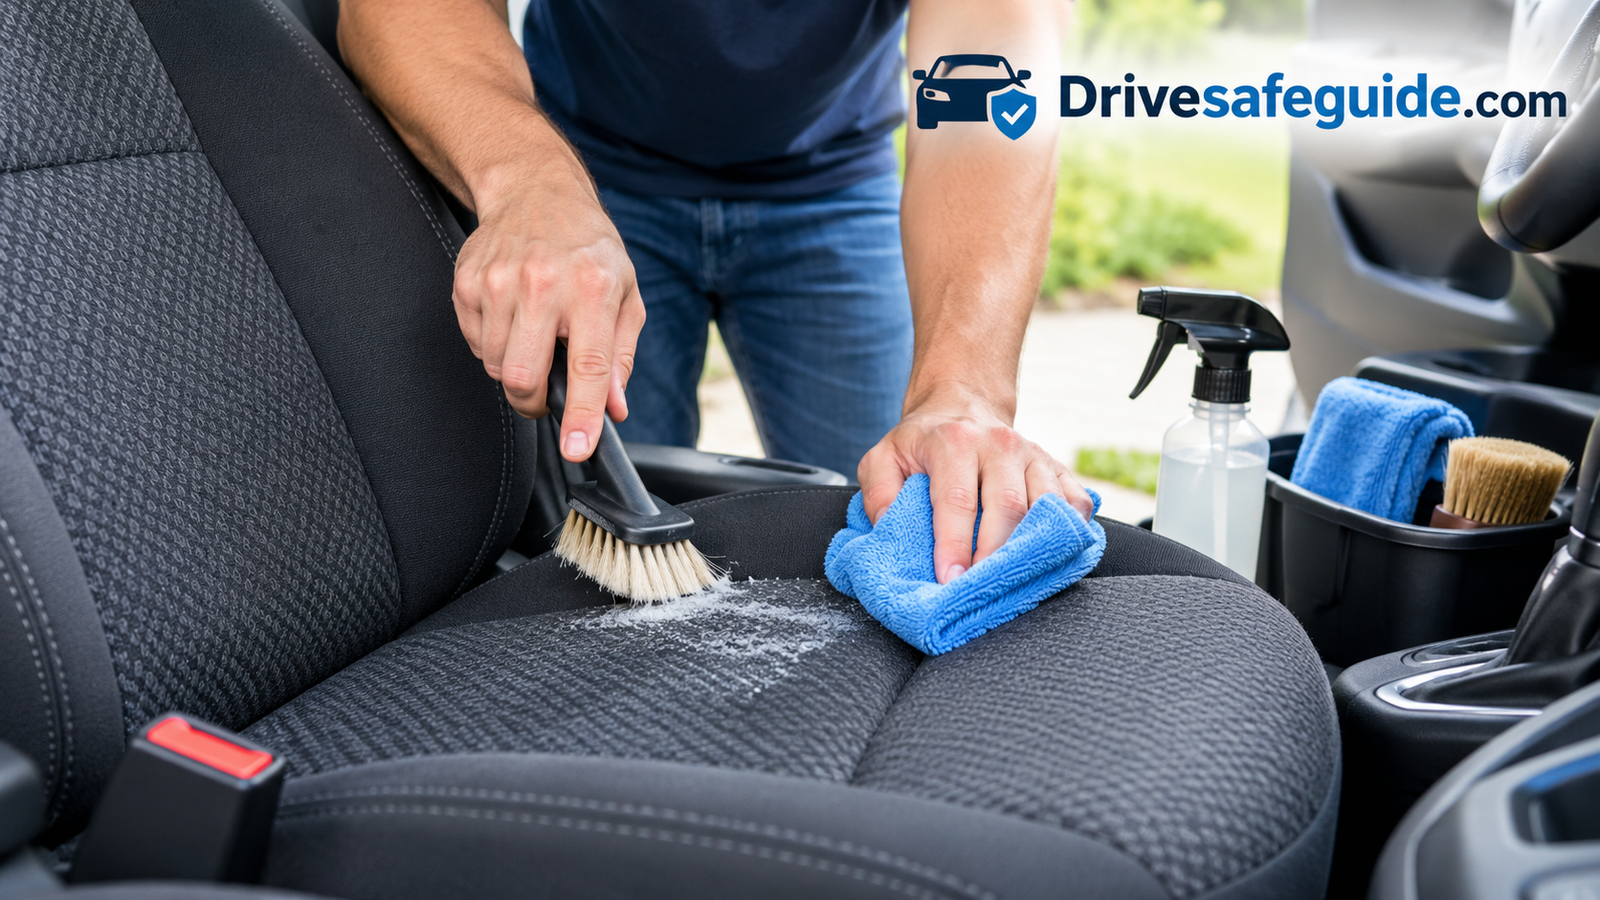
How to Clean Car Seats: A Complete Guide for Fabric, Leather, and Vinyl
Spilled coffee, muddy paws, mystery stains, and years of sweat all end up in your seats. Here is exactly how to lift every bit of it out safely, whatever your upholstery is made of.
Why Clean Seats Properly (and Why Most People Do It Wrong)
Think about how much of your day touches your car seats. Your back, your legs, your hands, your gym bag, the grocery spill from last Tuesday. Seats are the largest soft surface in your vehicle, and they quietly collect skin oils, sweat, crumbs, dust, pet dander, and moisture. Over months, that mix turns into dark patches on the bolsters, a stale smell you stop noticing, and fabric that feels stiff or greasy.
Cleaning them is not just about looks. Dirt acts like fine sandpaper, grinding into fibers and leather grain every time you slide in and out. Body oils break down leather finish and cause cracking. Moisture trapped in foam cushions can grow mildew. A clean seat lasts longer, resists stains better, and keeps resale value high, which is often worth far more than the few dollars of supplies you will spend.
The reason most people struggle is simple: they grab one product and use it on everything, or they soak the seat in water and hope for the best. Upholstery is not one material. Fabric, leather, perforated leather, vinyl, and suede-style microfiber all demand different treatment. Soak a fabric seat and you risk a damp cushion that smells for weeks. Use a harsh all-purpose cleaner on leather and you strip the protective topcoat.
This guide walks you through the whole process in a logical order. You will learn how to identify what you are cleaning, gather the right supplies, vacuum correctly, test before you commit, and then follow a method matched to your seat type. Every major step includes a diagram so you can picture exactly what to do. If you want a broader approach to the rest of the cabin afterward, our guide to the best car cleaning kit is a good companion read.
Starting from scratch? Browse popular upholstery cleaning kits that include brushes, cloths, and cleaner in one box.
Shop Car Interior Cleaning KitsIdentify Your Seat Material Before You Touch Anything
This is the single most important decision in the whole job, so do not skip it. Your owner’s manual almost always lists the upholstery type and often includes cleaning guidance. If the manual is missing, you can work it out in about a minute with a few simple checks.
Press a fingertip into the seat. Genuine leather has an irregular, slightly warm grain, and it develops fine creases like skin. Vinyl and faux leather feel more uniform, almost plastic, with a repeating pattern. Cloth shows visible woven threads. Microfiber suede-style materials feel soft and brushed, and the nap changes color when you drag a finger across it.
| Material | How it looks and feels | Best cleaning approach | Biggest risk |
|---|---|---|---|
| Woven fabric / cloth | Visible threads, matte, absorbs water | Upholstery cleaner, soft brush, blot and extract | Over-wetting and water rings |
| Genuine leather | Natural grain, soft, creases with age | pH-balanced leather cleaner, then conditioner | Harsh chemicals drying the surface |
| Perforated leather | Tiny holes in the seating area | Lightly dampened cloth, minimal liquid | Liquid clogging holes and soaking foam |
| Vinyl / faux leather | Uniform, smooth, slightly shiny | Mild soap solution, soft cloth | Solvents causing stickiness |
| Microfiber / suede-style | Brushed, soft nap, shows marks | Check tag code, often solvent or dry method | Water staining if code forbids water |
If you find a care tag under the seat or on a hidden seam, look for a letter code. W means water-based cleaners are fine. S means solvent only. WS means either works, and X means vacuum or brush only. This small tag has saved countless seats from a bad decision.
Not sure what you have? A cleaner labeled safe for multiple interior surfaces is a handy starting point.
Shop Upholstery CleanersThe Supplies and Tools You Actually Need
You do not need a professional detailing bay. A short, well-chosen list does the job, and most of it you may already own. Gather everything before you start so you are not walking around with wet hands looking for a towel.
Core Toolkit
- A strong vacuum with a crevice tool and brush head. Cordless handhelds are fine for a quick job, but a corded unit pulls out far more grit. Our roundup of the best car vacuum cleaners covers solid options at every budget.
- Soft-bristle upholstery brush. Stiff bristles can fuzz fabric or scratch leather, so choose soft or medium.
- Detailing brush or old soft toothbrush for seams, stitching, and seat controls.
- Five to eight clean microfiber towels. Keep separate towels for cleaning, rinsing, and drying.
- Spray bottle filled with clean water for diluting and misting.
- Two buckets or bowls, one for solution and one for rinse water.
Cleaners by Seat Type
- Fabric: a dedicated automotive upholstery cleaner, or a gentle mix of a few drops of clear dish soap in a cup of warm water.
- Leather: a pH-balanced leather cleaner and a water-based leather conditioner with UV protection.
- Vinyl: mild soap solution and a non-greasy vinyl protectant.
- Optional extras: a wet-dry vacuum or small portable extractor, baking soda for odor, white vinegar for certain stains, and a hair dryer or fan for faster drying.
Handy Protective Gear
Wear nitrile gloves if you are tackling anything biological, and keep a trash bag nearby for debris. Pulling everything out of the cabin first, including loose items, makes the job smoother. If you are constantly dealing with clutter, one of the best car trash cans keeps the mess from returning.
Pros of a dedicated kit
- Matched cleaners and brushes
- Less guesswork on dilution
- Often cheaper than buying separately
Cons of a dedicated kit
- May include products you will not use
- Cheap brushes can be too stiff
- Not all kits cover leather and fabric
Build your toolkit: Soft upholstery brushes and microfiber towel packs are inexpensive and make a visible difference.
Shop Brushes and TowelsStep 1: Clear the Cabin and Vacuum Every Surface
STEP 1Start by removing everything: floor mats, loose items, child seats, and anything tucked into seat pockets. Slide the front seats all the way forward, vacuum the rear footwells and under-seat areas, then slide them all the way back and repeat. Recline the seatbacks if possible so you can reach the hinge area where crumbs hide.
Now work the seat itself in a pattern. Use the brush attachment on the cushion and backrest to loosen surface dust, then switch to the crevice tool along every seam, between the cushion and backrest, and around the seat belt buckles. This is where coins, French fries, and grit gather. Skipping this step is the most common reason a cleaned seat looks muddy afterward, because wet cleaner turns loose dirt into paste.
For stubborn pet hair woven into fabric, a rubber squeegee or a damp rubber glove dragged across the surface rolls hair into clumps you can pick up easily. If hair is a recurring problem, our guide on traveling with your dog in the car includes setup ideas that limit shedding on your upholstery.
Need better suction? A compact vacuum with a crevice tool and brush attachments pays for itself quickly.
Shop Car VacuumsStep 2: Spot-Test Your Cleaner in a Hidden Area
STEP 2Every upholstery dye behaves differently. A cleaner that works beautifully on one car can bleach, darken, or stiffen the fabric on another. A spot test takes two minutes and protects you from a visible mistake. Choose a hidden spot: the underside of the seat, the back of the seatback near the floor, or a low edge that sits against the door sill.
Apply a small amount of your diluted cleaner with a cloth, rub gently, and then blot with a clean white towel. Check the towel for color transfer. Wait until the spot is completely dry before judging the result, because wet fabric always looks darker. If the color holds, the texture feels normal, and there is no ring or stiffness, you are cleared to proceed. If anything looks off, dilute the cleaner further or switch products.
This step is also your chance to learn how much liquid the seat can handle. If the area darkens heavily from just a light mist, you are dealing with thick foam underneath, and you should plan to use less liquid than you think you need.
Choose a gentle formula: Look for cleaners labeled safe for automotive fabric and leather, with a pH-balanced formula.
Shop Seat CleanersCleaning Fabric Seats: Pretreat, Agitate, Extract, and Dry
Fabric seats are the most common and the most forgiving, provided you control the moisture. The goal is to loosen soil with a cleaner, lift it out into a towel or extractor, and dry the seat quickly. Follow the four steps below in order, working one section at a time, such as one cushion or one backrest, so cleaner never dries on the surface.
Step 3: Pretreat Stains and Heavy Soil
STEP 3Lightly mist visible stains and the dark, high-contact areas on the bolsters and headrests with your cleaner. Let it dwell for three to five minutes so the surfactants can break the bond between dirt and fibers. Do not saturate; you want the fabric damp, not soaked. For oily stains, dab the cleaner on with a cloth rather than spraying.
Step 4: Agitate Gently With a Soft Brush
STEP 4Using a soft upholstery brush, scrub in small overlapping circles, then in straight lines in one direction. The cleaner should foam lightly. Press just enough to move the bristles through the fibers, because heavy pressure can fuzz the fabric or push stains deeper into the foam. Work from the outside of a stain toward the center to prevent spreading.
Step 5: Blot and Extract the Dirt
STEP 5Press a clean, dry microfiber towel firmly into the area and hold for a few seconds, then lift. Do not rub; blotting pulls the dirty liquid up into the towel. Switch to a fresh section of towel as it picks up color. If you own a wet-dry vacuum or portable extractor, this is where it shines: mist lightly with clean water, then pull the water straight back out to rinse the fabric. Repeat until the towel comes away clean.
Step 6: Dry the Seat Completely
STEP 6Drying is where cleaning succeeds or fails. Park in sun or a ventilated garage, open all doors or windows, and aim a fan at the seats. Running the car heater with windows cracked also helps. A hair dryer on a cool setting speeds up dense foam areas. Most seats are dry in two to four hours, but thick cushions can take longer in humid weather. Do not close the car up until the fabric feels dry to the touch and no longer cool.
Why this method works
- Low moisture protects the foam
- Works with store-bought or homemade cleaner
- Lifts both surface dirt and body oils
Watch out for
- Over-wetting causes musty smells
- Aggressive brushing fuzzes the weave
- Dark fabrics can show detergent residue
Deeper clean for fabric: A small portable carpet and upholstery extractor makes rinsing and drying far easier.
Shop Portable ExtractorsCleaning Leather Seats: Wipe, Clean, and Condition
Leather is durable but not indestructible. Modern automotive leather has a thin protective topcoat that does most of the work, and the biggest cleaning mistake is stripping that coating with harsh products. The approach below is gentle, fast, and repeatable. Each stage has its own diagram so you can picture the motion.
Leather Step 1: Dust and Wipe
LEATHER STEP 1After vacuuming, wipe the seats with a barely damp microfiber towel to remove surface dust. Dust left on the surface scratches the finish during scrubbing, so this prep pass matters. Pay attention to the creases where the seat folds, as that is where abrasive grit gathers.
Leather Step 2: Apply Cleaner and Lift Grime
LEATHER STEP 2Spray leather cleaner onto a soft brush or towel, not directly onto the seat, to prevent overspray and pooling in seams. Work a small section at a time, using gentle circular motions with a soft detailing brush for textured grain. Wipe away the loosened grime immediately with a clean towel. On light leather, you may see color on the towel, which is normal body oil and dirt, not dye.
Leather Step 3: Condition and Protect
LEATHER STEP 3Once the leather is clean and dry, apply a thin layer of water-based conditioner with a foam applicator. Work it in until the surface looks even, wait about ten minutes, then buff off the excess with a dry towel. Conditioner replaces moisture and adds UV protection, which slows fading and cracking. Over-applying leaves a greasy finish that attracts dust, so use less than you think you need. Condition every three to four months, or more often in hot climates. Parking in shade or using a sunshade with a strong UV rating also protects leather between treatments.
Protect your leather: Choose a pH-balanced cleaner and a conditioner with UV filters, ideally in a matte finish.
Shop Leather Care KitsCleaning Vinyl, Faux Leather, and Microfiber Seats
Vinyl and synthetic leather are tougher and easier to maintain, since they do not absorb liquid the way real leather or cloth does. Wipe with a soft cloth dampened with warm water and a few drops of mild soap, work in sections, and follow with a clean damp cloth to remove residue. Dry with a microfiber towel. For textured grain, use a soft brush to reach the low spots where grime hides.
Avoid solvent-heavy cleaners, alcohol in high concentrations, and magic erasers on vinyl, which can cause dulling or sticky patches. After cleaning, apply a non-greasy vinyl protectant, ideally one with UV filters. Skip the high-gloss dressings; they look wet for a day, then attract dust and can make the seat slippery.
Microfiber and Suede-Style Seats
These soft, brushed fabrics look luxurious but show water marks easily. Check the care tag first. If it allows water, mist the area lightly, wipe gently in one direction, and let the nap dry before brushing it back with a clean, soft brush to restore the texture. If the tag shows an S or X, use a solvent-based cleaner designed for the material or a dry brush only. Always clean an entire panel edge to edge so you do not leave a visible boundary line.
| Surface | Safe cleaner | Avoid | Finish |
|---|---|---|---|
| Vinyl | Mild soap and water | Strong solvents, harsh scrubbers | Matte UV protectant |
| Faux leather | Gentle interior cleaner | Alcohol-heavy wipes, oily dressings | Light conditioner |
| Microfiber | Per tag code, minimal moisture | Soaking, stiff brushes | Brush the nap back |
If your seats get hot enough in summer to stick to your legs, a breathable cover or one of the best car seat cushions for long drives reduces both heat and direct contact with the surface.
Vinyl and faux leather care: Pick a non-greasy protectant that blocks UV without a slick finish.
Shop Vinyl ProtectantsStain-by-Stain Guide: What Works for Coffee, Grease, Ink, and More
General cleaning handles everyday dirt, but specific stains need a smarter plan. The golden rule is to act quickly, blot instead of rubbing, and use the mildest effective product. Always test first, and never mix cleaning chemicals, especially bleach and vinegar or ammonia products.
| Stain | Fabric method | Leather / vinyl method |
|---|---|---|
| Coffee or tea | Blot, mist with water and a drop of dish soap, blot again. A little diluted white vinegar helps with older marks. | Wipe immediately with a damp cloth, then use leather cleaner. |
| Grease or oil | Cover with baking soda for 15 minutes, vacuum, then treat with upholstery cleaner. | Dab with cleaner, never rub. Repeat lightly if needed. |
| Ink | Dab with a cloth lightly dampened with isopropyl alcohol, working from the edge in. Test first. | Use a dedicated leather ink remover or leather cleaner on a cotton swab. |
| Chocolate or food | Scrape off solids, apply cleaner, agitate, blot. | Wipe with soapy cloth, then rinse and dry. |
| Blood | Use cold water only, then upholstery cleaner. Hot water sets it. | Cold damp cloth with mild soap. |
| Pet accidents | Blot, apply enzyme cleaner, let it dwell, then extract. | Wipe, apply enzyme-safe cleaner, dry thoroughly. |
| Denim dye transfer | Treat with upholstery cleaner and gentle agitation; repeat across several sessions. | Use leather cleaner, then a dedicated dye-transfer product if needed. |
Old, Set-In Stains
Dried stains need patience. Rewet the area lightly with cleaner, let it dwell for ten minutes, then agitate and extract. Repeat two or three times instead of scrubbing harder. Sometimes a ghost of the stain remains, which is normal, and the fabric may look better after the whole panel is cleaned evenly so the stained area does not stand out.
Stock a stain-fighting backup: Enzyme cleaners and spot removers are worth keeping in the garage.
Shop Stain RemoversCleaning Up After Kids, Child Seats, and Pets
Family cars take the biggest beating. Juice boxes, cracker crumbs, wet swimsuits, and muddy paws are all part of daily life. The key is a routine that keeps messes small, plus a few smart protections so the worst spills never reach your upholstery.
Child Car Seats
Child seats are safety equipment, so follow the manufacturer’s cleaning instructions exactly. Most covers can be hand washed or machine washed on a gentle cycle, but harnesses and buckles often should be spot cleaned only, with mild soap and water. Harsh chemicals can weaken harness webbing. Never use bleach, solvents, or lubricants on the buckle. If you are choosing or installing one, our child car seat guide explains what to look for. Protective mats under child seats also keep dents and grime off your seat beneath.
Dogs and Cats
Pet hair, dander, and nose prints are manageable with a seat cover or cargo liner. Choose waterproof, washable covers you can toss in the laundry. If you are shopping for protection, see our breakdown of cargo liner material types and our look at pet restraint crash test ratings, since a secured pet is a safer pet and a cleaner car at the same time.
Motion Sickness and Spills
Vomit needs fast action: remove solids, blot, treat with enzyme cleaner, and ventilate. Drivers who get queasy on winding roads may find our guide to motion sickness as a driver helpful in avoiding the problem altogether.
- Keep a small emergency kit in the trunk: wipes, a spare towel, a plastic bag, and a small bottle of cleaner.
- Use waterproof seat protectors for kids’ snack time and sports practice.
- Wipe sticky spills within a day, before they attract more dirt.
Protect your seats from daily chaos: Waterproof seat covers and protective mats cut cleanup dramatically.
Shop Seat ProtectorsEliminating Odors, Drying Fast, and Preventing Mold
A seat can look spotless and still smell off. Odors cling to foam and fabric, and the cause is usually moisture, smoke, food, or pets. Treat the source, not just the smell, and avoid heavily perfumed sprays that only mask the issue.
Baking Soda Method
Once the seat is dry, sprinkle a light layer of baking soda across the fabric, let it sit for several hours or overnight, then vacuum thoroughly. Baking soda absorbs odor molecules instead of covering them. It works best on fabric and carpet, but avoid leaving it on leather or dark vinyl, where residue can show.
Enzyme and Odor-Neutralizing Cleaners
For organic odors from pets, spilled milk, or vomit, enzyme cleaners break down the proteins that cause smell. Saturate lightly, let the product work according to the label, then blot and dry. Odors that come back after a few days usually indicate residue still trapped in the cushion, so a second treatment may be needed.
Stopping Mold and Mildew
If a seat stays damp, mildew can develop within a day or two, especially in humid climates. Signs include a musty smell, dark speckles, or a damp feel. Dry the area immediately, treat with a diluted mix of white vinegar and water on fabric (test first), and run a dehumidifier or desiccant pack in the cabin. For a dirty cabin air system that spreads odors, consider following our cabin air filter replacement guide, because a clogged filter can make smells worse.
| Drying method | Speed | Best for | Notes |
|---|---|---|---|
| Open doors and sunshine | Moderate | Fabric, vinyl | Avoid direct strong sun on dark leather |
| Fan aimed at seats | Fast | All materials | Best budget option |
| Hair dryer on cool | Fast, spot only | Small damp areas | Keep moving; do not overheat |
| Dehumidifier or desiccant | Slow, thorough | Humid regions | Great for preventing musty smells |
Beat stubborn smells: Odor absorbers and moisture-control bags keep the cabin fresh between cleanings.
Shop Odor EliminatorsMaintenance Schedule, Protection, and Common Mistakes
A clean seat stays clean much longer when you build small habits around it. Instead of dreading a big annual scrub, aim for light, frequent care.
| Frequency | Task | Time needed |
|---|---|---|
| Weekly | Quick vacuum and wipe of high-touch areas | 10 minutes |
| Monthly | Detailed vacuum, spot clean marks, wipe leather or vinyl | 30 minutes |
| Every three to four months | Full clean, condition leather, protect fabric | 60 to 90 minutes |
| Twice a year | Deep extraction clean for fabric, check seams and stitching | 2 hours with drying |
Add a Protective Layer
Fabric protectors repel liquid so spills bead up instead of soaking in, giving you time to blot. Leather conditioners with UV blockers slow fading, and a quality sunshade keeps surfaces cooler. Heat and sunlight are major aging factors, and our guide on protecting your car from sun damage covers habits that help the interior too. For a better understanding of how protective coatings differ on exterior surfaces, see ceramic versus wax coatings.
Mistakes to Avoid
- Soaking the seat. The foam holds water and takes forever to dry.
- Using household cleaners meant for floors or kitchens. They can strip dye and coatings.
- Skipping the vacuum. Wet dirt becomes mud.
- Scrubbing too hard. It damages fibers and leather grain.
- Forgetting the headrests and side bolsters. They are the dirtiest areas.
- Cleaning only one patch. It can leave a clean spot that looks odd; blend the cleaning outward.
Do not forget the rest of the driving experience while you are at it. A fresh seat cover on the wheel, such as one of the easy-install non-slip steering wheel covers, makes the cabin feel new, and a heated option from our heated seat cushion comparison is a cozy winter upgrade. If you are going on to wash the exterior, our walkthrough on how to wash a car pairs perfectly with this guide.
Keep seats looking new: Fabric guard sprays and UV sunshades are cheap insurance.
Shop Fabric ProtectorsFrequently Asked Questions About Cleaning Car Seats
What is the best way to clean car seats at home?
Start by vacuuming thoroughly, test your cleaner in a hidden spot, then use a method matched to your upholstery: gentle upholstery cleaner and blotting for fabric, pH-balanced cleaner and conditioner for leather, and mild soap for vinyl. Dry completely before closing the car.
Can I use dish soap to clean fabric car seats?
Yes, in small amounts. A few drops of clear dish soap in a cup of warm water works for many fabric seats. Use the foam only, blot well, and rinse with a lightly damp cloth, since leftover soap attracts dirt.
How often should I clean my car seats?
A quick vacuum weekly and a full clean every three to four months suits most drivers. Families with kids or pets may want a monthly refresh, and anyone with leather should condition it a few times a year.
How do I remove old stains from cloth seats?
Rewet with cleaner, let it dwell for ten minutes, agitate with a soft brush, and blot or extract. Repeat several times rather than scrubbing hard. Enzyme cleaners help with organic stains and diluted white vinegar helps with some food and coffee marks.
Is it safe to use vinegar on car seats?
Diluted white vinegar can work on some fabric stains and odors, but test first. Avoid it on leather, since acid can dry the finish, and never mix it with bleach or other cleaning chemicals.
How do I clean leather seats without damaging them?
Vacuum, wipe off dust, apply a pH-balanced leather cleaner to a soft brush or towel, wipe away grime, then apply a thin coat of conditioner. Avoid harsh solvents, soaking the leather, and scrubbing aggressively.
How long do car seats take to dry after cleaning?
Fabric seats generally dry in two to four hours with open doors and airflow, though thick cushions and humid weather can take longer. Use a fan or a wet-dry vacuum to speed things up.
How do I get rid of a bad smell in my car seats?
Find and clean the source first, then use baking soda on dry fabric overnight and vacuum it up. For pet or food odors, apply an enzyme cleaner. Persistent smells may mean moisture is trapped in the cushion, so dry it thoroughly.
Can I clean car seats with a steam cleaner?
Steam can sanitize and lift stains from many fabrics, but too much heat or moisture can damage foam, glue, and leather. Use low moisture, keep the nozzle moving, check your manual, and avoid steam on leather unless the manufacturer allows it.
What should I use to clean perforated leather seats?
Spray cleaner on a cloth, wring it nearly dry, and wipe gently so liquid does not enter the holes. Condition lightly with a small amount of product and buff dry.
How do I clean a baby or child car seat?
Follow the manufacturer’s instructions. Covers often wash on a gentle cycle, while harnesses and buckles should be spot cleaned with mild soap and water. Avoid bleach and lubricants, which can compromise safety components.
Should I hire a professional detailer?
A detailer is worth it for severe stains, strong odors, mold, or heavy pet damage, especially if you want a deep extraction or ozone treatment. For everyday dirt, the DIY steps above give excellent results at a fraction of the cost.
Conclusion: A Cleaner Cabin Is Easier Than You Think
Cleaning car seats comes down to a handful of habits: know your material, vacuum before you wet anything, test in a hidden spot, use the gentlest method that works, control moisture, and dry thoroughly. Follow the steps in this guide and even tired, stained seats can look and smell remarkably fresh, without a trip to a detailer.
Once you have done it a few times, the process becomes second nature. Add a quick weekly vacuum, wipe spills right away, and protect your upholstery with a quality conditioner or fabric guard, and you will rarely face a big scrub again. Your seats will last longer, your car will feel better to drive, and your resale value will thank you.
Ready to get started? Pick up a complete set of supplies and give your seats the refresh they deserve.
Shop Car Seat Cleaning SuppliesYou May Also Like
Keep exploring helpful guides, reviews, and safety tips from Drive Safe Guide.