Car Camping Conversion Tips for a Safe and Enjoyable Road Trip
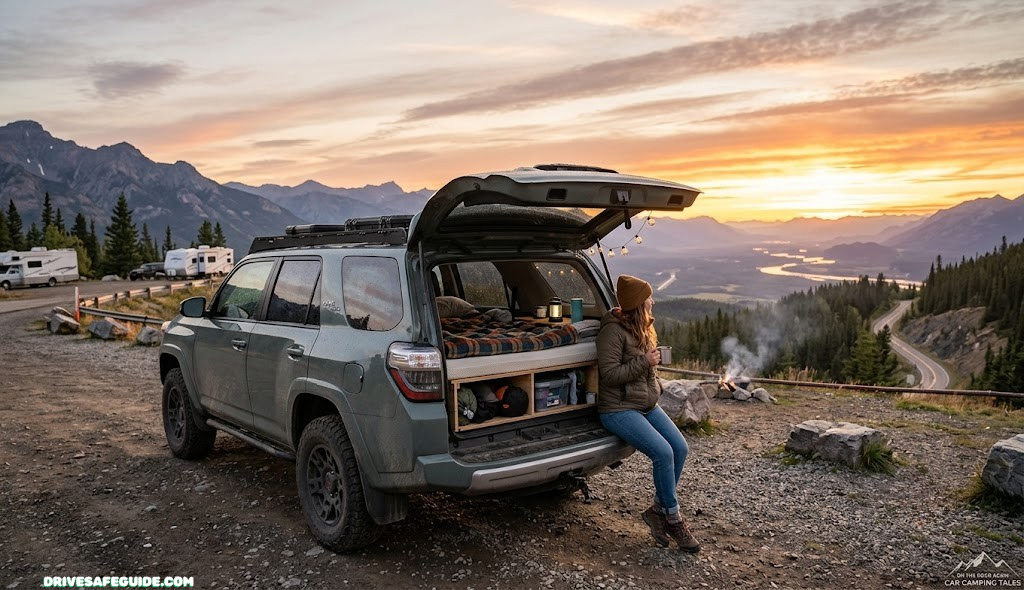
Somewhere between a tent and a full camper van sits one of the most practical ways to travel: sleeping in your own car. A thoughtful car camping conversion turns a daily-driver hatchback, SUV, or minivan into a private, weatherproof place to rest without the cost of a rooftop tent, the bulk of a trailer, or the commitment of a van build. Done well, it can make a cross-country trip cheaper, faster to set up each night, and honestly more comfortable than fumbling with tent stakes in a parking lot at 11 p.m.
Done poorly, though, a car camping setup can leave you cold, cramped, exhausted, or worse, stopped by a park ranger at 2 a.m. because you didn’t know the site’s overnight rules. This guide walks through the conversion decisions that actually matter: the sleeping platform, power, airflow, storage, cooking, hygiene, lighting, safety gear, and the legal side of where you’re allowed to park overnight. Before you go further, it’s worth cross-checking your road trip essentials checklist so your camping conversion complements the rest of your travel prep rather than duplicating it.
Why Convert Your Car Into a Camping Rig
Car camping sits in a sweet spot between backpacking and RV travel. You keep your vehicle’s fuel economy and parking flexibility, but you gain a dry, insulated, lockable space to sleep that a tent simply can’t match. When a storm rolls through at 3 a.m., tent campers are re-staking guy lines in the mud; you’re already asleep behind a locked door. That difference alone is why so many long-distance road trippers eventually convert their vehicle, even if only for a single big trip.
There’s also a cost argument. A basic conversion, foam mattress, a couple of storage bins, some blackout window covers, can run under $200. Compare that to hotel stays on a two-week trip, and the setup often pays for itself by the fourth or fifth night. It also removes a huge amount of daily friction: no searching for a campsite with tent pads, no packing and unpacking a tent each morning, and no need to find shelter if the weather turns while you’re mid-drive.
That said, car camping isn’t automatically safer or easier than tent camping, it’s safer and easier only if you convert the vehicle thoughtfully. A car with no ventilation plan, no fire safety gear, and a mattress thrown in the back with the windows fogged shut is a worse night than a well-pitched tent. The rest of this guide focuses on doing the conversion the right way, matching your build to real safety and comfort needs rather than just what looks good in a photo.
It’s also worth being honest about how this style of travel fits your trip’s shape. Car camping shines on itinerary-heavy trips where you’re covering ground and stopping in a new place most nights, national park loops, coast-to-coast drives, festival circuits, because setup and teardown take minutes rather than the twenty or thirty it takes to properly pitch and strike a tent. It’s a weaker fit for trips centered around staying in one place for a week, where a tent’s larger footprint and a real camp kitchen setup start to outweigh the convenience of sleeping in the vehicle itself. Matching the conversion style to the actual shape of your itinerary, rather than converting because it looks appealing online, is what determines whether you enjoy the setup by night ten or start resenting it.

Start with the surface you’ll actually sleep on. A dedicated car camping mattress pad compresses for storage and holds its shape night after night, unlike a leftover couch cushion.
Check Price on AmazonChoosing the Right Vehicle for Car Camping Conversions
Not every vehicle converts equally well, and it’s worth being honest about what you’re working with before you buy a single piece of gear. The three variables that matter most are cargo length with seats folded, interior height, and how flat the folded floor actually sits. A vehicle with a lumpy, sloped cargo floor will fight you on every sleeping platform design, no matter how good the mattress is.
Sedans, hatchbacks, and small SUVs
Compact vehicles can absolutely work for one adult, especially if you sleep diagonally or the rear seats fold flat. The tradeoff is storage: with a person lying down, there’s little room left for gear, so you’ll lean heavily on roof boxes or interior organizers that pack away rather than sit floor-level. Before loading anything on the roof, read through the guidance on rooftop cargo carrier safety, since an overloaded or poorly secured carrier changes your vehicle’s handling more than most people expect.
Minivans
Minivans are consistently underrated for car camping. Most modern minivans fold their second and third rows flat or nearly flat, creating a long, wide cargo area with more headroom than a typical SUV. Sliding doors also make entry and exit dramatically easier at night compared to climbing over a tailgate.
SUVs and crossovers
Mid-size and full-size SUVs offer the best balance of sleeping length, cargo height for sitting up, and enough remaining space for a basic kitchen setup. The main downside is that folded seats rarely sit perfectly flat, so most SUV conversions include a simple platform to bridge the gap.
| Vehicle Type | Typical Sleep Length | Storage Room | Best For |
|---|---|---|---|
| Compact hatchback | Diagonal only, ~5’6″–5’10” | Low | Solo sleepers, short trips |
| Mid-size SUV | 5’8″–6’2″ with platform | Moderate | Solo or couple, weekend to weeklong trips |
| Minivan | 6’0″–6’6″ flat | High | Couples, families, longer trips |
| Full-size SUV / truck cap | 6’2″+ flat | High | Two adults, extended travel |
Whatever you’re driving, do a walk-around before the trip. If you notice anything unusual, a shudder at speed, an odd pull, a warning light, resolve it before you’re relying on the vehicle as your only shelter. The checklist on preparing your car for road trip safety checks is a good pre-departure companion to this guide.
Essential Sleeping Setup: Platforms, Mattresses & Bedding
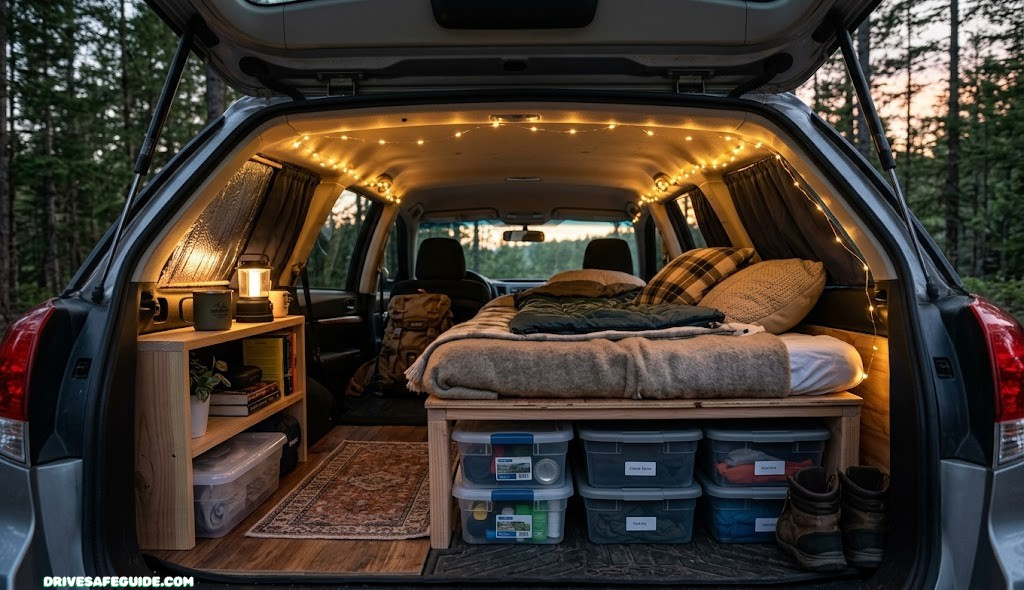
The sleeping platform is the single highest-impact upgrade in any car camping conversion. A flat, stable, insulated surface is the difference between waking up rested and waking up with a sore back after a night of rolling into the gap between folded seats.
Building or buying a platform
Platforms generally fall into two camps: a simple plywood deck cut to match your cargo floor, or a modular kit with slats and legs that can be broken down for storage. A DIY plywood deck is cheap and rock-solid but permanent-feeling; a modular kit costs more but can be removed entirely when you need the cargo space for hauling gear instead of sleeping.
Platform Pros
- Eliminates gaps between folded seats
- Creates flat storage space underneath
- Improves mattress lifespan by reducing pressure points
Platform Cons
- Reduces usable interior height
- Adds weight and installation time
- Custom builds don’t transfer to a different vehicle
Mattress and bedding choices
A dedicated camping mattress pad, foam or self-inflating, insulates you from the cold metal floor far better than blankets alone. Layer a fitted sheet over it to keep things from sliding, then choose bedding rated for the coldest night you realistically expect, not the average night. A sleeping bag rated 10–15°F below your expected low gives you margin if temperatures drop faster than forecast. If you’re converting for colder-season trips, the packing guidance in the winter car emergency kit checklist pairs directly with your bedding choices.

Skip the plywood measuring and cutting. A modular sleeping platform kit installs in minutes and folds flat when you need full cargo space back.
Check Price on AmazonPower Systems: Batteries, Inverters & Solar Charging
Once you’re sleeping in the vehicle regularly, running a phone charger, fan, or cooler off your starter battery is a fast way to end up stranded. A dedicated house battery, kept separate from the engine’s starting battery, is the safest way to power camping gear without risking your ability to start the car the next morning.
Portable power stations vs. DIY dual-battery setups
A portable power station, essentially a large battery with built-in inverter and charge ports, is the simplest option: no wiring, no isolator, just charge it before you leave and plug things in as needed. A DIY dual-battery setup with a battery isolator and possibly a solar panel is more capable for long trips but requires actual electrical work and a clear understanding of your amperage needs.
| Option | Setup Effort | Recharge Method | Best For |
|---|---|---|---|
| Portable power station | None, plug and play | Wall outlet, car outlet, solar | Weekend trips, phones/fans/lights |
| DIY dual-battery + isolator | Moderate to high | Alternator while driving | Extended trips, coolers, larger loads |
| Solar panel add-on | Low to moderate | Sunlight | Multi-day stays without driving |
Whichever route you choose, size your capacity to your actual devices, not a guess. Add up the watt-hours your fridge, fan, and lights draw over a night and buy at least 30% more capacity than that number to account for real-world inefficiency. If you also rely on a battery-powered air compressor or scan tool during trips, the buying guides on tire inflator duty cycle and CFM and OBD2 scan tools can help you plan total power draw for the trip.
Ventilation, Insulation & Climate Control
Airflow is the most overlooked part of a car camping build, and it’s arguably more important than the mattress. Two adults sleeping in a sealed vehicle overnight produce a surprising amount of moisture through breathing alone, and with no airflow, that moisture condenses on cold windows and metal surfaces, soaking bedding and encouraging mold over a multi-week trip.
Cracking windows safely
Window vent visors or a simple foam block wedged in a cracked window let air exchange happen without opening the vehicle enough for insects, rain, or unwanted access. Cross-ventilation, one window cracked at each end of the vehicle, works far better than a single opening.
Insulation for temperature control
Reflective foam board cut to fit each window does double duty: it insulates against outside temperature swings and blocks light and outside visibility for privacy. In hot climates, insulated window covers also reduce daytime heat buildup dramatically when the vehicle is parked between drives.
Good Ventilation Habits
- Crack two opposite windows slightly, even in cold weather
- Use a battery fan to keep air moving on still nights
- Wipe condensation from windows before it drips onto bedding
Mistakes to Avoid
- Sealing every window and vent completely
- Running any combustion heater without a carbon monoxide detector
- Ignoring visible mold or musty smell in bedding
A battery-powered carbon monoxide detector is inexpensive insurance for anyone sleeping in a vehicle regularly, especially if you ever run a heater, cook near an open door, or park close to another vehicle’s idling engine. Pair this with the broader prep in building a complete car safety kit, since ventilation gear and emergency gear often overlap.
Storage & Organization Systems That Actually Work
The gap between a chaotic car camping setup and a genuinely livable one usually comes down to organization. When gear has a fixed spot, you’re not digging through three bins at 10 p.m. looking for a headlamp; you know exactly where it is because it’s always there.
Stackable bins over loose gear
Uniform, stackable bins with lids do more for a build than almost any other single item. They protect food from moisture and pests, keep the platform underneath clean, and stack predictably so you’re not re-packing the whole trunk every time you need something from the bottom.
Vertical space and door pockets
Hanging organizers on the back of seats or across the ceiling use space that would otherwise sit empty. This is especially valuable in smaller vehicles where every cubic inch matters. A dedicated spot near the sleeping area for a flashlight, phone, and water bottle also matters more than people expect, fumbling in the dark for a light source is a common source of frustration and minor injury.
If you’re bringing a pet along for the trip, factor in a secured space for their bedding and food as well; loose bowls and bags are one of the most common sources of overnight mess. The crash-test data in pet restraint crash test ratings is worth reviewing if your dog rides along and sleeps in the vehicle with you.
Labeling and a simple inventory habit
A small strip of masking tape and a marker on each bin lid saves more time than it seems like it should, especially once you’re four days into a trip and everything has been repacked at least once. Grouping bins by function, one for food, one for clothing, one for tools and repair items, rather than by size, makes the system intuitive even for a travel companion who didn’t build it. A short mental or written inventory of what lives where also helps at the end of a trip, when tired, distracted packing is most likely to leave something behind at a campsite or rest stop.
Cooking & Food Storage While Car Camping
Cooking setups for car camping range from a simple cooler and no-cook meals to a full camp stove station set up outside the vehicle each evening. The right answer depends on trip length and how much you want cooking to be part of the experience versus a chore to get through quickly.
Cooler management
A quality cooler with good ice retention changes the entire food equation on longer trips. Pack it with dense ice on the bottom, food above, and open it as infrequently as possible to preserve cold air. Keep raw meat sealed and separated from ready-to-eat food, and drain melted ice water regularly rather than letting food sit submerged.
Stove safety, always cook outside
Camp stoves, whether propane or liquid fuel, should never be used inside the vehicle, even with a door or window open. Beyond the carbon monoxide risk covered earlier, spilled fuel and open flame near bedding and gear is a fire risk that isn’t worth taking. Set up a stove on a stable, level surface outside, away from dry grass, and always with a lid or pot nearby to smother flare-ups.
| Cooking Style | Setup Time | Gear Needed | Best For |
|---|---|---|---|
| No-cook meals | Minimal | Cooler, utensils | Short trips, minimal cleanup |
| Single-burner stove | Low | Stove, fuel, one pot | Solo travelers, simple meals |
| Full camp kitchen | Moderate | Stove, table, cookware set | Extended trips, group travel |

Ice retention matters more than size. A well-insulated cooler keeps food safe for days on a single ice fill, cutting down on town stops.
Check Price on AmazonWater Storage & Hygiene Solutions
Water is heavier and more logistically demanding than most first-time car campers expect. A rough baseline is one gallon per person per day for drinking and basic hygiene, more in hot climates or if you’re cooking meals that need water.
Storage containers
Rigid, food-grade water containers with a spigot are easier to manage than loose bottles and take up predictable space. Keep at least a portion of your water supply as an untouched emergency reserve separate from what you use daily, so a leak or spill in your main container doesn’t leave you without any backup.
Staying clean on the road
A simple hygiene kit, biodegradable wipes, hand sanitizer, a small basin, and a portable shower bag if you’re camping for more than a few days, covers most needs without requiring a shower hookup. Truck stops, gyms with day passes, and public recreation centers are reliable options for an actual shower every few days on longer trips.
If your route includes remote stretches with long gaps between towns, cross-reference your water plan with the broader prep in the cross-country driving checklist, which covers resupply spacing in more detail.
Lighting Setup for Safety and Comfort
Good lighting inside a car camping conversion does two jobs: it makes the space livable after dark, and it keeps you from fumbling in the dark in ways that lead to spilled water, stubbed toes, or worse. Layering a few different light sources works better than relying on one.
Task lighting vs. ambient lighting
A headlamp or small flashlight handles focused tasks, reading, cooking, digging through a bin. Battery-powered string lights or a lantern provide low, even ambient light for the whole space without draining a single light source too quickly. Keep at least one light source within reach of your sleeping spot at all times.
Exterior lighting for safety
A magnetic or clip-on light near your entry point helps you see the ground before stepping out at night, particularly useful if you’re parked somewhere uneven or unfamiliar. If you ever need to work under the hood or change a tire in the dark, a hands-free light source is dramatically safer than holding a flashlight in your teeth. The comparison in magnetic base flashlights for hands-free tire changes covers exactly this scenario.

One rechargeable lantern replaces a drawer full of dying flashlights. Look for a model with a low-power warm setting for reading and a bright setting for setup and teardown.
Check Price on AmazonSafety Essentials: Fire, First Aid & Emergency Preparedness
A car camping conversion adds gear, wiring, and combustible materials to a vehicle you also need to be able to escape quickly if something goes wrong. Safety planning isn’t optional here, it’s part of the build itself.
Fire safety
Keep a small fire extinguisher rated for both electrical and fuel fires within reach of the sleeping area, not buried under gear in the very back. If you’re running any electrical setup, inspect wiring connections periodically for heat, fraying, or a burning smell, and disconnect immediately if anything seems off. The guide on choosing a car fire extinguisher and mounting location covers exactly this kind of placement decision.
Escape planning
Know how you’d get out of the vehicle quickly in the dark, whether that’s a rear tailgate, sliding door, or window. A seatbelt cutter and window breaker kept near the sleeping platform, not in the glovebox, matters if you’re ever trapped after a rollover or into water. See emergency car escape tools for options that clip within reach of a sleeping area.
First aid and communication
A stocked first aid kit and a way to call for help, even a basic cell signal booster or offline maps, matters more the further you get from towns. Build or restock your kit specifically for the terrain and distance of your trip using this car safety kit guide as a baseline.
Legal Considerations: Where You Can (and Can’t) Sleep
This is the part of car camping that trips up more people than any gear decision. Rules for overnight vehicle sleeping vary enormously by city, state, and land type, and getting it wrong can mean a knock on the window at 1 a.m. or, in some places, a citation.
General categories to know
National forests and BLM land in the U.S. broadly allow dispersed overnight camping, often for free, though specific areas may have posted restrictions. Many rest stops allow a single overnight stop for driver rest, but not extended stays. City ordinances vary widely, some municipalities explicitly ban sleeping in vehicles on public streets, while others have no such rule at all. Retail parking lots are sometimes tolerated informally but are private property, so permission is always at the discretion of that specific store or corporate policy, which can change without notice.
| Location Type | Typical Rule | Notes |
|---|---|---|
| National forest / BLM land | Often allowed, free | Check local ranger district rules and stay limits |
| Interstate rest stops | Short-term rest usually allowed | Extended stays often restricted, signage varies by state |
| City streets | Varies widely | Some cities explicitly prohibit overnight vehicle sleeping |
| Retail parking lots | Informally tolerated in some cases | Private property, permission can be revoked at any time |
| National park campgrounds | Allowed in designated sites only | Usually requires a permit or paid site |
Always check current local rules before settling in for the night rather than assuming a spot that worked once will always work. For a deeper look at the legal nuance behind sleeping in a vehicle overnight, see can you sleep in your car overnight: the laws. If your trip includes park visits, pairing your parking plan with national park vehicle pass requirements avoids a surprise at the gate.
Maintaining Your Vehicle During Extended Camping Trips
A car camping conversion asks more of your vehicle than daily commuting does: more weight, more idle time in remote areas, and less access to a mechanic if something goes wrong. A short maintenance routine before and during a long trip catches small problems before they become trip-ending ones.
Before you leave
Check tire pressure and tread, top off fluids, and confirm your battery holds a charge under load, especially if you’re adding a second battery or running accessories overnight. The pre-trip walkthrough in preparing your car for road trip safety checks is worth doing even if you’ve done this trip before; conditions and vehicle wear change year to year.
While on the road
Extra weight from gear, water, and a sleeping platform changes your vehicle’s handling and stopping distance slightly, factor that in when following distance and braking on unfamiliar roads. If you notice unusual vibration at highway speed with the added load, don’t ignore it, the causes covered in car shaking at highway speeds can worsen quickly under sustained load. Keep an eye on dashboard warning lights as well; understanding the difference described in solid vs. flashing check engine lights helps you decide whether to keep driving to the next town or pull over immediately.

A two-minute pressure check catches problems early. Keep a digital gauge and compact inflator on hand so you’re never guessing about tire health mid-trip.
Check Price on AmazonBudgeting Your Car Camping Conversion
One of the most common questions from first-time converters isn’t “what gear do I need,” it’s “how much is this actually going to cost me.” The honest answer is that a functional setup can be built at almost any budget, but the difference between the cheapest possible build and a genuinely comfortable one usually comes down to a few specific upgrades rather than the total number of items you buy.
The bare-minimum build
At the low end, a foam sleeping pad, a couple of stackable bins, reflective window covers cut from a roll of insulation, and a basic flashlight can get a solo traveler through a short trip for well under $150. This tier skips a dedicated power system entirely, relying on a phone’s own battery and a car charger for the rare device that needs power, and skips a real kitchen setup in favor of no-cook meals and a cooler.
The comfortable mid-range build
Moving up, a mid-range build adds a proper insulated mattress pad, a modular or DIY sleeping platform, a portable power station sized for a fan and lights, a quality cooler, and a basic single-burner stove setup used outside the vehicle. This tier typically lands in the $400 to $900 range depending on how much of the platform work is DIY versus purchased as a kit, and it’s the sweet spot most weeklong and multi-week travelers land on.
The extended-trip build
For trips measured in months rather than weeks, it’s worth investing further: a dual-battery electrical setup with solar charging, a dedicated 12V fridge instead of a cooler and ice runs, and a more permanent platform with built-in storage underneath. This tier can run well past $1,500 once fridge, solar, and wiring are factored in, but it removes the daily friction points, ice runs, manual charging, repacking bins, that add up over months on the road.
| Build Tier | Approx. Cost | Core Additions | Best For |
|---|---|---|---|
| Bare-minimum | Under $150 | Foam pad, bins, window covers, flashlight | Short trips, tight budgets |
| Comfortable mid-range | $400–$900 | Insulated mattress, platform, power station, cooler | Weeklong to multi-week trips |
| Extended-trip | $1,500+ | Dual-battery system, solar, 12V fridge, built-in storage | Month-plus travel, frequent use |
Whichever tier fits your trip, it’s worth spending a little more on the items you’ll interact with every single night, the mattress and the ventilation setup, since those affect sleep quality far more than a nicer cooler or an extra light fixture ever will. It’s also worth pairing your budget plan with the gear breakdown in the road trip essentials checklist so you’re not double-buying items you already keep in the car for other trips.
Seasonal Adjustments: Summer vs. Winter Conversions
A conversion built for a mild spring trip can be genuinely miserable, or genuinely dangerous, in the depths of summer heat or winter cold if you don’t adjust the setup for the season. The core structure stays the same, but the priority items shift significantly depending on what temperatures you’re planning around.
Hot-weather adjustments
In summer, ventilation stops being a nice-to-have and becomes the single most important part of the build. A vehicle parked in direct sun can reach dangerous interior temperatures within an hour, so shade, reflective window covers on every window, and a battery fan running overnight are close to non-negotiable. Choose lightweight, breathable bedding over heavier winter-rated bags, and store any food or medication that’s sensitive to heat in an insulated cooler rather than a standard bin. Parking orientation matters too: angling the vehicle so the sleeping area stays in shade during peak afternoon sun makes a noticeable difference by evening.
Cold-weather adjustments
In winter, insulation and warmth retention take priority over airflow, though some ventilation still needs to stay open to manage condensation and prevent carbon monoxide buildup if any heating source is used. A sleeping bag rated well below your expected low, a reflective insulated pad under your mattress to block cold rising from the floor, and window insulation cut to fit each pane all matter more here than in summer. Battery performance also drops in cold temperatures, so budget extra charge capacity or plan to run the engine briefly to top off a house battery if you’re relying on one overnight. The seasonal checklist in the winter car emergency kit checklist overlaps significantly with what a cold-weather conversion needs.
Summer Priorities
- Maximize airflow and shade
- Lightweight, breathable bedding
- Insulated cooler for heat-sensitive items
Winter Priorities
- Maximize insulation, floor and windows
- Cold-rated sleeping bag with margin
- Extra battery capacity for cold-weather drain
Common Car Camping Conversion Mistakes to Avoid
Most car camping conversion problems repeat themselves across new travelers, and nearly all of them are avoidable with a small amount of planning before departure rather than troubleshooting mid-trip. A few patterns show up more than any others.
Testing gear for the first time on trip night one
Setting up a sleeping platform, power station, or stove for the first time in an unfamiliar parking spot after dark is a recipe for frustration. Do a full dry run at home, build the platform, load the bins, test the lights and power station, before you’re relying on any of it for an actual night’s sleep. This also surfaces problems, a platform that doesn’t quite fit, a fan that’s louder than expected, while you still have easy access to fix them.
Underestimating how much gear actually fits
It’s easy to plan a build around photos of spacious van conversions and then discover that a sedan or compact SUV simply doesn’t have the volume for everything on the list. Measure your actual cargo space, length, width, and height with seats folded, before buying platform materials or storage bins, and be willing to cut items rather than force a build that doesn’t fit.
Ignoring weight distribution
Piling heavy items, water containers, batteries, coolers, toward the rear of the vehicle changes handling and can affect braking distance more than people expect. Distribute weight as evenly as possible and keep the heaviest items low and centered rather than stacked high toward the back doors.
Skipping a plan for where you’ll actually park
Arriving in an unfamiliar area at 9 p.m. with no idea where overnight parking is allowed leads to rushed, poorly chosen spots. Identify two or three candidate locations for each night using apps or forums before you’re tired and just want to stop, and always have a backup in mind in case your first choice doesn’t pan out.
Neglecting the vehicle itself
It’s easy to spend all your planning energy on the camping side of the build and treat the vehicle as an afterthought. A car camping trip puts more hours and more load on your vehicle than typical driving, so pre-trip maintenance and mid-trip attention to warning signs matter as much as the sleeping setup itself. Reviewing defensive driving habits that reduce collision risk is a useful refresher before a long trip, especially if you’ll be driving unfamiliar roads while fatigued from early starts or long travel days.
Frequently Asked Questions
Is it legal to sleep in my car while road tripping?
It depends entirely on location. National forests, BLM land, and many rest stops generally allow it, while some cities and private lots restrict or prohibit it. Always check local signage and current ordinances rather than assuming a blanket rule applies everywhere.
What’s the minimum gear needed for a basic car camping conversion?
A flat sleeping surface, an insulated mattress pad, weather-appropriate bedding, window coverings for privacy and temperature, and a basic light source cover the essentials. Everything beyond that, power stations, kitchens, extra storage, improves comfort but isn’t strictly required to start.
How do I stop condensation from soaking my bedding overnight?
Crack two opposite windows slightly for cross-ventilation, use a small battery fan to keep air moving, and wipe down window condensation before it drips onto fabric. Reflective insulation on windows also reduces the temperature difference that causes condensation in the first place.
Is it safe to run a heater inside the car overnight?
Combustion heaters, propane or fuel-burning, are not safe to run in a sealed vehicle due to carbon monoxide risk. Battery-powered electric heaters are safer but still require ventilation and a working carbon monoxide detector as a precaution.
How much water should I bring for car camping?
A common baseline is one gallon per person per day for drinking and basic hygiene, more in hot climates. Keep a portion of that supply as an untouched emergency reserve separate from your daily-use container.
Do I need a separate battery for camping power, or can I use my car’s main battery?
A dedicated house battery or portable power station is strongly recommended. Drawing camping power from your starting battery risks draining it enough that the vehicle won’t start the next morning.
What vehicle types work best for a car camping conversion?
Minivans and mid-size to full-size SUVs generally offer the best combination of sleeping length and storage room, since their rear seats fold close to flat. Smaller hatchbacks and sedans can work for one person sleeping diagonally, with less remaining storage space.
How do I stay clean without shower access for multiple days?
Biodegradable wipes, hand sanitizer, and a small basin handle daily hygiene, while a portable shower bag works for longer stretches without facilities. Truck stops, gyms with day passes, and recreation centers are reliable options for an actual shower every few days.
Should I cook inside my car camping setup?
No. Camp stoves should always be used outside the vehicle on a stable, level surface, away from bedding and dry vegetation. Cooking inside risks both fire and carbon monoxide exposure, even with a door or window cracked open.
How do I keep my sleeping platform from sliding around while driving?
Most platform kits and DIY builds are secured with straps, brackets, or a snug fit against the vehicle’s interior panels. Test the fit with moderate braking in a safe, empty area before relying on it for a real trip.
Does added camping weight affect how my car handles or brakes?
Yes. Extra water, gear, and a sleeping platform add noticeable weight, which can slightly increase stopping distance and change handling, especially on curves or in wet conditions. Adjust following distance accordingly and watch for any new vibration or handling changes under load.
Can I car camp comfortably in cold weather?
Yes, with the right insulation and bedding. Reflective window insulation, a mattress pad that blocks cold from the floor, and a sleeping bag rated well below the expected low temperature make cold-weather car camping genuinely comfortable, not just survivable.
Your Car, Ready for the Road
A good car camping conversion isn’t about buying the most gear, it’s about matching a handful of key decisions, sleeping platform, ventilation, power, and legal parking knowledge, to how you actually plan to travel. Start with the sleeping surface and airflow, since those affect every night of the trip, then layer in power, storage, and cooking based on how long you’ll be out there.
Before you head out, run through your full road trip essentials checklist one more time, and make sure your vehicle itself is trip-ready with a proper car safety kit on board. A comfortable place to sleep only matters if the vehicle getting you there is running safely too.
None of this needs to happen all at once. Many long-time car campers built their setup over several trips, starting with a mattress pad and window covers on trip one, adding a proper platform and lighting on trip two, and only investing in a power system once they knew exactly how they used the space. Treat this guide as a menu rather than a checklist that all needs checking off before your first night out; the right build is the one that matches how you actually travel, refined trip by trip rather than assembled perfectly on the first attempt.
Shop Car Camping Essentials🌟 Recommended for Comfort
Drive More Comfortably Every Day
From lumbar supports to seat cushions, the right accessories can transform long drives from painful to comfortable. Browse our top picks on Amazon.
📯 Shop Comfort AccessoriesAffiliate link — we earn a small commission that keeps DriveSafeGuide running. Thank you!