Top 6 Car Cleaning Kits Reviewed: Professional Detailing at Home
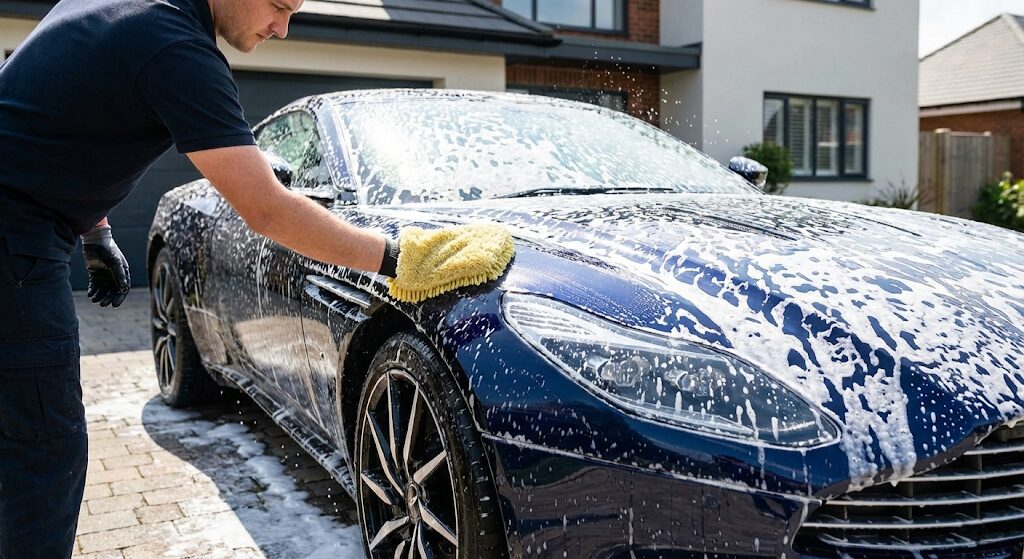
1. Introduction: Why a Dedicated Car Cleaning Kit Matters
There is a distinct, undeniable sense of pride that comes from driving a meticulously clean vehicle. The gleaming paint, the streak-free windows, and the deep, rich black of freshly dressed tires don’t just happen by accident. Achieving that coveted showroom shine requires the right tools, the right chemicals, and the right approach. For many vehicle owners, the prospect of piecing together a detailing arsenal bottle by bottle is overwhelming, time-consuming, and surprisingly expensive.
This is precisely where the best car cleaning kits come into play. A well-curated car wash kit eliminates the guesswork. Automotive chemists and professional detailers have already done the heavy lifting, pairing pH-balanced soaps with the correct grade of microfiber and the ideal synthetic wax. Buying a bundle ensures chemical synergy—meaning the wash soap won’t strip the wax included in the same box, and the tire dressing won’t degrade the wheel cleaner.
Whether you are a weekend warrior looking to protect your daily commuter or an aspiring enthusiast preparing for a local car show, investing in an all-in-one detailing solution is the most efficient path to perfection. In this comprehensive guide, we will break down the top six kits on the market, analyzing their formulations, included accessories, and overall value. Beyond just product reviews, we’ll explore advanced techniques like ceramic coating application, paint correction fundamentals, and seasonal detailing strategies that will transform your approach to automotive care.
Editor’s Choice: Complete Detailing Bundle
Kickstart your detailing journey with a comprehensive kit that includes pH-balanced soaps, synthetic waxes, and premium microfiber towels. Perfect for beginners and pros alike.
Check Price on Amazon2. The Science of Automotive Detailing: Beyond the Driveway Wash
Before diving into the specific reviews of the 6 best car cleaning kits, it is crucial to understand the chemistry and physics behind automotive detailing. Washing a car is not merely about removing dirt; it is about preserving the delicate layers of modern automotive paint.
Modern vehicles feature a base coat (the color) protected by a clear coat (a transparent layer of resin). The clear coat is susceptible to micro-scratches, UV degradation, and chemical etching from bird droppings and acid rain. Understanding how to keep your car looking new in hot climates with proper paint care is directly tied to the products you use.
High-quality car cleaning kits feature pH-neutral soaps. Unlike household dish detergents, which are highly alkaline and designed to strip heavy grease, a pH-neutral automotive shampoo encapsulates dirt particles in rich foam, allowing them to glide off the clear coat without inducing swirl marks or stripping pre-existing wax layers. The chemistry extends to protective products as well. Traditional carnauba wax molecules create a sacrificial layer that fills microscopic pores in the paint, while modern ceramic coatings chemically bond to the clear coat at the molecular level, creating a semi-permanent shell of protection.
3. Review: Meguiar’s Complete Car Care Kit
Meguiar’s is a titan in the automotive detailing industry, boasting over a century of heritage. The Meguiar’s Complete Car Care Kit is widely regarded as the gold standard for enthusiasts transitioning from basic car washes to comprehensive detailing. This kit is thoughtfully assembled to cover every stage of the detailing process: washing, cleaning, prepping, polishing, and protecting.
At the heart of this kit is the Gold Class Car Wash Shampoo and Conditioner. This formula is renowned for its rich, luxurious suds that not only lift dirt but also condition the paint, enhancing gloss even before wax is applied. The inclusion of a smooth surface clay bar is what elevates this kit. Claying removes embedded contaminants (like industrial fallout and rail dust) that washing alone cannot touch, leaving the paint feeling smooth as glass.
| Feature | Specification / Included Item |
|---|---|
| Wash Soap | Gold Class Shampoo & Conditioner (pH Balanced) |
| Paint Correction | Quik Clay Detailing System & ScratchX 2.0 |
| Protection | Liquid Gold Class Carnauba Plus Wax |
| Interior/Tires | Quik Interior Detailer, Endurance Tire Gel |
✓ Pros
- Includes a clay bar system for deep paint decontamination.
- High-quality carnauba wax provides a deep, warm glow.
- Excellent value for the sheer volume of products included.
✗ Cons
- Lacks premium microfiber wash mitts and drying towels.
- Carnauba wax doesn’t last as long as modern ceramic sealants.

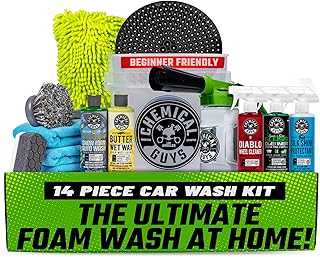
Chemical Guys 16-Piece Arsenal
The ultimate foam cannon and bucket kit. Includes everything from Honeydew Snow Foam to Butter Wet Wax. A top-tier choice for serious enthusiasts.
View on Amazon4. Review: Chemical Guys 16-Piece Arsenal Builder
If there is one brand that has revolutionized modern detailing marketing and enthusiast engagement, it is Chemical Guys. The 16-Piece Arsenal Builder Wash Kit is a massive, all-encompassing package that provides an incredible unboxing experience. It is often cited as one of the best car lover gift ideas used daily by auto enthusiasts.
This kit introduces the user to the foam cannon experience. Attached to a pressure washer or standard garden hose (depending on the attachment chosen), the Torq Foam Cannon blankets the vehicle in thick, shaving-cream-like suds using the included Honeydew Snow Foam. This thick foam maximizes “dwell time,” allowing the soap to break down heavy dirt before a wash mitt ever touches the paint.
The kit also includes a heavy-duty detailing bucket equipped with a Dirt Trap insert—a vital piece of hardware that keeps abrasive dirt particles at the bottom of the bucket and away from your wash mitt. Finishing off with their famous Butter Wet Wax and Silk Shine interior dressing, this kit is as comprehensive as it gets.
✓ Pros
- Includes a professional-grade foam cannon.
- Bucket includes a grit guard/dirt trap to prevent scratching.
- Comes with high-quality, plush microfiber towels.
✗ Cons
- Higher price point than entry-level kits.
- The sheer number of products can be overwhelming for beginners.
5. Review: Armor All Premier Car Care Kit
Not everyone needs a 16-piece kit with specialized foam cannons. For the everyday driver who wants a clean, respectable-looking car without spending an entire Saturday in the driveway, the Armor All Premier Car Care Kit remains a steadfast favorite. Armor All is synonymous with accessible, easy-to-use car care.
This kit focuses on convenience. It features the classic Armor All Protectant, which guards dashboards and vinyl trims against UV fading and cracking. The included glass wipes, interior cleaning wipes, and tire shine spray are designed for rapid deployment. If you notice a smudge on the dash or dull tires before heading to work, this kit allows you to remedy the situation in minutes.
| Feature | Specification / Included Item |
|---|---|
| Wash Soap | Ultra Shine Wash & Wax |
| Convenience Items | Glass Wipes, Cleaning Wipes, Protectant Wipes |
| Wheels & Tires | Extreme Wheel & Tire Cleaner, Extreme Tire Shine |
| Best For | Daily commuters and quick weekend washes |
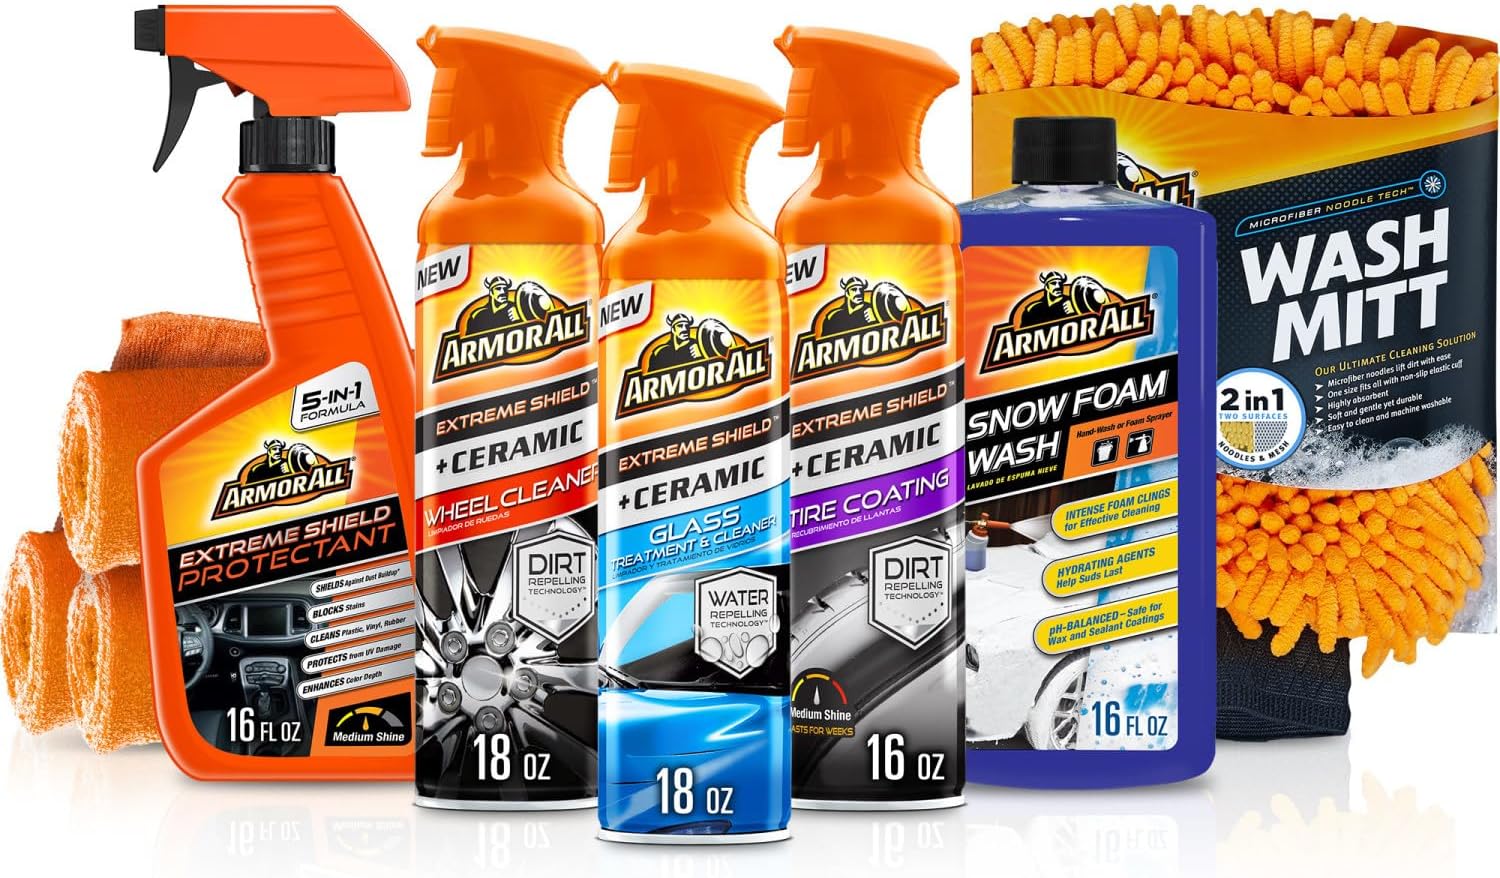
Armor All Premier Car Care Kit
The king of convenience. Get an impressive clean in half the time with legendary protectant formulas, easy-to-use wipes, and extreme tire shine.
Shop Now on Amazon6. Review: Griot’s Garage Starter Wash & Dry Kit
Griot’s Garage caters to the discerning automotive purist. Their Starter Wash & Dry Kit doesn’t overwhelm you with twenty different bottles; instead, it provides a curated selection of ultra-premium liquids and class-leading textiles. Quality over quantity is the mantra here.
The standout feature of this kit is the PFM (Pure Freakin’ Magic) Terry Weave Drying Towel. Many detailers argue that the PFM towel is the best drying towel ever created. It can absorb massive amounts of water in a single pass without wringing, virtually eliminating the risk of water spots and towel-induced marring. Combined with their Brilliant Finish Car Wash, which offers incredible lubricity, this kit is designed strictly to protect the paint during the wash process.
✓ Pros
- The included PFM Drying Towel is industry-leading.
- High-lubricity soap minimizes wash-induced swirl marks.
- Exceptional build quality on included wash mitts.
✗ Cons
- Does not include wax, interior cleaners, or tire shine.
- Higher cost-per-ounce compared to mass-market brands.
7. Review: Turtle Wax Ultimate Hybrid Solutions Kit
Turtle Wax has undergone a massive resurgence in recent years, largely due to their Hybrid Solutions line. This kit bridges the gap between traditional carnauba waxes and modern ceramic coatings, offering incredible durability and water-beading properties at an accessible price point.
The star of this kit is the Ceramic Wash & Wax, followed by the Ceramic Wet Wax. The Wet Wax is a game-changer for speed detailing. After washing and rinsing the car, you simply spray the Wet Wax onto the wet panels and dry the car with a microfiber towel. The water acts as a carrier, spreading a layer of Silicon Dioxide (SiO2) ceramic protection that lasts for months, not weeks. The hydrophobic (water-repelling) properties achieved with this kit rival professional ceramic coatings costing hundreds of dollars.
| Feature | Specification / Included Item |
|---|---|
| Technology | SiO2 Ceramic Polymer Blend |
| Wash Soap | Hybrid Solutions Ceramic Wash & Wax |
| Protection | Ceramic Wet Wax (Spray-on, dry-off application) |
| Durability | Excellent chemical resistance and UV protection |
Turtle Wax Ceramic Hybrid Kit
Step into the future of detailing with SiO2 ceramic technology. Achieve months of insane water beading and gloss with minimal effort.
Check Deals on Amazon8. Review: Adam’s Polishes Essentials Detailing Kit
Adam’s Polishes is highly respected among professional detailers for formulating perfectly balanced, highly effective chemicals that smell amazing. The Essentials Detailing Kit lives up to its name by providing exactly what you need to detail a car to a professional standard.
This kit includes their famous Detail Spray, which acts as a clay lubricant, a drying aid, and a quick gloss enhancer. It also includes their aggressive yet safe Wheel & Tire Cleaner, which chemically breaks down brake dust, turning it purple as it bleeds off the wheel barrel. If you are preparing your car for road trip safety checks and want the vehicle looking immaculate before hitting the highway, the Adam’s kit delivers a flawless, confidence-inspiring finish.
✓ Pros
- Professional-grade chemicals with incredible scents.
- Wheel cleaner is one of the most effective on the market.
- Detail Spray is highly versatile and leaves a slick finish.
✗ Cons
- Premium pricing.
- Does not include a dedicated heavy-duty compounding polish.
9. Interior vs. Exterior Kits: What Do You Really Need?
When shopping for the best car cleaning kit, you’ll quickly notice a divide: some kits focus heavily on the exterior paint, while others offer a balance of interior and exterior products. Understanding your specific needs will dictate your purchase.
If your vehicle spends its life parked under a tree, bombarded by sap and bird droppings, you need an exterior-heavy kit featuring clay bars, heavy-duty soaps, and ceramic sealants. Conversely, if you regularly transport children or pets, the interior takes the brunt of the abuse. In this case, you need a kit with enzymatic upholstery cleaners, leather conditioners, and UV protectants for the dashboard.
It is also worth noting that no liquid kit can substitute for deep mechanical cleaning inside the cabin. Pairing a good interior chemical kit with one of the best car vacuum cleaners for deep interior cleaning is the only way to truly extract embedded sand, pet hair, and food crumbs from the carpets.

Adam’s Polishes Essentials Kit
Experience professional-grade detailing chemistry. Featuring their legendary Detail Spray and color-changing Wheel Cleaner for an immaculate finish.
View on Amazon10. Tools of the Trade: Microfiber, Brushes, and Foam Cannons
The chemicals in a car cleaning kit are only as effective as the tools used to apply them. Using a premium ceramic soap with an old, dirty bath towel will completely negate the product’s benefits and ruin your paint.
Microfiber: Microfiber towels are measured in GSM (Grams per Square Meter). A higher GSM means a thicker, plusher towel. For drying, look for towels above 500 GSM. For removing wax or applying detail spray, a 300-400 GSM edgeless towel is ideal. Never use cotton terry cloths on modern clear coats.
Grit Guards: The “Two-Bucket Method” is a detailing staple. One bucket holds soapy water, the other holds clean rinse water. Both should have Grit Guards at the bottom. You dip your mitt in the soap, wash a panel, then rinse the mitt in the clean water, rubbing it against the Grit Guard to dislodge dirt before going back for more soap.
Brushes: Boar’s hair detailing brushes are essential for cleaning intricate areas like lug nuts, air conditioning vents, and emblems without scratching the surrounding surfaces. For wheels, dedicated wheel woolies with flexible shafts can reach deep into wheel barrels to remove caked-on brake dust that sprays and mitts simply cannot access.
11. Common Detailing Mistakes That Ruin Your Paint
Even with the best car cleaning kit in hand, improper technique can cause severe damage to your vehicle. Avoid these common detailing sins:
- Using Dish Soap: Liquid dish soap is formulated to strip baked-on grease from pans. On a car, it strips away protective wax and dries out plastic moldings and rubber seals, accelerating UV damage.
- Washing in Direct Sunlight: Hot paint causes water and soap to evaporate rapidly. This leaves behind hard water spots and soap scum that can etch into the clear coat, requiring machine compounding to remove.
- Washing in Circles: Never wash or dry the paint in circular motions. Swirl marks are simply circular scratches. Always wash in straight, overlapping lines matching the aerodynamics of the vehicle.
- Ignoring the Wheels: Wheels are the dirtiest part of the car, coated in abrasive metallic brake dust. Always clean the wheels first using a dedicated brush and bucket. If you wash the paint first, splashing wheel cleaner can ruin your freshly washed panels.

Premium Microfiber Drying Towels
Don’t ruin your paint with cheap rags. Upgrade to ultra-plush, 800+ GSM edgeless microfiber towels that absorb gallons of water without leaving a single scratch.
Shop Towels on Amazon12. How to Maintain Your Detailing Gear
To ensure your car cleaning kit lasts for years, you must properly maintain the tools themselves. Microfiber towels, in particular, require special care. Never wash microfiber towels with regular clothing, as they will attract lint like a magnet. Wash them in cold or warm water using a dedicated microfiber detergent or a free-and-clear liquid detergent. Never use fabric softener or dryer sheets. Fabric softeners coat the microscopic fibers in synthetic lipids, completely destroying their ability to absorb water.
If your kit includes a foam cannon, always flush it with clean water after use. Leaving soap residue inside the brass internal components will cause the mesh aerator screen to clog, resulting in weak, watery foam on your next wash.
Finally, store your liquid chemicals in a temperature-controlled environment. Extreme heat or freezing temperatures in a garage can cause waxes to separate and soaps to lose their viscosity, rendering them useless.
13. Ceramic Coating: Professional Protection Explained
The detailing world has been revolutionized by ceramic coating technology over the past decade. Unlike traditional waxes that sit on top of the paint, true ceramic coatings form a chemical bond with the clear coat through a process called cross-linking. This creates a hard, glass-like shell that resists UV rays, chemical etching, and light abrasion. Understanding ceramic coating application is essential for anyone serious about long-term paint protection.
Professional-grade ceramic coatings contain Silicon Dioxide (SiO2) concentrations ranging from 70% to over 90%, while consumer-grade spray sealants typically contain 5% to 15% SiO2. The higher the concentration, the harder and more durable the coating becomes. Professional coatings can last anywhere from two to seven years with proper maintenance, whereas consumer sprays may require reapplication every three to twelve months.
The application process for a true ceramic coating is far more involved than simply wiping on a spray wax. The vehicle must first undergo a complete decontamination wash, followed by chemical decontamination using an iron remover that dissolves embedded metallic particles. Next comes the clay bar treatment to remove surface contaminants, followed by paint correction to remove swirl marks and scratches. Only after the paint is completely flawless can the ceramic coating be applied in a temperature-controlled environment.
Temperature and humidity play critical roles in the application process. Most coatings require ambient temperatures between 60°F and 80°F with humidity below 70%. If the environment is too cold, the coating will not flash properly and may streak. If it’s too hot, the coating will flash too quickly, making it impossible to level before it hardens. This is why professional detailers invest in climate-controlled application bays.
Once applied, ceramic coatings require a curing period of 24 to 48 hours during which the vehicle must not be exposed to water. After curing, the coating provides exceptional hydrophobic properties—water beads up and rolls off the surface, carrying dirt and contaminants with it. This self-cleaning effect makes maintenance washes dramatically easier and less frequent. However, ceramic coatings are not scratch-proof. They resist light marring but can still be scratched by improper washing techniques or automated car washes with aggressive brushes.
For the DIY enthusiast, several consumer-grade ceramic coating kits have emerged that simplify the application process while still delivering impressive results. These kits typically include a surface prep spray, the coating itself, and an applicator block with suede microfiber cloths. While they won’t last as long as professional-grade coatings, they offer a significant upgrade over traditional waxes and sealants. The key to success with any ceramic coating is the preparation—the paint must be surgically clean and completely free of oils, waxes, and contaminants before application.
14. Paint Correction Fundamentals: Compound vs Polish
Paint correction is the process of removing imperfections from the clear coat through controlled abrasion. This is arguably the most skill-intensive aspect of automotive detailing, requiring an understanding of abrasive technology, pad selection, and machine operation. The goal of paint correction is to level the clear coat to remove swirl marks, scratches, oxidation, and water spot etching while removing as little material as possible.
The terms “compound” and “polish” are often used interchangeably by beginners, but they serve very different purposes. A compound is a heavy-cutting abrasive designed to remove deeper scratches and significant oxidation. Compounds work by aggressively abrading the clear coat to level out imperfections. They typically leave behind a slight haze or micro-marring that must be refined with a finishing polish. Polishes, on the other hand, contain much finer abrasives designed to refine the finish left by compounding, removing the haze and restoring maximum gloss and clarity.
Understanding pad selection is equally important. Cutting pads are typically made of firm foam or microfiber and are used with compounds to tackle deeper defects. Polishing pads are softer and used with finishing polishes to enhance gloss. Finishing pads are the softest and are used to apply waxes, sealants, or to perform a final jeweling step that maximizes reflection. The color coding system varies by manufacturer, but generally, darker colors indicate more aggressive cutting action while lighter colors indicate softer finishing pads.
The machine polisher itself is a critical investment. Dual-action (DA) polishers are recommended for beginners because they oscillate in a random pattern that mimics hand motion, significantly reducing the risk of burning through the clear coat or creating holograms. Rotary polishers spin in a fixed circle and generate more heat and cutting power, but they require extensive experience to operate safely. For the home enthusiast, a quality DA polisher with a selection of pads and products can achieve professional-level results with practice and patience.
Before beginning any paint correction work, it’s essential to measure the clear coat thickness using a paint depth gauge. Modern clear coats are typically between 30 and 50 microns thick—thinner than a human hair. Aggressive compounding removes 2-4 microns per session, so understanding how much material you have to work with prevents catastrophic failure. As a general rule, you should never remove more than 25% of the total clear coat thickness over the life of the vehicle.
Test spots are mandatory before tackling an entire vehicle. Choose a representative panel, typically the hood or trunk lid, and perform your planned correction steps in a small 2-foot by 2-foot area. Inspect the results under multiple lighting conditions, including direct sunlight and LED inspection lights. If the test spot achieves your desired results with the least aggressive combination, you can proceed with confidence across the entire vehicle. This methodical approach saves countless hours and prevents unnecessary clear coat removal.
15. Water Spot Removal and Prevention Strategies
Water spots are among the most frustrating cosmetic defects that plague vehicle finishes. These unsightly mineral deposits occur when water droplets evaporate on the paint surface, leaving behind calcium, magnesium, and other dissolved solids. What many car owners don’t realize is that water spots exist in two forms: mineral deposits sitting on top of the clear coat (Type I) and actual etching into the clear coat caused by chemical reactions (Type II). The treatment approach differs dramatically between these two types.
Type I water spots are relatively easy to address. A simple wash with a pH-neutral soap will often remove fresh mineral deposits before they have a chance to bond with the surface. For stubborn deposits, a dedicated water spot remover containing mild acids or chelating agents can dissolve the minerals without affecting the underlying paint. White vinegar, diluted 1:1 with distilled water, is a popular DIY solution. The acetic acid dissolves the alkaline mineral deposits. However, it should be used sparingly and never allowed to dry on the surface, as prolonged acid contact can damage the clear coat.
Type II water spots are far more serious. These occur when water droplets act as tiny magnifying glasses, concentrating UV rays onto the paint surface. The intense heat and light can literally burn the mineral deposits into the clear coat, creating craters that cannot be removed with chemicals alone. Type II water spots require mechanical abrasion—compounding and polishing—to level the surrounding clear coat and eliminate the etching. In severe cases, the etching may penetrate entirely through the clear coat into the base coat, at which point repainting is the only solution.
Prevention is infinitely easier than correction when it comes to water spots. The most effective strategy is to never allow water to air-dry on the vehicle. After washing, use a dedicated drying aid spray and a plush microfiber drying towel to remove all water before it can evaporate. If you live in an area with hard water, consider installing a water deionizer or using a rinse-less wash product that allows you to wash without a hose. Modern ceramic coatings and sealants also help by creating a hydrophobic surface that causes water to bead up and roll off rather than sitting flat and evaporating in place.
For those who park outdoors, sprinkler systems are a notorious source of water spot damage. The water from sprinklers often contains high levels of minerals and can dry rapidly on hot paint, creating severe etching in a matter of hours. If your parking spot is near sprinklers, adjust their trajectory or invest in a quality car cover. The minor inconvenience of deploying a cover is far preferable to the hundreds of dollars required to correct water spot etching through professional paint correction services.
16. Headlight Restoration: Bringing Clarity Back
Cloudy, yellowed headlights are not merely an aesthetic issue—they are a significant safety hazard. Oxidized headlight lenses can reduce light output by up to 80%, dramatically compromising nighttime visibility. Modern vehicles use polycarbonate plastic for headlight lenses because it is lightweight, impact-resistant, and can be molded into complex aerodynamic shapes. However, polycarbonate is susceptible to UV degradation, which breaks down the molecular structure of the plastic, causing it to turn yellow and hazy over time.
Headlight restoration kits work by physically removing the oxidized layer of plastic through sanding, then polishing the lens back to clarity. The process begins with wet sanding using progressively finer grits of sandpaper, typically starting at 800 grit and working up to 3000 grit. Each step removes the scratches left by the previous, coarser grit. The lens will appear completely frosted and opaque after the initial sanding stages, which often alarms first-time users, but this is an expected part of the process.
After sanding, a polishing compound is used with a drill-mounted buffing pad or by hand to restore optical clarity. The polishing step removes the fine sanding marks and brings the lens to a crystal-clear finish. However, polishing alone is not enough to ensure long-lasting results. The original UV protective coating has been sanded away, leaving the raw polycarbonate vulnerable to rapid re-oxidation. This is why most quality restoration kits include a UV sealant that must be applied as the final step.
The UV sealant creates a new protective barrier that shields the polycarbonate from the sun’s damaging rays. Some kits use a clear coat wipe-on formula, while others provide a ceramic coating specifically formulated for plastics. Without this protective layer, restored headlights can begin to yellow again in as little as six months. With proper sealing and periodic reapplication, a quality restoration can last two to three years before needing to be repeated.
For those seeking a permanent solution, professional detailers offer headlight restoration services that include sanding, polishing, and the application of a professional-grade 2K clear coat. This two-part catalyzed clear coat is the same product used on automotive paint and provides years of UV protection. However, it requires proper spray equipment and respiratory protection, making it less suitable for the average DIY enthusiast. For most car owners, the consumer-grade kits included in comprehensive detailing packages provide an excellent balance of results and ease of use.
17. Convertible Top Care and Protection
Convertible tops present unique detailing challenges that are often overlooked in standard car care discussions. Whether your convertible features a fabric (canvas) top or a vinyl top, these materials require specialized products and techniques that differ dramatically from paint care. Neglecting your convertible top not only affects its appearance but can lead to leaks, mold growth, and premature wear that costs thousands of dollars to replace.
Fabric convertible tops are typically constructed from multi-layer canvas materials that are treated with water-repellent coatings at the factory. Over time, exposure to UV rays, acid rain, and environmental fallout degrades these coatings, causing the fabric to absorb water rather than repel it. When water soaks into the fabric, it can lead to mold and mildew growth within the layers, creating unpleasant odors and potentially staining the material from the inside out. Regular cleaning and re-treatment with a fabric guard product is essential for maintaining water repellency.
Cleaning a fabric convertible top requires a gentle approach. Aggressive scrubbing can fray the fibers and create fuzzy spots that permanently alter the texture of the material. Use a soft horsehair brush and a dedicated convertible top cleaner that creates thick, lubricating foam. Work the cleaner into the fabric in straight lines, never in circles, to avoid twisting the fibers. Rinse thoroughly with a gentle stream of water—pressure washers should never be used on convertible tops as they can force water through the fabric and damage the waterproof membrane beneath.
Vinyl convertible tops require a different approach entirely. Vinyl surfaces are non-porous, so water absorption is not a concern. However, vinyl is highly susceptible to UV damage, which causes fading, cracking, and shrinkage over time. Vinyl tops should be cleaned with a dedicated vinyl cleaner that removes embedded dirt without stripping the plasticizers that keep the material flexible. After cleaning, a UV protectant specifically formulated for vinyl must be applied to replenish the plasticizers and provide a barrier against solar radiation.
One of the most damaging practices for convertible tops is lowering them while they are wet or damp. When a wet top is folded into the storage compartment, it creates the perfect environment for mold and mildew growth. The trapped moisture cannot evaporate, leading to musty odors that permeate the entire interior. Always ensure your convertible top is completely dry before lowering it. If you must lower it after washing or being caught in rain, raise it again as soon as possible and allow it to dry fully in the sun.
18. Engine Bay Detailing: The Forgotten Zone
The engine bay is perhaps the most neglected area of automotive detailing, yet it is one of the most important for long-term vehicle health and resale value. A clean engine bay runs cooler, is easier to work on, and allows you to spot leaks and problems before they become catastrophic. When a potential buyer opens the hood and sees a meticulously detailed engine compartment, it sends a powerful signal that the vehicle has been well-maintained throughout its life.
Detailing an engine bay requires caution and preparation. Modern engine compartments are filled with sensitive electronics, including the ECU (engine control unit), alternator, fuse boxes, and various sensors. While these components are designed to withstand some moisture (they have to survive rain and puddle splashes), directly spraying high-pressure water at electrical connectors can cause short circuits and expensive damage. The safest approach is to cover sensitive components with plastic bags secured by rubber bands before introducing any water or chemicals.
The degreasing process begins with a warm engine—not hot, but warm to the touch. Heat helps loosen greasy deposits and baked-on grime. Apply a dedicated engine degreaser liberally to all metal and plastic surfaces, avoiding the covered electrical components. Allow the degreaser to dwell for several minutes, but never let it dry on the surface. Use a variety of brushes to agitate stubborn deposits: a soft detail brush for intricate areas, a long-handled brush for deep reaches, and a stiff-bristle brush for heavily caked-on grease.
Rinsing should be done with a gentle stream of water, not a pressure washer. A garden hose with the nozzle set to a shower pattern provides enough force to rinse away degreaser without forcing water into connectors. After rinsing, remove the plastic coverings and use compressed air or a leaf blower to blow water out of crevices and electrical connectors. Start the engine and let it run for 10-15 minutes—the heat will evaporate any remaining moisture in safe areas.
Once the engine bay is dry, the dressing stage begins. Rubber hoses, plastic covers, and trim pieces benefit from a water-based dressing that restores their deep black color and provides UV protection. Avoid oil-based dressings that leave a greasy film—these attract dust and can actually accelerate deterioration of rubber components. For metal surfaces like valve covers and intake manifolds, a light spray of metal polish or quick detailer restores shine without leaving heavy residues that smoke off when the engine heats up.
19. Undercarriage Cleaning and Rust Prevention
The undercarriage of your vehicle endures more abuse than any other surface. It is constantly bombarded by road salt, mud, gravel, and standing water, yet it receives the least attention during routine cleaning. In regions where road salt is used during winter months, neglecting undercarriage maintenance can reduce a vehicle’s structural lifespan by years as rust eats away at frame rails, suspension components, and brake lines.
Effective undercarriage cleaning requires either specialized equipment or a willingness to get low. The most effective tool is a pressure washer with an undercarriage attachment—a wand with multiple upward-facing nozzles on wheels that you roll beneath the vehicle. This tool blasts away salt, mud, and debris from areas that are impossible to reach with a standard spray nozzle. For those without access to such equipment, a set of jack stands and a creeper allows you to slide beneath the vehicle and manually clean the undercarriage with a pressure washer or strong hose nozzle.
After thoroughly cleaning the undercarriage, rust prevention becomes the priority. Fluid Film and similar lanolin-based rust inhibitors are among the most effective products available to consumers. Unlike rubberized undercoatings that can trap moisture against the metal and accelerate rust, lanolin-based products creep into seams and crevices, displacing moisture and creating a self-healing barrier that prevents oxidation. These products should be applied annually before winter begins in salt-belt states.
It’s important to recognize the difference between surface rust and structural rust. Surface rust appears as orange discoloration on steel components and can often be treated with a wire brush and rust converter that chemically transforms iron oxide into a stable, paintable surface. Structural rust, on the other hand, has compromised the integrity of the metal, creating holes, flaking, or significant thinning. If you can push a screwdriver through a rusted section of the frame, the vehicle may be unsafe to drive and requires professional evaluation.
For those restoring a vehicle or seeking maximum undercarriage protection, professional rust-proofing services offer treatments that penetrate deep into factory seams and body cavities. These treatments often use specialized wands that access the inside of frame rails, rocker panels, and door bottoms through existing drain holes. While more expensive than DIY options, professional rust-proofing is a worthwhile investment for vehicles that will be kept long-term in corrosive environments.
20. Seasonal Detailing Strategies: Adapting to the Calendar
The products and techniques that work beautifully in the mild temperatures of spring and fall may fail completely during the extremes of summer and winter. Understanding seasonal detailing strategies ensures that your vehicle receives appropriate protection year-round, regardless of what Mother Nature throws at it.
Winter Detailing Preparation: Winter is the most punishing season for vehicle finishes. Before the first snowfall, your vehicle should receive a comprehensive protection detail. This starts with a thorough decontamination wash to remove summer’s accumulated bug remains, tree sap, and road film. Follow this with a clay bar treatment and the application of a durable synthetic sealant or ceramic coating—products that can withstand the chemical assault of road salt and calcium chloride brine solutions used for de-icing. Pay special attention to wheel wells and undercarriage, applying a rust inhibitor to protect against salt corrosion. The interior should be treated with all-weather floor mats and fabric protection to guard against the salt, slush, and moisture tracked in on winter boots.
Summer Detailing Priorities: Summer brings intense UV radiation, high temperatures, and increased insect activity. The primary concern shifts from corrosion protection to UV defense. Interior surfaces—particularly dashboards, door panels, and leather seats—are vulnerable to fading, cracking, and heat damage. Apply a quality UV protectant with a high SPF rating to all interior surfaces. Exterior protection should focus on products with high heat tolerance; traditional carnauba waxes can actually melt and become hazy on panels that exceed 180°F in direct summer sun. Synthetic sealants and ceramic coatings maintain their integrity at much higher temperatures.
Spring Decontamination: After months of winter abuse, spring detailing focuses on decontamination. The accumulated salt, sand, and chemical residues must be thoroughly removed before they have a chance to embed in the paint or continue corroding the undercarriage. A thorough spring detail includes iron remover treatment to dissolve embedded metallic particles, clay bar decontamination to remove surface contaminants, and a fresh application of sealant or wax to protect against the upcoming summer sun. This is also the ideal time to shampoo carpets and upholstery to remove the salt stains and moisture that accumulated during winter months.
Fall Preparation: Fall is the time for pre-winter preparation, but it also presents unique challenges. Falling leaves contain tannic acid that can stain paint if left to decompose on the surface. Tree sap becomes more prevalent as trees prepare for dormancy. A thorough fall detail includes sap removal, another application of durable sealant, and preparation of the undercarriage for the coming salt season. This is also the time to check and restore rubber door seals with a silicone-based lubricant to prevent them from freezing shut during winter cold snaps.
21. Professional vs DIY Detailing: A Comprehensive Cost Analysis
One of the most common questions in the detailing community is whether it’s more economical to detail your vehicle yourself or pay a professional. The answer depends on several factors: the quality level you demand, the value of your time, and the initial investment you’re willing to make in equipment and education. Let’s break down the numbers to help you make an informed decision.
A professional full-correction detail from a reputable shop typically costs between $500 and $1500, depending on vehicle size, paint condition, and the services included. This price includes exterior wash, chemical decontamination, clay bar treatment, multi-stage paint correction (compound and polish), and the application of a sealant or ceramic coating. Additional services like interior shampooing, leather conditioning, and engine bay detailing add to the total. The major advantage of professional services is expertise—experienced detailers can assess paint condition, choose the right pad and product combinations, and operate rotary and DA polishers with precision that takes years to develop.
For the DIY enthusiast, the initial investment in quality equipment is significant but amortizes quickly across multiple vehicles. A comprehensive DIY setup includes a dual-action polisher ($150-$400), a selection of pads ($60-$100), compounds and polishes ($80-$150), clay bar kit ($25-$40), quality microfiber towels ($50-$100), two buckets with grit guards ($40), a foam cannon or gun ($30-$80), and the chemicals for washing, decontamination, and protection ($100-$200). The total initial investment ranges from approximately $500 to $1000—roughly the cost of one professional full-correction detail.
The value proposition becomes clear when you consider that this equipment can be used dozens of times across multiple vehicles over many years. If you detail your vehicle twice per year and have two vehicles in the household, you’ll perform four full details annually. At a professional cost of $800 each, that’s $3200 per year in savings after the initial investment is recouped in the first year. Over five years, the DIY approach saves $15,000 to $20,000 compared to professional services.
However, this analysis assumes that your time has no value, which is rarely the case. A full correction detail takes an experienced DIY detailer 8-12 hours, and a beginner may require 15-20 hours spread across a weekend. If your professional hourly rate is $100 or more, the time investment may outweigh the financial savings. Additionally, there is a learning curve—your first few attempts at paint correction will not produce professional-level results, and mistakes can be costly. The decision ultimately comes down to whether you view detailing as an enjoyable hobby or a necessary chore.
22. Eco-Friendly and Waterless Wash Options
As environmental consciousness grows and water restrictions become more common in drought-prone regions, eco-friendly car washing methods have evolved from niche alternatives to mainstream solutions. Traditional driveway washing with a garden hose can consume 80 to 140 gallons of water per wash, and the runoff carries soap, oil, heavy metals, and brake dust directly into storm drains that empty into local waterways. Modern waterless and rinse-less wash products address both of these environmental concerns while still delivering excellent cleaning results.
Waterless wash products are spray-on, wipe-off formulations that encapsulate dirt particles in a lubricating polymer solution. The product is sprayed onto a panel, allowed to dwell for a moment to lift and encapsulate dirt, then gently wiped away with a clean microfiber towel. The polymers create a barrier between the dirt particles and the paint, preventing the scratching that would occur if you wiped a dry, dusty panel with a towel alone. A full waterless wash on a moderately dirty vehicle uses only 4 to 8 ounces of product and generates zero runoff.
Rinse-less wash products take a slightly different approach. Rather than being sprayed directly onto dry panels, rinse-less washes are diluted in a bucket of water (typically 1 to 3 ounces per 2 gallons) and applied with a microfiber wash mitt. The solution encapsulates dirt and provides lubrication, allowing you to wash panel by panel without a hose for rinsing. After washing each panel, you simply dry it with a clean microfiber towel. The entire process uses just 2 to 3 gallons of water—a reduction of over 95% compared to traditional washing—and the small amount of remaining water can be disposed of in a utility sink rather than running into the storm drain.
It’s important to understand the limitations of waterless and rinse-less methods. These products are designed for maintenance cleaning on vehicles with light to moderate dirt accumulation. A vehicle covered in thick mud, caked-on road salt, or heavy winter grime still requires a traditional pressure wash to remove the bulk of contamination before waterless products can be safely used. Using waterless wash on excessively dirty vehicles risks dragging abrasive particles across the paint and creating swirl marks.
Many of the best car cleaning kit manufacturers now include waterless or rinse-less wash options in their product lines. Chemical Guys offers EcoSmart Waterless Wash, Optimum has their legendary No Rinse Wash & Shine, and Meguiar’s produces Ultimate Waterless Wash & Wax. For environmentally conscious enthusiasts living under water restrictions, these products provide a viable path to maintaining a clean vehicle without compromising environmental responsibility or paint safety.
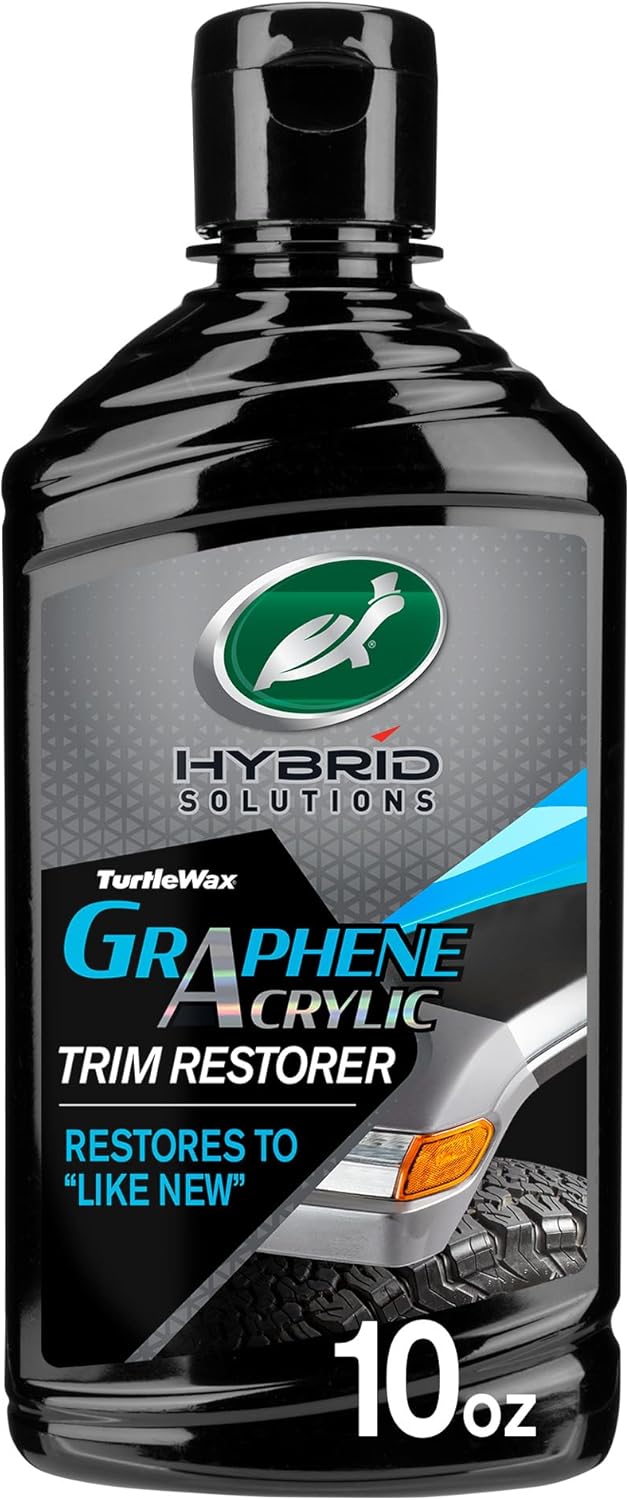
23. Trim Restoration: Bringing Plastic Back from the Dead
Faded, chalky plastic trim is one of the most aging cosmetic issues a vehicle can develop. The black textured plastic found on bumpers, door handles, mirror housings, and window surrounds is particularly vulnerable to UV degradation. As UV rays break down the polymers on the surface, the plastic oxidizes and turns from deep black to an unsightly light gray. This process accelerates when the plastic is exposed to harsh chemicals from automatic car washes or improper cleaning products.
Trim restoration products fall into two categories: temporary dressings and permanent restoration solutions. Temporary dressings are typically water-based or silicone-based products that coat the surface and restore a dark appearance. These products are easy to apply and provide immediate visual improvement, but they wash away after a few rains or car washes. They’re ideal for maintenance between deep details but shouldn’t be considered a permanent fix.
Permanent trim restoration products use a fundamentally different approach. These ceramic-infused or dye-based formulations penetrate into the microscopic pores of oxidized plastic and create a new molecular bond. Unlike surface dressings, these products actually restore the plastic rather than just covering it up. Quality trim restorers can last one to two years before requiring reapplication, and they resist washing, rain, and UV exposure far better than temporary dressings.
Application technique dramatically affects the longevity of trim restoration. The plastic must be surgically clean before applying any restoration product. Use an all-purpose cleaner and a stiff brush to scrub the textured surface, removing years of accumulated dirt and old dressing residue. After cleaning, wipe the trim with isopropyl alcohol to remove any remaining oils or silicones that would prevent the restoration product from bonding. Apply the restorer in thin, even coats, allowing each to dry fully before applying the next. Thick applications lead to streaking and uneven drying that’s difficult to correct once cured.
Heat guns have gained popularity as a DIY trim restoration method, but they come with significant risks. The theory is that applying heat brings oils within the plastic to the surface, temporarily restoring color. While this can produce dramatic before-and-after results, the heat actually damages the plastic further by breaking down UV inhibitors and making the surface brittle. Trim treated with a heat gun will fade faster and more severely than before, potentially requiring replacement. Stick with dedicated chemical restoration products for safe, lasting results.
24. Interior Odor Elimination: The Science of Fresh
Interior odors are among the most persistent and frustrating detailing challenges. Unlike surface dirt that can be wiped away, odors have often penetrated deep into fabric fibers, carpet padding, and even the headliner material. Understanding the science of odor elimination—rather than simply masking smells with air fresheners—is essential for achieving a truly fresh interior.
Automotive odors generally fall into three categories. Organic odors (food spills, pet accidents, mildew) are caused by bacteria and fungi that continue to produce odor molecules as they decompose organic matter. Chemical odors (cigarette smoke, vape residue, fuel spills) are caused by volatile organic compounds that adhere to surfaces and continue to off-gas over time. Environmental odors (mold, mildew, mustiness) are caused by moisture trapped in carpets, padding, or the HVAC system that supports fungal growth.
Each type of odor requires a different elimination approach. Organic odors demand enzymatic cleaners that actually digest the bacteria and organic matter causing the smell. These enzyme-based products break down proteins, fats, and carbohydrates at the molecular level, eliminating the food source for odor-causing bacteria. Standard carpet cleaners may remove the visible stain but leave behind organic residue that continues to smell. For severe organic contamination, an extractor (hot water extraction machine) is necessary to flush the enzymes deep into carpet padding and then extract them along with the dissolved contaminants.
Chemical odors like cigarette smoke require a different strategy. Smoke particles are microscopic and can penetrate every porous surface in the vehicle, including the headliner, seat foam, and even the seatbelt webbing. Ozone generators are the most effective tool for smoke odor elimination. Ozone (O3) is a highly reactive molecule that oxidizes odor-causing compounds on contact, literally destroying them through a chemical reaction. Professional ozone treatments require the vehicle to be sealed with the generator running inside for several hours, followed by thorough ventilation. Consumer-grade ozone generators are available but must be used with extreme caution—ozone is a lung irritant, and the vehicle must be fully aired out before driving.
HVAC system odors deserve special attention because they affect the air you breathe while driving. That musty smell when you first turn on the air conditioning is almost always caused by mold and bacteria growing on the evaporator core. As moisture condenses on the cold evaporator, it creates a dark, damp environment perfect for microbial growth. Specialized HVAC cleaning products are foaming formulas that are injected through the evaporator drain tube or through the vents, expanding to fill the entire evaporator housing and killing the growth at its source. After treatment, running the fan on high with the A/C compressor off for the last few minutes of every drive helps dry the evaporator and prevents future growth.
Frequently Asked Questions (FAQs)
1. Is it better to buy a car cleaning kit or individual products?
For beginners and most enthusiasts, kits are far better. They offer significant cost savings, ensure chemical compatibility across products, and provide a structured system to follow. Advanced professionals may prefer piecing together individual products for hyper-specific needs.
2. Can I use a car wash kit on a matte or satin paint finish?
Standard kits containing waxes, gloss enhancers, or “wash and wax” soaps should NEVER be used on matte finishes. These will add unwanted shine and ruin the flat look. You must use specific matte-formulated soaps and sealants.
3. What is the two-bucket method?
It is the safest way to wash a car. One bucket contains soapy water, and the second contains clean rinse water (both with grit guards). You dip your mitt in soap, wash a panel, and rinse the dirty mitt in the clean water before getting more soap. This prevents rubbing dirt back into the paint.
4. How often should I use the products in my detailing kit?
Wash your car every 1-2 weeks depending on weather conditions. Interior wipe-downs can be done bi-weekly. Apply wax or sealants every 3 to 6 months, and use a clay bar only 1-2 times a year when the paint feels rough to the touch.
5. Do I need a pressure washer to use a car cleaning kit?
No. While pressure washers are required for standard foam cannons, many kits (like Chemical Guys) offer foam guns that attach to standard garden hoses. A standard hose and bucket are perfectly adequate for a pristine wash.
6. Will a car cleaning kit remove scratches?
Most basic wash kits will not remove scratches. They remove dirt and add protective wax (which may temporarily fill and hide micro-scratches). To permanently remove scratches, you need a kit that specifically includes compounding polish and a dual-action orbital polisher.
7. How long does the wax in these kits actually last?
Traditional carnauba wax (like Meguiar’s Gold Class) lasts 4 to 8 weeks. Synthetic polymer sealants last 3 to 6 months. Modern SiO2 ceramic sprays (like Turtle Wax Hybrid Solutions) can last 6 to 12 months with proper maintenance.
8. Can I use interior detailing spray on leather seats?
It depends on the product. Many “all-purpose” interior detailers are safe for coated automotive leather. However, for deep conditioning and preventing cracks, you should use a dedicated leather cleaner and conditioner combo.
9. Why do my windows streak even after using a glass cleaner?
Streaking is usually caused by using too much product, washing glass that is hot to the touch, or using a dirty towel. Always use a dedicated waffle-weave microfiber towel specifically for glass, and spray the cleaner onto the towel, not directly on the window.
10. How do I clean the microfiber towels included in my kit?
Wash them in a washing machine with cold or warm water using a microfiber-specific detergent or a liquid detergent free of dyes and perfumes. Never use fabric softener, and dry them on the lowest heat setting or air dry them.
11. What is a ceramic coating and how is it different from wax?
Ceramic coatings are liquid polymers containing Silicon Dioxide (SiO2) that chemically bond with the clear coat to form a hard, glass-like protective layer. Unlike wax that sits on top and wears away in weeks, ceramic coatings last years and provide superior protection against UV, chemicals, and light scratches.
12. Can I apply a ceramic coating myself?
Yes, consumer-grade ceramic coating kits are designed for DIY application. However, proper preparation is critical—the paint must be completely decontaminated, clayed, and polished before coating application. Temperature and humidity must also be controlled for the coating to cure properly.
13. How do I remove water spots that won’t wash off?
For fresh water spots, a mixture of equal parts distilled water and white vinegar can dissolve mineral deposits. For etched water spots that have damaged the clear coat, machine polishing with a compound is required to level the surface.
14. Is it safe to pressure wash my engine bay?
Pressure washing an engine bay carries significant risk. High-pressure water can force its way past seals into electrical connectors, causing short circuits and corrosion. A gentle stream from a garden hose with sensitive electronics covered is the safer approach.
15. What’s the difference between compound and polish?
Compound contains aggressive abrasives that remove deeper scratches and heavy oxidation but leaves a slight haze. Polish contains much finer abrasives that refine the finish, removing the haze left by compounding to create maximum gloss and clarity.
16. How can I wash my car during a drought or water ban?
Waterless and rinse-less wash products allow you to clean your vehicle using only a few ounces of product and minimal or no water. These encapsulate dirt particles in lubricating polymers, allowing them to be safely wiped away without scratching the paint.
17. How do I restore faded plastic trim?
Permanent trim restoration requires ceramic-infused or dye-based products that penetrate the oxidized surface. Clean the trim thoroughly, wipe with alcohol to remove oils, then apply the restorer in thin coats. Temporary silicone dressings wash away quickly and won’t provide lasting results.
18. What causes the musty smell from my car’s AC?
Musty AC odors are caused by mold and bacteria growing on the evaporator core. Moisture condenses on this cold component, creating an ideal environment for microbial growth. Special foaming HVAC cleaners can be injected through the vents to kill the growth at its source.
19. How do I prepare my car for winter?
Winter preparation includes a thorough decontamination wash, application of a durable sealant or ceramic coating, undercarriage rust inhibitor treatment, all-weather floor mats, and fabric protection for carpets and upholstery.
20. How much does a full professional detail cost?
Professional full-correction details range from $500 to $1500 depending on vehicle size and condition. DIY equipment investment is similar to one professional detail but can be used for years, offering significant long-term savings for enthusiasts.
Transform Your Driveway into a Detailing Bay
Investing in one of the best car cleaning kits is the easiest and most cost-effective way to protect the second largest investment you’ll likely ever make. Whether you choose the deep carnauba glow of Meguiar’s, the ceramic technology of Turtle Wax, or the all-in-one arsenal of Chemical Guys, the key to success is consistency and proper technique. Don’t let your paint degrade under the sun and environmental fallout.
Shop the Top Rated Car Cleaning Kits on Amazon