
What Is Hydroplaning?
Picture the moment your car suddenly feels disconnected — the steering wheel goes light, the road noise drops away, and your vehicle begins to drift of its own accord. That sensation of terrifying weightlessness is hydroplaning, and it is one of the most disorienting emergencies any driver can face. The good news is that understanding what is happening to your car in that moment makes you dramatically more capable of surviving it.
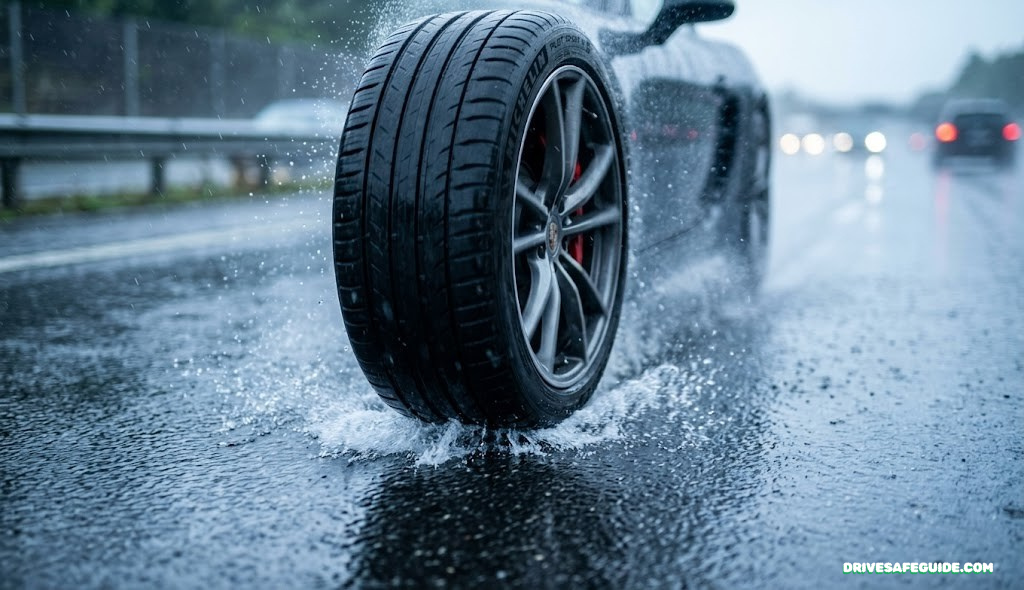
Hydroplaning occurs when a tire’s ability to channel water away from its contact patch fails to keep pace with the speed of the vehicle. The result is that a wedge of water pressure builds up under the leading edge of the tire and physically lifts it off the road surface. When that lift force exceeds the weight bearing down on the tire, the rubber loses direct contact with the pavement. At that point, you are no longer driving — you are gliding on water, and the normal rules of traction, braking, and steering no longer apply.
The term was first studied in depth by NASA researchers analyzing aircraft tire failures on wet runways. They discovered that the lift geometry and fluid dynamics at play were eerily similar to what happens beneath a racing tire, a commercial aircraft wheel, or an ordinary passenger car tire — the physics care nothing for context. What matters is water depth, vehicle speed, tire tread, and tire pressure. Change any one of those variables and the risk profile shifts dramatically.
Most drivers are surprised to learn hydroplaning can begin at 35 mph with worn tires. At highway speeds, even a light surface film of water is enough to trigger the effect if tread is below 4/32 inch.
There are three recognized types of hydroplaning. Dynamic hydroplaning — the classic high-speed variety — happens when the tire rolls through standing water faster than it can push it aside. Viscous hydroplaning happens at lower speeds on smooth or polished surfaces where a thin, greasy film of water bonds to the road and prevents full rubber contact. Reverted rubber hydroplaning occurs when a tire locks completely, generates heat, and the steam reacts with the road surface to create a micro-layer of vapor the tire floats on — most commonly associated with hard braking on wet surfaces without ABS.
Every driver should understand all three types, because the prevention and recovery strategies vary slightly for each. But the core recovery steps share a universal foundation: stay calm, do less rather than more, and let physics work in your favor.
If you’re also preparing for poor visibility alongside slippery conditions, our complete guide to rain driving safety and cruise control risks at high speeds addresses the full wet-weather picture.
The Physics Behind Hydroplaning
To recover from hydroplaning effectively, you need a mental model of what is actually happening beneath your vehicle. It is not a mysterious or random event — it follows precise physical laws, and those laws are your allies once you understand them.
The Water Wedge Equation
Every tire on a moving vehicle displaces water in three phases. First, water in front of the tire deflects outward to the sides. Second, water that cannot escape outward fast enough is squeezed under the leading edge of the contact patch. Third, grooves in the tread channel the remaining water rearward and away from the contact zone. When the car moves faster than these three phases can complete, phase three fails — water accumulates under the tire faster than it can evacuate, and lift occurs.
Tire engineers use a formula that predicts the critical speed at which dynamic hydroplaning begins: roughly 10.35 times the square root of tire inflation pressure in PSI. A tire inflated to 32 PSI, for example, theoretically begins hydroplaning at around 58.5 mph. But that assumes new tires with optimal tread depth. As tread wears down, the grooves become shallower and less effective at water evacuation, dropping the critical speed significantly. A tire at half its original tread depth can hydroplane at 45 mph.
Why Steering Input Becomes Dangerous
During full dynamic hydroplaning, the front tires are floating on water and have essentially zero lateral grip. Any steering input you apply does not translate to a directional change — it simply repositions the wheel angle. When traction suddenly returns (which it will, often in under a second), the wheels will snap the car in whichever direction they are pointing. If you have been frantically steering in the wrong direction while floating, regaining traction instantly puts you on a collision course with a guardrail or another lane.
This is why the golden rule of hydroplaning recovery is to minimize steering input, not maximize it. Hold the wheel with intention but without force. Do not allow panic to translate into death-grip corrections that compound your problem.
🔬 Key Insight: Traction Returns Faster Than You Expect
Studies of vehicle dynamics on wet pavement show that full dynamic hydroplaning episodes typically last between 0.5 and 3 seconds on standard road puddles. Your car will almost certainly self-recover if you resist the instinct to overcorrect during that window.
Understanding that wet roads multiply your braking distance is foundational. Our deep-dive into safe following distance rules explains exactly how much extra space you need in rain — a critical factor in giving yourself time to react without panicking into a hydroplane.
Warning Signs That Hydroplaning Is Beginning
Catching hydroplaning early — at the first whisper of reduced grip rather than full float — gives you more time to respond correctly and avoid the worst outcomes. Your vehicle sends multiple simultaneous signals; training yourself to recognize them in advance is the difference between a controlled correction and a panicked accident.
Physical Sensations in the Car
The most immediately obvious sign is steering lightness. The wheel will feel unnervingly easy to turn — almost like there is nothing connected to it. This is because the front tires have lost lateral grip and are no longer providing the resistance to steering that you feel during normal driving. A normal, weighted steering feel is replaced by something disturbingly vague.
Simultaneously, you may notice a change in road noise. The steady hiss and rumble of tires on wet pavement drops away, replaced by an unusual silence or a higher-pitched whirring. The tire tread is no longer biting into textured asphalt — it is skimming across water, and the acoustics change accordingly.
In rear-wheel-drive vehicles, the rear end may also begin to float or yaw slightly, as rear-tire grip diminishes independently of the fronts. In front-wheel-drive cars, the engine note may rise — the driven wheels spinning faster because water has reduced their load — while the car’s actual speed stays flat or drops.
Dashboard Signals
Modern vehicles equipped with stability control and traction control systems will often flash their respective warning lights when wheel slip is detected. If your ESC or TCS indicator begins flickering on a wet road, your wheels are fighting for traction and you may be in the early stages of surface aquaplaning. Treat those lights as a real-time alert to slow down.
✅ DO Notice Early
- Watch for steering lightness at speed
- Listen for road noise changes
- Feel for rear drift or yaw
- Watch ESC/TCS indicator lights
- Monitor engine RPM vs actual speed
❌ DON’T Ignore These
- Dismiss light steering as “smooth road”
- Assume puddles are shallow
- Treat standing water as decoration
- Continue at speed after warning signs
- Assume AWD means you’re immune
Recognizing vehicle instability is also critical when dealing with other slippery conditions. Our guide on black ice driving survival covers similar sensory warning detection for winter conditions that share many response characteristics with hydroplaning.

A top-tier all-season tire with aggressive water-channeling tread grooves specifically engineered to resist hydroplaning. Consistently rated among the best for wet grip and aquaplaning resistance.
View on AmazonStep-by-Step Hydroplaning Recovery
When hydroplaning strikes, most drivers have two to three seconds to respond before the situation becomes unrecoverable. These steps must be executed in sequence, calmly, and without the overcorrections that cause most aquaplaning crashes. Read them now so that in the moment, your hands and feet act from muscle memory rather than panic.
Release the Accelerator — Do Not Brake
The single most important action is to lift your foot cleanly off the accelerator pedal. You are not jabbing the brakes — you are simply removing the power input that has been maintaining or increasing your speed. Engine braking will begin to decelerate the vehicle gently while you remain in control of your direction.
Why this matters: applying the brakes while all four tires are floating on water does not slow the car — the tires have no contact with the road to generate friction. Worse, it risks locking the tires and triggering a spin. Reducing throttle is the safest first action regardless of vehicle type, drivetrain, or tire condition.
Hold the Steering Wheel Steady and Straight
With your foot off the gas, your next responsibility is the steering wheel. Hold it firmly but without force — fingers and palms engaged, arms slightly bent. Your goal is to maintain the wheel in roughly the same position it was when hydroplaning began, or to bring it gently to point in the direction you want to travel.
Do not make large steering corrections. Do not saw the wheel back and forth. Every sudden steering movement you make is waiting to translate into a violent snap when the tires regain traction. Think of it as holding a compass heading rather than steering through a corner.
Let the Vehicle Slow Down Naturally
With throttle released and steering held steady, engine braking and rolling resistance will naturally begin to slow your vehicle. This is what you want. Speed is the enemy during hydroplaning — the slower you go, the smaller the water wedge force, and the sooner the tire drops back onto the road surface.
Resist any urge to floor the clutch, shift down aggressively, or rev the engine. In a manual transmission car, leave the clutch engaged in the current gear so engine braking can work. The car’s deceleration should feel gradual and controlled, not jerky or abrupt.
Wait for the Steering to Feel Weighted Again
As the tires drop back onto the road surface, the steering wheel will regain its familiar resistance. This is the tactile feedback that tells you traction has returned. Do not react to this moment with a sudden steering correction — the car is already pointing somewhere, and that direction is about to become real. Assess where you are and make small, deliberate steering adjustments only after traction is confirmed through that weighted steering feel.
This is the step most drivers skip in their mental preparation. They focus on Steps 1 through 3 but are unprepared for the sharp sensory shift of traction returning. Prepare for it mentally: traction will snap back, steering will go heavy again, and you will need to assess and steer smoothly rather than jerk.
Apply Gentle Braking to Reduce Speed Further
Only after traction has confirmed itself through weighted steering should you consider braking. With ABS, apply smooth, firm pressure and hold it — the system will manage the pulsing automatically to prevent lockup. Without ABS, use threshold braking: press until you feel the tires begin to protest, then ease off just barely, maintaining maximum grip braking without crossing into lockup. Never stab the brake pedal on a wet surface after a hydroplaning event — the road is still wet, traction is still reduced, and sudden hard braking can restart the cycle.
Steer to Safety and Reduce Speed for Remaining Wet Road
Once the vehicle is stable and slowing, guide it smoothly back to your lane or desired path. Scan ahead for more water, reduced visibility, or other hazards. Reduce your speed by at least 15–20% below the speed at which hydroplaning occurred and maintain that lower speed for as long as road conditions remain wet. Do not resume highway speeds immediately after recovery — the conditions that caused the event have not changed, and the same puddle or rain-slicked section may be ahead.
Ease off gas → Hold steering steady → Let the car slow naturally → Feel traction return → Apply gentle braking → Guide to safety. Six steps that must run in that order. Jumping to braking before traction returns is the most common mistake that converts recoverable hydroplaning into a spin.

Being stranded after a rain-related incident is a real risk. A reliable jump starter and emergency kit ensures you can handle post-hydroplaning scenarios — dead battery from running electronics, or any secondary event.
View on AmazonABS vs. Non-ABS Braking During Hydroplaning
Anti-lock Braking Systems fundamentally change the braking protocol during and after a hydroplaning event. Understanding whether your vehicle has ABS — and knowing which technique to apply for each — is a basic safety literacy that every driver should carry.
| Factor | Vehicle With ABS | Vehicle Without ABS |
|---|---|---|
| Braking technique | Apply firm, continuous pressure and hold | Threshold braking — press to edge of lockup, ease slightly |
| What the system does | Automatically pulses brakes to prevent wheel lockup | Nothing — driver must modulate manually |
| Common mistake | Pumping the pedal (disables ABS benefit) | Stabbing full brake pressure and locking all wheels |
| Steering while braking | Full steering ability maintained during ABS | Minimal steering ability with locked wheels |
| Pedal feel during engagement | Vibration and pulsing is normal — do not release | No feedback system — driver relies on feel |
| Stopping distance on wet road | Generally shorter — maintains directional control | Can be longer if wheels lock and skid |
The critical rule for ABS vehicles bears repeating: do not pump the brake pedal. This is the residual habit from non-ABS driving that actively prevents ABS from working. The pulsing vibration you feel through the pedal is the system doing exactly what it is designed to do. Fighting that pulsing by releasing and re-pressing destroys the system’s cadence and can increase stopping distance dramatically.
For a deeper look at how electronic safety systems protect you in emergencies, our article on skid control techniques covers ABS, ESC, and traction control interactions in detail.
Hydroplaning Recovery by Vehicle Type
While the core six steps apply universally, the specific handling characteristics of different vehicles change how recovery feels and which nuances to watch for. Knowing your vehicle’s drivetrain and weight distribution pays dividends when fractions of a second matter.
Front-Wheel Drive
Front-wheel-drive vehicles tend to understeer — meaning the car wants to go straight even when you steer into a corner. During hydroplaning, the driven and steering wheels are both at the front, so traction loss is felt most immediately in the steering. Recovery is generally straightforward: lift off gas, hold steering, and the front tires will recover. The car’s natural tendency to go straight actually works in your favor here.
Rear-Wheel Drive
Rear-wheel-drive cars are more susceptible to oversteer during hydroplaning, where the rear swings out. If you feel the rear begin to drift, apply very slight opposite lock (steer in the direction of the skid) — just enough to counter the rotation without overcorrecting. This is the one scenario where small steering corrections are appropriate during the event itself, rather than purely at recovery. Black ice and oversteer handling share similar countersteering principles.
All-Wheel Drive and Four-Wheel Drive
Many AWD drivers carry a false confidence in wet conditions. AWD distributes torque and improves traction during acceleration, but it provides zero advantage when all four tires are floating on water. Hydroplaning bypasses the AWD system entirely — there is no road contact to grip. Worse, AWD vehicles are often heavier, which increases the kinetic energy at play when traction suddenly returns. Do not let your drivetrain be a reason to maintain speed in the rain. Check our guide on whether front-wheel drive is safe in winter for a direct comparison of drivetrain safety myths.
Motorcycles
Hydroplaning on a motorcycle is a different emergency entirely. With two narrow tires, the window between surface contact and full float is razor-thin. The golden rule is the same — ease off throttle gradually, avoid any braking — but body positioning and counter-lean become critical. Do not sit upright suddenly or shift weight; maintain neutral body position and allow the deceleration to work. Motorcycles also respond far more sensitively to rear-wheel slide initiated by hydroplaning, making smooth throttle management the highest priority.

If a hydroplaning event leads to a collision, having clear footage of road conditions — standing water, reduced visibility, other drivers’ behavior — is invaluable for insurance claims and legal protection.
View on AmazonHow to Prevent Hydroplaning — Before It Happens
Reaction skills matter, but prevention is where hydroplaning deaths are actually prevented. The conditions for hydroplaning are not random or unpredictable — they follow known patterns that can be managed with driving behavior changes and vehicle maintenance.
Speed is the Master Variable
Every hydroplaning formula has vehicle speed as the dominant factor. Water wedge force rises with the square of velocity — doubling your speed quadruples the lift force on each tire. The most powerful preventive action you can take on a wet road is simply to slow down. The standard recommendation is to reduce highway speed by at least 10 mph when roads are wet, and by 15–20 mph in heavy rain with standing water visible.
This connects directly to our comprehensive overview of highway safety tips — wet pavement and speed management appear at the top of every professional driver safety checklist.
Avoid Standing Water and Puddles
Visible standing water is a direct invitation to hydroplane. Change lanes to avoid it when safe. If avoidance is impossible, reduce speed significantly before entering the water zone. The outside lanes of multi-lane roads drain more slowly than center lanes on crowned roads — in heavy rain, position yourself in the center lane where the road surface peaks and water flows outward.
Tire Condition is a Critical Factor
Worn tires cannot evacuate water effectively. A tire at 2/32 inch tread depth — the legal minimum in most states — has lost a significant percentage of its water-channeling capacity compared to a new tire. At highway speeds in rain, the difference between new tread and worn tread is the difference between control and hydroplaning. Regularly inspect your tires using the quarter-coin test (if you see the entire top of the coin above the tread surface, the tire needs replacement).
Maintain Proper Tire Pressure
Underinflated tires flatten the contact patch, making it harder to push water through the tread grooves. Overinflated tires create a convex contact patch that concentrates weight on the center of the tread, reducing the effective channeling area. Follow your manufacturer’s recommendation — found on the driver’s door jamb sticker, not on the tire sidewall — and check pressure monthly, since temperature changes cause pressure to fluctuate. Our guide to TPMS sensor replacement explains how to keep your tire pressure monitoring system functioning accurately.
Research consistently shows that the highest accident risk on wet roads is in the first 30 minutes of rainfall. Road grime and oil residue mix with the initial rain to create an extremely slippery emulsion before the sustained rainfall washes it away. Slow down significantly when rain first begins.
Tire Selection and Maintenance for Wet Road Safety
Not all tires handle water equally. Choosing a tire designed for wet performance and maintaining it properly is the single highest-return investment a driver can make in wet-road safety.
Tread Pattern Geometry
Tires designed for wet performance use asymmetric or directional tread patterns optimized for channeling water. Directional tires — recognizable by their V-shaped or arrow-like tread grooves — are engineered so that rotation in a specific direction aggressively pumps water outward from the center contact zone. They can evacuate several gallons of water per minute at highway speeds. Running a directional tire in the wrong rotational direction (an easy mistake during tire rotation) completely defeats this engineered advantage.
Wide circumferential grooves (the continuous channels that run around the circumference of the tire) and lateral grooves (the cross-channels) work together to create a network of drainage paths. All-season tires balance these features with year-round capability. Performance summer tires often sacrifice some wet drainage for maximum dry grip — verify wet ratings when choosing performance tires.
Tire Age Matters as Much as Tread
Rubber compounds degrade over time regardless of how the tires look. Industry guidance and most tire manufacturers recommend replacing tires that are six to ten years old regardless of tread depth. Aged rubber loses the molecular flexibility that allows tread grooves to flex open and close — this pumping motion is part of what makes tread channels effective at water evacuation. Inspect your tire’s DOT code (the date code embedded in the sidewall) and replace aging tires proactively.
| Tire Type | Wet Performance | Hydroplaning Resistance | Best For |
|---|---|---|---|
| All-Season | Good | Moderate–High | Most year-round drivers |
| Summer Performance | Very Good (dry bias) | Moderate | Dry climate sport driving |
| Grand Touring All-Season | Very Good | High | Highway, mixed conditions |
| Winter / Snow | Excellent on cold wet | High on cold roads | Cold, wet climate winters |
| Low-Profile Sport | Moderate | Lower (shallow grooves) | Performance cars, dry roads |
Our comprehensive discussion on summer tire vs. all-season tire tradeoffs includes wet performance testing data from independent sources that directly informs hydroplaning risk.

Maintaining precise tire pressure is one of the most actionable hydroplaning prevention steps available. A quality digital gauge gives instant, reliable readings in any light condition — far more accurate than the guesswork of stick gauges.
View on AmazonWhy Cruise Control and Wet Roads Are a Dangerous Combination
Using cruise control on wet roads is a habit that significantly elevates hydroplaning risk, and it is one that a surprising number of experienced drivers maintain without understanding why it is dangerous.
Here is the mechanism: when your tires hit a patch of standing water and begin to lose traction, wheelspin can occur momentarily. A traction-control system will recognize this wheelspin and cut engine power to restore grip. But if cruise control is active, the system simultaneously tries to maintain the set speed. The result is a conflict in commands, and in many vehicles, the cruise control system’s speed-maintenance command wins briefly — meaning the engine applies power at precisely the moment when traction is most vulnerable.
Even in vehicles where traction control successfully overrides cruise control, the reapplication of power as the system cycles is a hazard. The safe rule is absolute: disengage cruise control any time road surfaces are wet. Tap the brake pedal once to cancel it — a behavior that should become reflexive the moment windshield wipers go on. Our dedicated article on rain driving safety and cruise control at highway speeds examines several incident case studies where cruise control directly contributed to loss-of-control accidents in wet conditions.
✅ Wet Road Habits
- Cancel cruise the moment wipers activate
- Slow by 10–20 mph on wet pavement
- Increase following distance to 5–6 seconds
- Brake early and smoothly at intersections
- Check tire pressure before wet-weather trips
❌ Common Wet-Road Mistakes
- Leaving cruise control active in rain
- Tailgating at highway speeds
- Accelerating through visible puddles
- Braking hard at intersections
- Trusting AWD on standing water
What to Do After Regaining Control
Surviving a hydroplaning event without a collision is not the end of the incident. The physiological aftermath — adrenaline surge, shaking hands, racing heart — can itself be a hazard if you immediately resume normal driving without acknowledging what just happened.
Immediate Post-Recovery Protocol
Once you have stabilized your vehicle and speed has reduced, assess the traffic situation in your mirrors and around you. If it is safe to do so and you feel physically distressed, activate your hazard lights and move to a safe pull-off. Give yourself two to three minutes to breathe, calm the adrenaline response, and mentally reset. This is not weakness — professional racing drivers are trained to do exactly this after near-miss incidents.
If you did make contact with another vehicle, a guardrail, or any roadside structure, follow standard accident protocol: check yourself and passengers for injury, call emergency services, activate hazards, and do not move the vehicle if injuries may be involved. Having a complete emergency kit simplifies every aspect of roadside response — our full guide to building a car safety kit covers exactly what should be in your vehicle before incidents happen.
Vehicle Inspection After Hydroplaning
A hydroplaning event that included sudden traction recovery, rapid steering corrections, or any form of curb or barrier contact should prompt a basic vehicle inspection before continuing a long trip. Check your tire sidewalls for visible bulging or cuts (rapid pressure changes can cause internal damage). Inspect wheel alignment by driving slowly on a flat road — if the vehicle pulls to one side, alignment may have been affected. Listen for any new sounds from the suspension, steering, or wheels.
If you were driving fast enough to have used significant engine braking during recovery and the temperature gauge shows any rise, monitor it closely for potential issues. Our resource on driving with a blown head gasket explains what stress indicators to watch for after any sudden mechanical demand on the engine.
Reporting Road Hazards
If poor drainage, a broken curb, or a storm drain failure created the standing water that caused your hydroplaning event, reporting it to your local road authority benefits every subsequent driver. Most state departments of transportation have online or phone-based hazard reporting systems. Noting the exact location, the depth of standing water observed, and the road conditions helps prioritize maintenance crews.

A compact, discreet dash cam that records continuously in HD — essential documentation if a hydroplaning event results in a collision, an insurance dispute, or a road hazard report requiring photographic evidence.
View on AmazonThe Most Common Hydroplaning Mistakes Drivers Make
Understanding what not to do during hydroplaning is just as valuable as the recovery steps themselves. These are the mistakes that appear most frequently in accident reports involving wet-road loss-of-control incidents.
| Mistake | Why It Happens | Why It Makes It Worse | Correct Action |
|---|---|---|---|
| Slamming the brakes | Panic instinct | Locks wheels on water — no friction possible | Ease off gas first; brake only after traction returns |
| Sawing the steering wheel | Trying to “find” grip | Violent snap when traction returns | Hold wheel steady until traction confirms |
| Flooring the accelerator | Confusing wheelspin for stalling | Increases speed and water wedge force | Remove throttle immediately |
| Pumping ABS brakes | Old non-ABS habit | Disables ABS, extends stopping distance | Hold steady pressure on ABS-equipped vehicles |
| Resuming highway speed immediately | Believing the event was isolated | Same or worse conditions often follow | Maintain reduced speed for remaining wet road |
| Trusting AWD immunity | Marketing-driven misconception | AWD provides zero grip when tires are floating | Apply same recovery steps regardless of drivetrain |
Several of these mistakes also appear in the context of other skid emergencies. Our comparison of brake fade vs. hydraulic failure reactions shows how the same overcorrection instincts create secondary emergencies across different loss-of-control scenarios.
For high-wind driving — another scenario where overcorrection is the primary danger — our guide on driving in high winds without losing control maps directly onto these principles.
Full Wet-Road Driving Strategy: Prevention Meets Preparedness
Hydroplaning does not occur in isolation. It is one of several connected hazards that wet weather creates simultaneously — reduced visibility, increased stopping distances, compromised driver attention, and road surface contamination among them. Developing a complete wet-weather driving framework transforms individual techniques into a coherent, automatic safety system.
Before You Drive in Rain
Check your tires whenever significant rain is forecast. Verify tread depth, look for uneven wear (which can indicate alignment or suspension issues that reduce wet grip), and confirm tire pressure matches the door-jamb specification. Run your wipers and confirm the blades clear the windshield cleanly — streaks and skipping reduce forward visibility by more than most drivers realize. Confirm your headlights and tail lights are functioning; in many states, headlights are legally required whenever wipers are in use, and being visible to other drivers is as critical as your own visibility. Our night driving safety checklist covers the full lighting inspection routine applicable to any low-visibility conditions including heavy rain.
Speed Management Throughout the Drive
Slowing down is the most powerful and actionable thing you can do in the rain, and it is free. Calibrate your speed by following the general guideline: reduce by 10 mph in light rain, by 15–20 mph in moderate to heavy rain, and by 30+ mph on roads with visible standing water or flooding. On unfamiliar roads, reduce further — drainage quality varies enormously by location and maintenance history, and you cannot know what is around the next bend.
Speed management and following distance are inseparable. Wet roads increase braking distances by 50–70% depending on tire condition. If you are driving at 60 mph in rain and following at the normal two-second dry-weather gap, you are leaving approximately half the braking distance you actually need. Move to four to six seconds of following distance whenever roads are wet. Our defensive driving habits guide integrates following distance calculations with wet-road awareness training.
Route and Lane Selection
In heavy rain, road position is a proactive safety decision. Roads in valleys and underpasses collect runoff from surrounding terrain — these are the highest-probability flash flooding and deep standing water zones. Monitor weather updates before departing and identify alternate routes around known flood-prone areas. Our comprehensive guide on flash flood vehicle safety covers the specific protocols for when water levels rise unexpectedly during travel.
On multi-lane roads, center lanes tend to have better drainage than outer lanes on a crowned road surface. Moving to a center lane during heavy rain both reduces your standing-water exposure and keeps you farther from the road edge and any eroded shoulder.
Electronics and Driving Aids
Modern vehicles come equipped with electronic stability control, traction control, and advanced ABS as standard features in most markets. These systems provide a genuine safety benefit in wet conditions, but they are not a substitute for proper driving technique — they are supplemental aids that reduce the margin of error while you apply the correct inputs. ESC cannot defy physics; it can only help you apply the correct physics more effectively.
Apps that provide real-time road condition data and traffic hazard reports are increasingly valuable for wet-weather route planning. Our curated list of apps every driver should use includes several platforms that integrate weather data with route planning specifically for hazardous conditions.
🌧 Rain Driving Quick Reference
Wiper on? → Cruise off. Slow by 10–20 mph. Add 4–6 second following distance. Stay in center lane on multi-lane roads. Check tire pressure monthly. Replace tires at 4/32 inch tread. Never accelerate through standing water. Keep an emergency kit in the vehicle.
If you are preparing for a long drive in potentially adverse weather, our thorough guide to eliminating road trip risks before departure provides a vehicle-by-vehicle and route-by-route checklist that includes wet-road preparation as a core component.
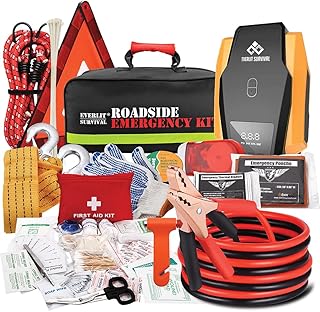
From jump cables to reflective triangles and a rain poncho, a complete road kit turns any roadside emergency into a manageable situation. Wet-weather incidents especially benefit from high-visibility gear and reliable communication tools.
View on AmazonFrequently Asked Questions About Hydroplaning
The very first action is to resist the instinct to brake hard. Instead, ease off the accelerator completely and keep the steering wheel pointed straight ahead or slightly into the direction you want to travel. Sudden steering or braking inputs amplify the loss of control.
Hydroplaning can begin at speeds as low as 35 mph on wet roads, particularly with worn tires or standing water. At 55 mph and above with low tread depth, even a thin film of water is enough to lift tires completely off the pavement.
If your vehicle has ABS, you can apply gentle, steady brake pressure rather than pumping — ABS manages the pulsing automatically. Without ABS, avoid braking entirely until you feel tire traction return. Braking while all four tires are floating on water will not slow you down and can trigger a spin.
No. Four-wheel drive and all-wheel drive do not prevent hydroplaning. Hydroplaning is a tire-to-water contact issue, not a power-distribution issue. When all four tires lose contact with the road surface, AWD provides no advantage over a two-wheel-drive vehicle.
Tires with at least 4/32 inch (3mm) of tread depth provide significantly better water evacuation than tires at or below the legal minimum of 2/32 inch (1.6mm). Many safety experts recommend replacing tires when tread reaches 4/32 inch rather than waiting for the 2/32 inch wear indicator.
Yes. Using cruise control on wet roads significantly increases hydroplaning risk. When the system detects wheelspin from water contact, it can accelerate to maintain speed — the opposite of what you need. Disengage cruise control whenever road surfaces are wet or slippery.
Once traction returns, slow down gradually with light, progressive braking. Check your mirrors for traffic behind you, calm your nerves, and reduce speed further. If you feel your heart racing and hands shaking, it is appropriate to pull over safely for a few minutes to collect yourself before continuing.
Lighter vehicles, sports cars with low-profile tires, and any vehicle with worn or underinflated tires are at greater risk. Trucks and SUVs with very wide tires can also hydroplane more easily than their weight suggests because wider tires require more force to push water aside.
Yes, significantly. Underinflated tires have a larger, flatter contact patch that is less efficient at channeling water through the tread grooves. Overinflation reduces the contact patch but increases road hardness sensitivity. Maintaining the manufacturer-specified tire pressure optimizes water evacuation and grip.
Dynamic hydroplaning occurs at higher speeds when water builds up faster than the tire can expel it, lifting the tire completely. Viscous hydroplaning happens at lower speeds on smooth or polished road surfaces where a thin, sticky water film prevents full tire contact — no deep puddle is needed.
Warning signs include: steering feels very light or disconnected; the rear of the vehicle begins to drift; engine RPM rises without corresponding acceleration; and the vehicle no longer responds predictably to steering inputs. If you experience any of these on wet roads, assume you are hydroplaning and apply the recovery steps immediately.
Every Wet Road Is a Test. Pass It Every Time.
Hydroplaning is not a freak accident — it is a predictable physical event with a well-defined set of causes and recoveries. The six-step recovery sequence, proper tire maintenance, speed reduction, and cruise control discipline together build a complete defensive framework that converts a terrifying emergency into a manageable situation. Practice the steps mentally on every rainy drive, keep your tires in peak condition, and give yourself the gift of preparation before the moment it matters.
Explore Safe Driving Habits Defensive Driving Guide