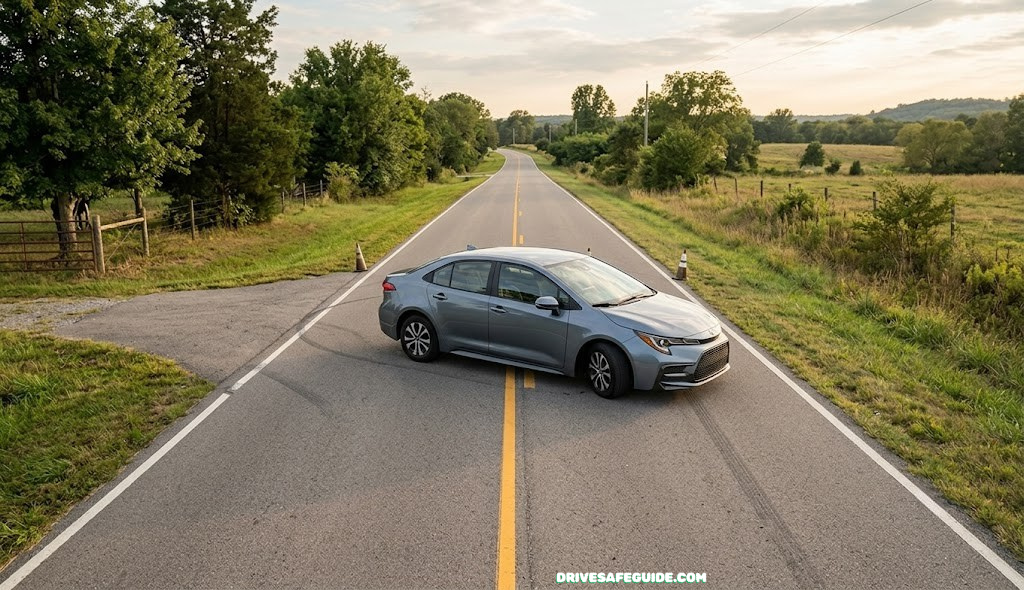
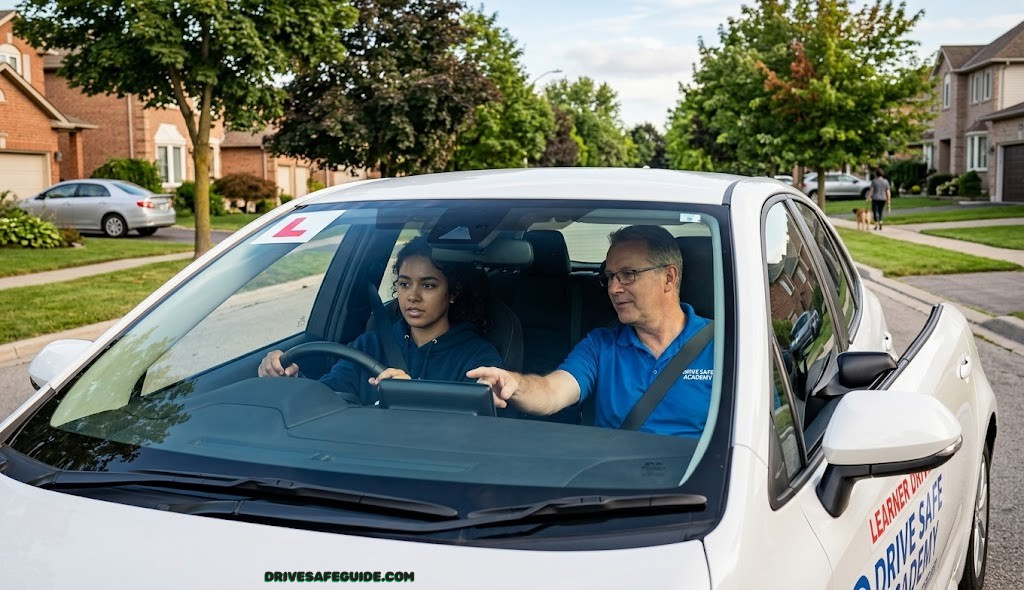
Every licensed driver eventually meets a road too narrow to make a U-turn in one sweep. The three-point turn — sometimes called a K-turn or a three-point turnaround — is the maneuver that gets you facing the other direction without backing into a ditch, a parked car, or oncoming traffic. It looks simple on paper: forward, reverse, forward. In practice, it’s one of the most failed maneuvers on driving tests, mostly because people misjudge how much road they actually have to work with.
This guide breaks the maneuver down the way a driving instructor would: the real dimensions involved, the exact sequence of wheel and mirror movements, how the numbers change depending on what you’re driving, and the specific habits that separate a clean three-point turn from one that ends with a curb strike or a failed exam sheet.
What a Three-Point Turn Actually Is
A three-point turn is a way to reverse your vehicle’s direction on a road that isn’t wide enough for a single U-turn, using three distinct movements: a forward arc toward one side of the road, a reverse arc toward the opposite side, and a final forward movement that straightens the car into the new direction of travel. Done correctly, it uses the full width of the road without ever touching a curb, shoulder, or opposing lane of traffic longer than necessary.
The maneuver exists because turning circles are physical, not optional. Every vehicle has a minimum turning radius determined by its wheelbase, steering geometry, and track width. On a road narrower than that turning circle, a driver physically cannot complete a 180-degree turn in one continuous arc — the front or rear of the vehicle will run out of pavement before the turn is finished. Breaking the turn into three points solves that geometry problem by using reverse gear to “reset” the arc.
If you’re studying for a permit test alongside this maneuver, it’s worth reviewing a broader set of permit test practice questions and comparing notes with a structured online drivers ed course, since examiners in most states will ask for this exact maneuver during the road portion.
It’s worth separating two things that often get blurred together: the physical act of reversing direction, and the specific three-movement technique this guide covers. Any driver can eventually get a car pointed the other way given enough space and enough attempts. What the three-point turn adds is efficiency and predictability — a repeatable sequence that uses the minimum necessary road space, keeps the vehicle under control at every stage, and gives other road users a clear, readable pattern of movement to anticipate. That predictability is exactly what examiners, and more importantly other drivers sharing the road with you, are relying on.
New drivers sometimes assume this maneuver is purely a test formality — something to memorize for the exam and rarely use again. In practice, it shows up constantly: missed turns on unfamiliar rural roads, GPS routing you down a dead-end residential street, a delivery driver needing to reverse course on a narrow lane, or a road trip detour that ends at a barricade with no room to loop around. Treating it as a real, ongoing skill rather than a one-time test item pays off well beyond licensing day.

Measure Before You Practice
A 100-ft open-reel tape measure makes it easy to confirm your practice road actually meets the minimum width covered in Section 3, before you ever put the car in reverse.
Check Price on AmazonThe Legal & DMV Definition
Most state driver handbooks describe the three-point turn in near-identical language: a driver must be able to turn the vehicle around on a two-lane road, using forward and reverse gears, without driving onto a sidewalk, striking a curb, or entering the roadway shoulder in a way that endangers other traffic. Examiners are typically scoring three things simultaneously — mechanical control, situational awareness, and legal compliance — not just whether you eventually end up facing the other way.
What varies state to state is the exact scoring rubric. Some jurisdictions treat touching the curb with a tire as a minor point deduction; others treat it as an automatic maneuver failure. Signaling requirements also differ: several states require a turn signal before the initial forward arc, even though there’s no intersection involved, because you’re crossing into the opposing lane of travel.
| Scoring Factor | Typical Treatment | Why Examiners Check It |
|---|---|---|
| Curb contact | Minor deduction to automatic fail, depending on state | Signals loss of spatial control |
| Signal use before first arc | Often required, sometimes optional | Confirms intent communicated to nearby traffic |
| Number of correction moves | 1–2 extra corrections usually tolerated | More than that suggests misjudged geometry |
| Checking over-the-shoulder before reversing | Almost universally required | Mirrors alone don’t cover the direct blind zone behind the car |
| Stopping fully between each point | Required in most jurisdictions | Rolling transitions are treated as a loss of control |
Because the exact rubric differs by state, always cross-reference this guide with your local DMV handbook. If you’re coaching a new driver through the whole licensing process rather than just this one maneuver, our overview of parents teaching teen drivers covers how to structure practice sessions so maneuvers like this one don’t get rushed the week before the test.
Examiners are also trained to watch for something less obvious than curb strikes or missed shoulder checks: decision-making speed. A driver who pulls up to a section of road, pauses to actually evaluate whether it’s wide enough and whether the sightlines are clear, and only then begins the maneuver is demonstrating the exact judgment the test is designed to certify. A driver who begins turning the wheel the instant they’re told to, without that evaluation step, is often marked down even if the mechanical execution turns out fine — because the underlying skill being tested isn’t really “can you turn the car around,” it’s “can you judge whether and how to turn the car around safely.” That distinction matters just as much once the license is issued and no one is scoring you anymore.
Some states also fold a verbal or written component into this part of the test, asking the driver to explain aloud what they’re checking for before starting the maneuver. If your state includes that step, practice narrating your own checks out loud during practice sessions — mirrors, shoulder, sightline, road width — so it becomes automatic rather than something you have to consciously remember to say under test-day pressure.
Minimum Road Width & Turning Radius, Explained
This is the number most guides skip, and it’s the one that actually determines whether a three-point turn is possible at all. The road needs to be at least as wide as your vehicle’s minimum turning diameter — roughly double the turning radius listed in a manufacturer’s spec sheet — plus a small safety margin for driver error. For an average sedan, that works out to a practical minimum of about 20 to 24 feet of paved width. Larger vehicles need meaningfully more.
Fig. 1 — The three contact points and the full curb-to-curb width they require
Two figures matter more than any other when you’re judging whether a road is wide enough: the vehicle’s turning circle diameter (found in the owner’s manual or manufacturer spec sheet) and the actual paved width of the road, measured curb to curb or shoulder to shoulder. As a rule of thumb, comfortable execution needs the road to be at least 1.3 to 1.5 times the vehicle’s turning diameter, which accounts for the fact that a three-point turn isn’t a single perfect arc — it’s an imperfect human approximation of one, done in three overlapping pieces.
Residential streets in most U.S. suburbs are built to a 24 to 36 foot curb-to-curb standard specifically because it accommodates a passenger vehicle’s three-point turn with room to spare. Older neighborhoods, rural county roads, and many mountain roads fall well under that standard, which is exactly why this maneuver — and the judgment to avoid it when the road is too narrow — matters.
Judging road width by eye is a skill that improves with repetition, but it’s easy to get wrong in either direction. Some drivers overestimate a narrow lane because parked cars or a wide shoulder create a visual illusion of extra space that isn’t actually usable pavement. Others underestimate a genuinely wide road because tree cover or a lack of visible lane markings makes the space feel tighter than it is. When in doubt, a quick pace-off on foot — walking the width heel-to-toe, or using a tape measure if one is in the vehicle — removes the guesswork entirely, especially the first several times you attempt the maneuver in an unfamiliar area.
Road camber and crown also factor in, though most drivers never think about it. Most paved roads are built with a slight crown — higher in the center, sloping down toward each shoulder — to drain water. On a road with a pronounced crown, the reverse point of the turn can feel like the vehicle is drifting toward the shoulder even with the wheel held steady, simply because gravity is pulling slightly downhill. Anticipate that drift on a crowned road by holding a touch more counter-steer than you would on a flat surface, and by keeping your speed at a genuine idle so any correction is small and controlled.
Step-by-Step Execution
The mechanics break into three distinct movements, each bookended by a full stop, a mirror check, and — critically — a direct over-the-shoulder look rather than relying on mirrors alone.
Point One: The Forward Arc
Signal right, check your mirrors and blind spot, and confirm the road is clear in both directions. Turn the steering wheel fully toward the right shoulder while moving forward slowly, aiming the nose of the car toward the far right edge of the road. Stop just before the front tires would leave the pavement, with the wheel still turned all the way.
Point Two: The Reverse Arc
Shift into reverse. Turn your body and look over your right shoulder through the rear window — this is the single most commonly skipped step, and the most heavily scored one on a driving test. Turn the steering wheel fully to the left as you reverse slowly, aiming the rear of the car toward the far left edge of the road. Stop just before the rear tires would leave the pavement.
Point Three: Straighten and Complete
Shift back into drive. Check mirrors and blind spot one final time, then straighten the wheel while moving forward, bringing the vehicle fully into the new lane of travel, facing the opposite direction from where you started. Cancel your signal once you’re settled into the lane.
Fig. 2 — Steering wheel position and gear at each of the three points
Two habits separate smooth execution from a jerky, multi-correction mess: moving at idle speed with your foot covering the brake rather than the accelerator, and treating each of the three stops as a genuine full stop rather than a rolling pause. If your vehicle has a manual transmission, this maneuver is also where stalling in low-speed direction changes most commonly happens, so idle-speed clutch control is worth practicing separately before combining it with the turn itself.
Hand position matters more in this maneuver than in almost any other low-speed driving situation, because you’re making two full steering-wheel rotations in opposite directions within a matter of seconds. A hand-over-hand technique — feeding the wheel through your palms rather than crossing your arms — gives you more control and a faster response than trying to spin the wheel with a single push-pull motion. Practice the hand-over-hand motion stationary, with the engine off, until it feels natural before combining it with actual vehicle movement.
Timing the stops is worth deliberately overdoing at first. New drivers tend to under-stop — easing off the accelerator without fully arresting the vehicle’s momentum before shifting gears, which both looks rushed to an examiner and increases the chance of a rollback or an unintended lurch when the next gear engages. Come to a complete, motionless stop, confirm the gear change, complete your mirror and shoulder check, and only then begin moving again. It costs perhaps two extra seconds per point and it is the single most reliable way to look — and be — in control of the vehicle.
Dimensions by Vehicle Type
Turning radius scales with wheelbase, and wheelbase scales with vehicle class. A compact sedan and a full-size pickup are not working with the same geometry, and treating them the same is how drivers of larger vehicles end up curb-checking on roads that would be comfortable in a smaller car.
| Vehicle Class | Typical Turning Circle Diameter | Comfortable Minimum Road Width |
|---|---|---|
| Compact / subcompact car | ~32–35 ft | ~20–22 ft |
| Midsize sedan | ~35–38 ft | ~22–24 ft |
| Compact SUV / crossover | ~36–39 ft | ~23–25 ft |
| Minivan | ~38–41 ft | ~24–27 ft |
| Full-size pickup truck | ~44–48 ft | ~28–32 ft |
| Pickup with a towed trailer | Not applicable — do not attempt | Use a pull-through or unhitch first |
These figures are general ranges, not a substitute for your specific vehicle’s published turning circle, which is usually listed in the owner’s manual or manufacturer spec sheet. If you regularly drive a larger vehicle, it’s worth pairing this section with our guide on blind-spot mirrors for trucks and SUVs, since the wider turning arc also means a wider blind zone during the reverse point of the maneuver.

Shrink the Blind Zone
Add-on convex mirrors give you a wider field of view during the reverse point of the turn, especially useful in trucks and SUVs with larger turning circles.
Check Price on AmazonMirror & Blind-Spot Checklist During Each Phase
A three-point turn asks you to monitor three separate zones almost simultaneously: what’s ahead as you pull forward, what’s behind and to the side as you reverse, and what’s approaching from either direction on the road itself. Mirrors alone can’t cover all of it — the rear blind zone directly behind most passenger vehicles is invisible to both the rearview and side mirrors.
| Phase | Primary Check | Secondary Check |
|---|---|---|
| Before starting | Both directions of the road, full length | Driveways, alleys, or hidden cross streets nearby |
| Point 1 (forward) | Rearview + right side mirror | Right blind spot for pedestrians near the shoulder |
| Point 2 (reverse) | Direct over-the-shoulder look through rear window | Rearview mirror as a secondary confirmation, not primary |
| Point 3 (forward, complete) | Mirrors + windshield ahead | Oncoming traffic that may have appeared mid-maneuver |
This layered checking habit is the same discipline covered in broader defensive driving habits that reduce collision risk — the three-point turn is simply a concentrated, low-speed test of that habit. If a driver in your household has a diagnosed attention or processing difference, our guide on driving with dyslexia, ADHD, or dyspraxia includes specific strategies for multi-zone checking sequences like this one.
Common Test-Failing Mistakes
Examiners see the same handful of errors repeatedly. Almost all of them trace back to rushing the maneuver rather than treating each point as its own deliberate, fully-stopped action.
What Passes
- Full stop between each of the three points
- Direct over-the-shoulder look before reversing
- Slow, controlled speed throughout — idle speed is ideal
- Staying within the road’s paved width the entire time
- Signaling before the initial forward arc where required
What Fails
- Curb strike or driving onto a sidewalk or shoulder edge
- Relying only on mirrors instead of a physical shoulder check
- Rolling straight from forward into reverse without stopping
- More than two or three correction moves to complete the turn
- Failing to yield to oncoming traffic that appears mid-maneuver
For a fuller picture of how examiners score the whole road test — not just this maneuver — see our breakdown of instant-fail mistakes on a driving test. Many of the same rushed-decision patterns that fail a three-point turn show up elsewhere on the test route too.
One mistake that doesn’t show up on either list but deserves its own mention: choosing the wrong location entirely. Even a technically flawless three-point turn can fail an examiner’s judgment if it’s performed near a blind curve, close to a driveway with limited visibility, or within sight of a “no U-turn” sign. Site selection happens before the wheel ever turns, and it’s graded just as heavily as the mechanical execution — a reminder that this maneuver tests decision-making as much as it tests steering.
Three-Point Turn vs. Other Turnaround Maneuvers
The three-point turn isn’t the only way to reverse direction, and it isn’t always the right choice. Knowing when to use a different maneuver — or none at all — is as much a part of road judgment as the mechanics themselves.
| Maneuver | Best Used When | Key Risk |
|---|---|---|
| U-turn (single arc) | Road is wider than the vehicle’s turning circle, and legal at that location | Illegal or restricted on many arterial roads and near intersections |
| Three-point / K-turn | Road is too narrow for a U-turn but has no cross traffic or driveway nearby | Momentarily blocks both lanes; requires clear sightlines |
| Y-turn | Very narrow road with a slight widening or shoulder to use as the reverse point | Similar to a three-point turn but on tighter geometry — higher risk of curb contact |
| Pull-through turnaround | A driveway, parking lot, or cul-de-sac bulb is available nearby | Minimal — generally the safest option when available |
Three-Point Turn — Pros
- Works on roads too narrow for a single-arc U-turn
- Doesn’t require finding a driveway or lot
- A required, testable skill in nearly every state
Three-Point Turn — Cons
- Temporarily blocks the full width of the road
- Higher cognitive load than a simple U-turn
- Not legal or safe on every road type — see restrictions below
If a driveway, side street, or parking lot is within easy reach, a pull-through turnaround is almost always the lower-risk choice. The three-point turn is a fallback for when no such option exists — not the default first move.
Where a Three-Point Turn Is Restricted or Illegal
Most states prohibit turning around — by any method — in specific locations: on a curve or hill where oncoming traffic can’t see you in time, within a set distance of a railroad crossing, at a “no U-turn” sign (which typically applies to three-point turns too, since they cross the same lanes), inside an intersection controlled by a traffic signal, or on a highway or freeway shoulder.
Roundabouts, one-way streets, and multi-lane roads with a center median are additional locations where a three-point turn either doesn’t apply or is outright prohibited — on those roads, use a designated turnaround point instead. Our guide to roundabout navigation rules covers how to legally reverse direction using a roundabout when one is nearby, which is often safer than a mid-block three-point turn.
Night, Rain & Low-Visibility Considerations
Every one of the dimensions and sightline distances in this guide assumes daylight and dry pavement. Reduce either variable and the safety margins need to grow substantially, because both your visibility to other drivers and your reaction time shrink.
- At night: Use your headlights and confirm your reverse lights are functioning before starting — other drivers rely on them to understand your vehicle is about to move backward. Our night driving safety checklist covers headlight aim and glare management relevant to this scenario.
- In rain: Wet pavement extends stopping distance and reduces tire grip during the tight steering-wheel angles this maneuver requires. Review rain driving safety fundamentals before attempting the maneuver in wet conditions.
- On ice or snow: Avoid a three-point turn entirely if the road surface is compromised — see black ice survival guidance and our notes on driving in snow without chains. The tight, repeated steering inputs are exactly the kind of maneuver that triggers a skid on a low-traction surface.
If any of these conditions apply and an alternative turnaround point — a driveway, a lot, a signal-controlled intersection — is within reach, use it instead of forcing a three-point turn in reduced visibility.
Practicing Safely
The best place to build muscle memory for this maneuver is an empty parking lot, not a public road. Set up cones or chalk marks to simulate a road edge, and practice the three points slowly before ever attempting it with real curbs and real traffic.
Set a Realistic Boundary
Use two lines of cones spaced to match the minimum road width from Section 3 for your specific vehicle. Practicing in a wide-open lot with no boundary teaches the wrong habits, because real roads always have an edge.
Practice Each Point in Isolation First
Do the forward arc alone, stop, reset, then the reverse arc alone, stop, reset. Combine them into the full sequence only once each individual movement feels controlled.
Add a Second Observer
A passenger who can watch the cones from outside the vehicle and call out distance to the boundary removes the guesswork while the driver is still building a feel for the car’s dimensions.
New drivers often benefit from a structured curriculum rather than ad-hoc practice — see our comparison of online drivers ed programs for options that sequence maneuvers like this one alongside parallel parking and hill starts. If you’re building out a broader practice routine, our guide to parallel parking, step by step and hill starts without rollback cover the other two maneuvers most commonly tested alongside the three-point turn.

Build a Practice Boundary
A set of weighted rubber cones is the easiest way to mark a realistic road-width boundary in an empty lot before practicing on real streets.
Check Price on AmazonTroubleshooting Common Problems
Stalling Between Points
Almost always a clutch-control issue in a manual transmission, or a driver riding the brake too hard in an automatic while trying to creep forward. Slow down the overall pace rather than the individual inputs — most stalls happen because a driver rushes the transition between gears. See fixing manual transmission stalling for a deeper breakdown.
Rolling Back on an Inclined Road
If the practice or test road has any grade to it, the vehicle can roll in the wrong direction during the pause between points. Use the parking brake as a hold between points on a slope, or feather the brake and throttle together the way you would on any hill start.
Needing More Than Three Corrections
This is almost always a sign the road is narrower than comfortable for the vehicle, not a driver skill issue. Cross-check the road width against the vehicle dimensions table in Section 5 before assuming more practice will fix it — sometimes the honest fix is choosing a different spot.
Poor Rear Visibility
Larger SUVs and trucks with high rear pillars can make the direct shoulder-check difficult. A rear or 360-degree camera helps, but should supplement — never replace — the physical shoulder check examiners require. Our backup camera installation guide covers retrofit options if your vehicle didn’t come with one. Pairing a backup camera with a dash cam that also records the rear view gives you a way to review your own maneuvers after practice sessions and spot habits worth correcting before test day.

Add a Rear View You Can Trust
A retrofit backup camera supplements — never replaces — the physical shoulder check, but it removes the guesswork on vehicles with limited rear visibility.
Check Price on AmazonFrequently Asked Questions
How much road width do I actually need for a three-point turn?
As a general guideline, plan on roughly 1.3 to 1.5 times your vehicle’s turning circle diameter — around 20 to 24 feet for an average sedan, and more for SUVs and trucks. Always check your vehicle’s specific turning circle in the owner’s manual rather than relying on averages alone.
Is a three-point turn the same as a K-turn?
Yes — “K-turn” is simply a common nickname for the three-point turn, referencing the rough shape the vehicle’s path traces when viewed from above.
Do I have to signal before starting a three-point turn?
In most states, yes, because the initial arc crosses into the opposing lane. Check your specific state’s driver handbook, since signaling requirements for this maneuver aren’t fully uniform nationwide.
What happens if I touch the curb during the test?
It depends on the state and examiner. Some treat a light curb touch as a minor point deduction, while others count it as an automatic failure of that maneuver. Treat any curb contact as something to avoid entirely rather than something to risk.
Can I do a three-point turn on a busy street?
You shouldn’t. The maneuver briefly blocks the full width of the road, so it should only be attempted when you have a clear, extended sightline in both directions and no oncoming traffic is close enough to be affected.
Is a three-point turn legal on a highway?
No. Turning around on a highway or freeway — including on the shoulder — is illegal in virtually every state due to the speed differential with oncoming and following traffic. Use the next legal exit or interchange instead.
How many corrections are allowed before it counts as a failure?
Most examiners tolerate one or two extra steering corrections without penalty. Needing significantly more than that usually indicates the road was misjudged as too narrow for the vehicle, which is itself part of what’s being scored.
Should I use mirrors or turn my head when reversing?
Both, but the direct over-the-shoulder look through the rear window is the primary check almost every state requires — mirrors alone don’t cover the blind zone directly behind the vehicle.
Can I do a three-point turn with a trailer attached?
It’s strongly discouraged. A trailer’s independent pivot point makes the reverse phase unpredictable even for experienced drivers. Find a pull-through turnaround or unhitch the trailer instead.
What’s the difference between a three-point turn and a Y-turn?
They use the same basic forward-reverse-forward logic, but a Y-turn is typically performed on an even narrower road, often using a slight widening or shoulder area as the reverse point rather than the full opposite lane.
Do automatic transmissions make this maneuver easier?
Generally yes, since there’s no clutch control to manage and less risk of stalling between points. The steering and spatial judgment requirements are identical regardless of transmission type.
Where’s the safest place to practice before attempting it on a real road?
An empty parking lot with cones or chalk marking a simulated road width is the standard recommendation, letting you practice each of the three points slowly before adding real curbs and traffic to the equation.
Bottom Line
A three-point turn comes down to two things: knowing whether the road is actually wide enough for your specific vehicle, and executing three deliberate, fully-stopped movements instead of one rushed, continuous one. Get the dimensions right, keep your speed at idle, and make the over-the-shoulder check a habit rather than an afterthought, and this maneuver stops being a source of test anxiety and becomes just another tool for getting where you’re going.
For the rest of your road-test preparation, browse our full library of permit test practice questions and common instant-fail mistakes to round out your prep.
Shop Driving Practice Essentials🚗 Recommended for Drivers
Drive Safer Every Day
Explore our top picks for car safety gear — from dashcams to emergency kits — all hand-picked to help you stay safe on the road.
🚗 Shop Car Safety EssentialsAffiliate link — we earn a small commission that keeps DriveSafeGuide running. Thank you!