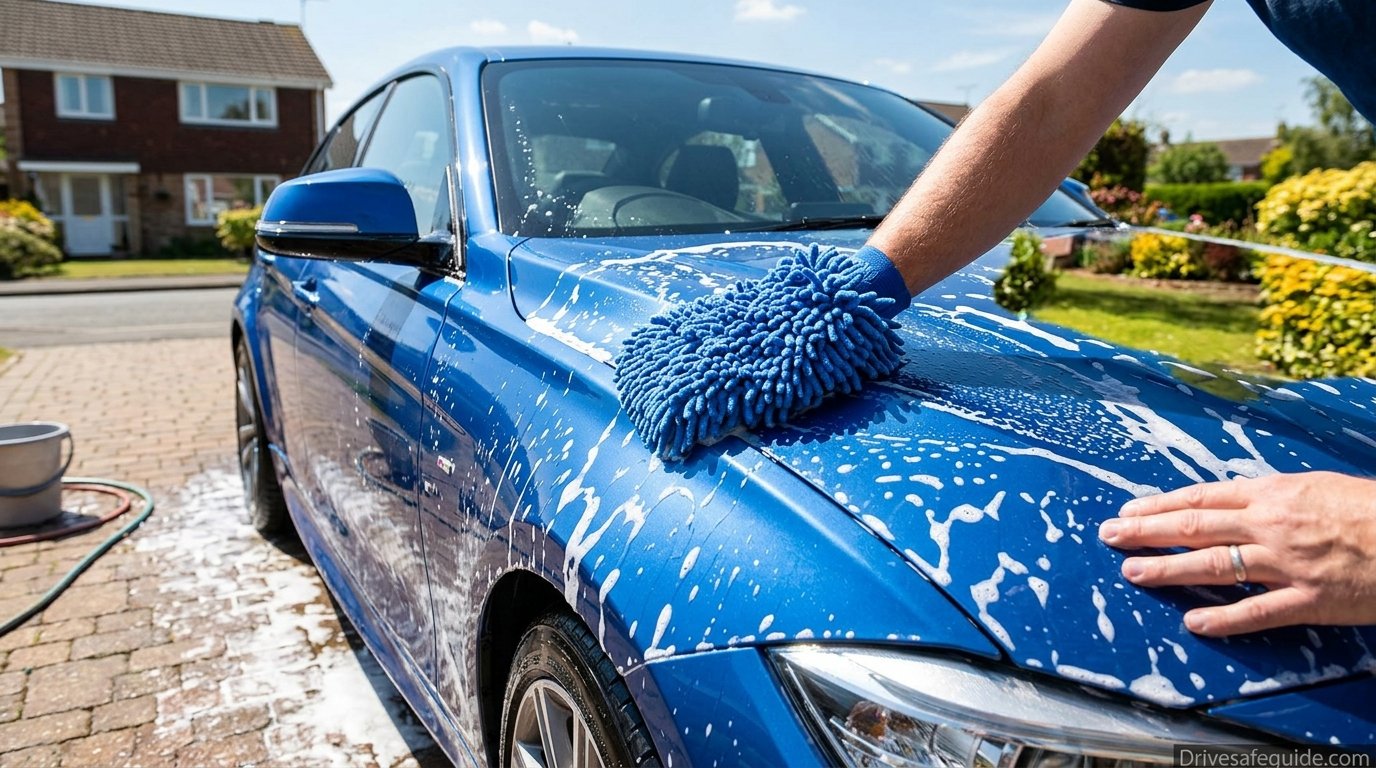
How to Wash a Car: The Complete Step-by-Step Guide for a Spotless, Scratch-Free Finish
A proper car wash does more than make your car look good. It protects your paint, keeps your windows and mirrors clear, and helps you spot small problems before they become expensive ones. Here is exactly how to do it right at home.
Most people wash their car the way they wash a dinner plate: a bucket of soapy water, an old sponge, a lot of scrubbing, and a quick towel-off. It feels productive, and the car does look cleaner for an afternoon. But that routine is also the number one cause of the fine, swirly scratches you see in direct sunlight on so many daily drivers. The good news is that a better method costs about the same, takes about the same amount of time, and gives you a noticeably better result.
This guide walks you through the whole process from the ground up. You will learn what to buy, where and when to wash, how to work from the top of the car to the bottom without dragging dirt across your paint, how to deal with wheels, glass, and trim, and how to dry and protect the finish so the shine lasts. We will also cover alternatives like pressure washers, waterless products, and automatic washes, so you can pick what suits your space, budget, and schedule.
Whether you drive a ten-year-old commuter or a brand-new family SUV, the principles are the same. Dirt is abrasive, soap is a lubricant, and your job is to lift contamination off the paint with as little friction as possible. Keep that idea in your head and every step below will make sense.
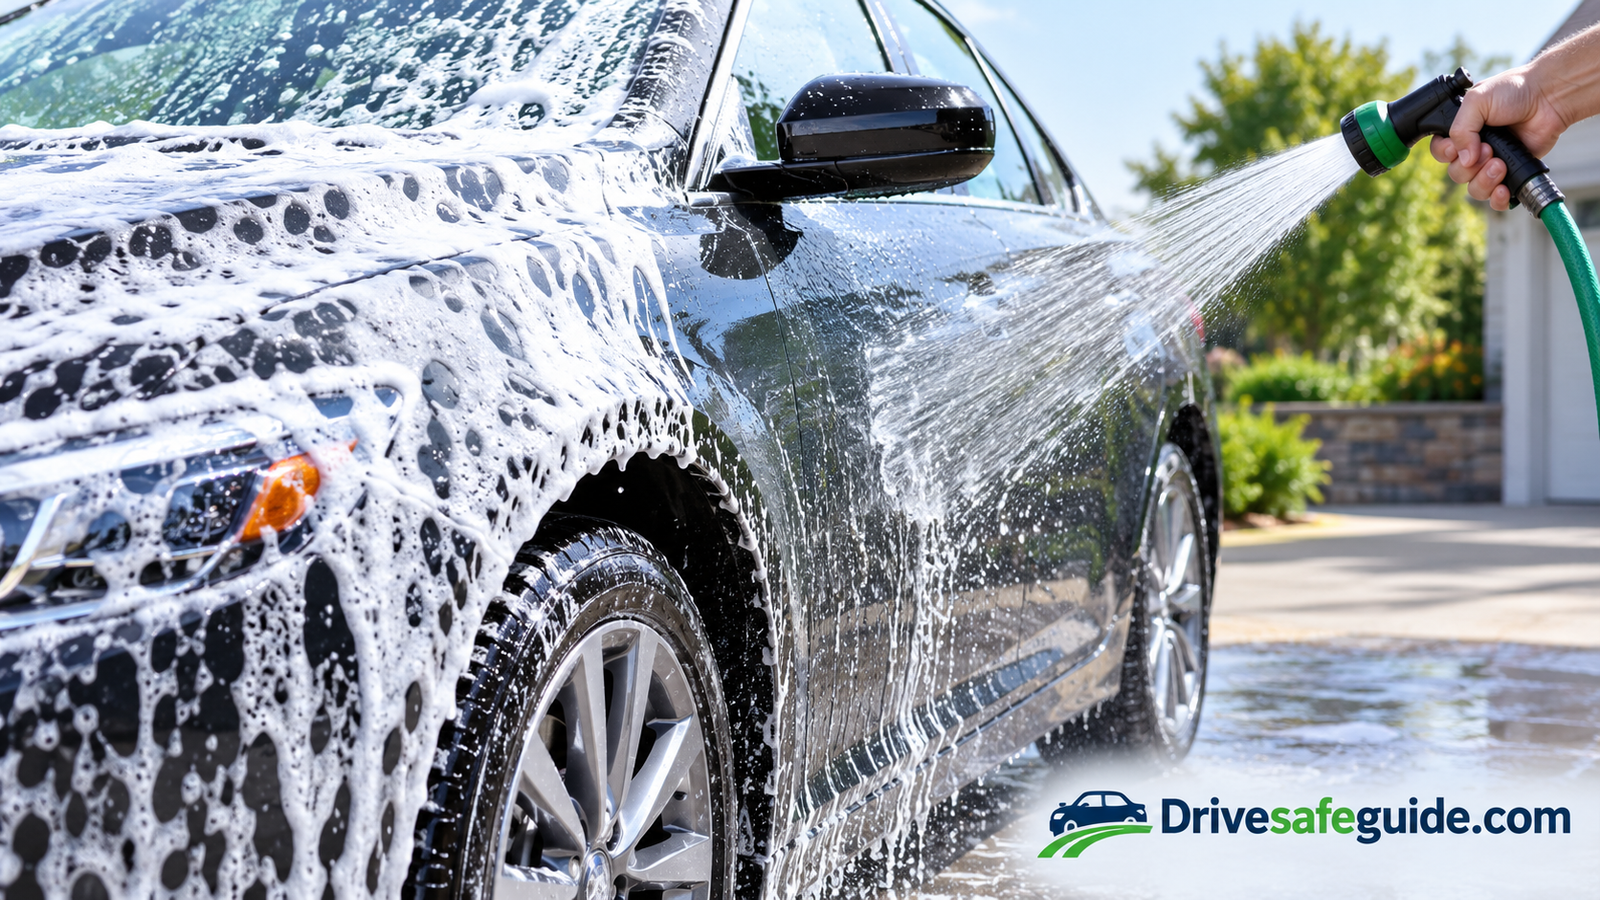
Why a Proper Car Wash Matters More Than You Think
It is easy to think of washing your car as a cosmetic chore, something you do when the neighbors might judge you or when a date is coming up. In reality, regular washing is basic maintenance, closer to changing your wiper blades than to polishing a trophy. Here is why it earns a spot on your calendar.
Your paint is under constant attack
Everything that lands on your car is trying to damage it in some way. Bird droppings are acidic and can etch clear coat in a matter of days under a hot sun. Bug splatter contains enzymes that bond to paint and get harder to remove the longer they bake. Tree sap hardens into amber-like blobs. Road tar, brake dust, industrial fallout, and pollen all settle into the surface, and when rain mixes with them you get a thin film of grime that keeps working on the finish long after the weather has cleared.
In colder regions, road salt is the real villain. Salt and brine cling to the lower panels, the wheel wells, and the undercarriage, and they speed up corrosion on any exposed metal. If you live where winters bring salt trucks, washing is not a luxury. It is the cheapest rust prevention you can buy, and it pairs well with the ideas in our guide to the best rust-proofing methods for your undercarriage.
A clean car is a safer car
This is the part most washing guides skip, and it is the reason a site like ours cares about the subject at all. A dirty windshield scatters light, which makes oncoming headlights and low sun far more blinding. Grimy side mirrors hide the vehicle in your blind spot. Mud-caked headlights and taillights can lose a surprising amount of brightness, which means you see less and other drivers see you later. Dirty camera lenses and radar sensors can disable or confuse driver-assistance features like lane keeping, adaptive cruise control, and parking sensors.
If you rely on a dash cam, a smudged lens can ruin footage at exactly the moment you need it. Our roundup of the best dash cams explains why lens clarity matters as much as resolution.
Washing is a free inspection
When you wash by hand, you touch every panel, wheel, and tire on the car. That is the best chance you have to notice a new stone chip, a developing rust bubble, a nail in a tire, a crack in a light lens, or fluid weeping near a wheel. Catching a small problem on a Saturday morning is a lot cheaper than finding it on a highway at night. It is also a good moment to peek at tire wear and pressure, something covered in more detail in our comparison of digital and analog tire gauges.
Resale value and pride of ownership
Paint in good condition is one of the first things a buyer notices, and it is one of the hardest things to restore later without a professional. A consistent washing habit keeps the clear coat intact, keeps trim from fading, and keeps your interior from picking up the smell of old fast food. It also simply feels good to drive a clean car.
Think of washing as maintenance, not decoration. A wash every two weeks, done properly, protects the paint, improves visibility, and gives you an easy chance to spot problems early.
What You Need Before You Start
You do not need a garage full of products to wash a car well, but a few well-chosen items make an enormous difference. The most common mistake beginners make is using household substitutes: dish soap, bath towels, and kitchen sponges. They work in the sense that dirt comes off, but they do it in ways that strip protection and scratch paint. Here is the short list of what to buy, and why.
| Item | Why You Need It | What to Look For |
|---|---|---|
| Two 5-gallon buckets | One holds soapy water, one holds clean rinse water, so dirt never goes back onto the car. | Sturdy handles, a different color for each bucket, and room for a grit guard. |
| Grit guards (two) | A plastic insert that traps grit at the bottom of the bucket instead of letting your mitt pick it back up. | A fit that matches your bucket’s diameter, with a solid base. |
| Car wash shampoo | A pH-balanced soap with lubricants that lets the mitt glide without stripping wax or sealant. | Foaming, pH-neutral, labeled safe for waxed and coated finishes. |
| Microfiber wash mitt | A deep pile mitt pulls grit into the fibers and away from the paint. | Thick, plush microfiber, machine washable, no scratchy tag or stitching on the wash side. |
| Wheel brush and tire brush | Wheels hold the worst grime on the car and need their own tools. | Soft bristles that will not scratch wheel finishes, plus a stiffer brush for tire sidewalls. |
| Wheel cleaner | Dissolves baked-on brake dust that regular soap leaves behind. | A formula safe for your wheel finish; check the label for painted, chrome, or polished wheels. |
| Hose with spray nozzle | Controlled rinsing from top to bottom. | A nozzle with a gentle flat or shower setting, not just a hard jet. |
| Microfiber drying towels | Absorb water without dragging or leaving lint. | Large, plush, high-absorbency waffle-weave or twisted-loop towels. |
| Glass cleaner | Leaves windows streak-free so you can see clearly. | An ammonia-free formula, especially if you have tinted windows. |
| Wax, sealant, or spray coating | Protects the paint and makes the next wash easier. | An easy spray-on product if you are new to this. |
The dish soap question
Dish soap is designed to cut grease from plates, which is exactly why it is wrong for your car. It strips wax, sealants, and the oils that keep rubber and plastic trim supple. A single wash will not ruin anything, but regular use leaves the paint exposed and dull. Car shampoo costs only a few dollars more and lasts for dozens of washes because you dilute it heavily.
Why microfiber, not sponges or bath towels
A flat sponge pushes dirt across the paint because grit has nowhere to go but between the sponge and the surface. A microfiber mitt has long fibers that let particles sink into the pile, which keeps them off the paint. For drying, regular cotton bath towels are rougher than they feel and leave lint, while microfiber absorbs several times its weight and glides across the surface.
- pH-neutral shampoo
- Two buckets
- Grit guards
- Plush mitt
- Soft wheel brushes
- Waffle-weave towels
Optional upgrades that are worth it
Once you have the basics, a few extras can make washing faster or give better results. A foam cannon or foam gun attached to a pressure washer covers the car in thick suds that loosen dirt before you touch the paint. A pressure washer itself saves time and water pressure, and our breakdown of the best pressure washing machines shows what to look for if you want one. A dedicated drying blower removes water from mirrors, grilles, and trim where towels cannot reach. If you want to skip piecing items together, our review of the best car cleaning kits compares complete sets.
Buying a kit
- Everything arrives together
- Usually cheaper than buying separately
- Good for first-timers
Buying pieces individually
- You choose higher quality items
- More time spent researching
- Costs add up if you upgrade everything
Picking the Right Time, Place, and Water Setup
Where and when you wash matters nearly as much as how. Washing in the wrong spot is why many people end up with water spots, streaky soap residue, and a driveway full of suds. A few minutes of planning solves most of it.
Wash in the shade, on a cool car
Direct sun is the enemy of a good wash. Hot panels cause soap and water to dry before you can rinse or towel them, which leaves spots and film that can be hard to remove. Aim for early morning, late afternoon, or a shady spot like the side of a building or a garage. Before you start, touch the hood and roof. If the metal feels warm to your hand, give it time to cool or move the car to shade. On hot days, our notes on extreme heat engine care are worth a read, because a hot engine bay and hot brakes are also things to let cool before you spray water around them.
Choose a flat, ventilated, drainable surface
A level driveway or paved lot lets water drain in one direction and keeps buckets from tipping. If you wash on grass, the car may sink slightly, and mud can splash onto the lower panels you just cleaned. Avoid washing in a closed garage, especially when using wheel cleaners or sprays, because fumes can build up.
Check your local water rules
In many regions, watering restrictions or drought rules limit outdoor washing, and some areas prohibit letting soapy water run into storm drains because it flows untreated to local streams. Washing on a lawn or gravel lets the ground filter some of the runoff, or you can use a commercial car wash that recycles its water. If you live somewhere with strict limits, a rinseless or waterless product (covered in the methods comparison below) is a great way to keep the car clean using only a couple of gallons.
Hose, water pressure, and water quality
Any standard garden hose will work, but a nozzle with adjustable patterns gives you more control. Avoid very high pressure up close to the paint, around trim edges, or near cracked seals, because it can force water where it does not belong or lift loose paint. If your area has hard water, minerals in the water leave white spots when droplets dry. Drying promptly with towels prevents most of this, and some people attach an inline filter to the hose for extra protection.
Gather everything first
Fill both buckets, set out your mitt, brushes, and towels, and have a place to put them where they will not pick up dirt. Having everything within reach means you never stop mid-wash while soap dries on the paint. If kids or pets are nearby, store your cleaners safely. Our guide to car rides with a dog has helpful tips for keeping furry passengers and wet cleaners apart.
Shade or cool panels, level ground, buckets filled, grit guards installed, brushes and towels ready, windows rolled up, and the sunroof closed. That five-minute setup saves a lot of frustration later.
How to Wash a Car by Hand: The Step-by-Step Method
This is the heart of the guide. The method below is called a two-bucket wash, and it is the standard approach used by careful owners and professional detailers. The logic is simple: work from the cleanest parts of the car to the dirtiest, rinse your mitt before it goes back into the soap, and never let dirt travel back onto a panel you have already cleaned. Set aside about an hour for your first wash, and expect to get faster with practice.
Park in the Shade and Set Up Your Station
Move the car to a cool, shaded, level spot and feel the panels with the back of your hand. If the metal is hot, wait. Roll up all windows fully, close the sunroof, fold in mirrors if your car allows it, and retract any antenna. Lay out your buckets, mitt, brushes, and towels within arm’s reach. Starting with a calm, organized setup is the easiest way to prevent mistakes later.
If you only have sun, wash one section at a time and rinse it immediately. Never let soap sit on a warm panel.
Prepare the Two Buckets
Drop a grit guard into the bottom of each bucket. Fill the first bucket about three-quarters full of clean water and leave it plain, since this is your rinse bucket. Fill the second with water and add car shampoo according to the label, then spray the hose into it to build suds. This is your wash bucket. The workflow is: dip the mitt into soap, wash one panel, rinse the mitt in the clean bucket against the grit guard, then go back to the soap. The rinse bucket slowly turns murky, and that is exactly the point: that is dirt that never touched your paint again.
Clean the Wheels and Tires First
Wheels are the dirtiest part of any car, so they come first. If you wash them last, you will splash brake dust and road grime onto freshly cleaned paint. Make sure the wheels are cool to the touch, then spray wheel cleaner on the face and barrel, and let it dwell for the time shown on the label. Agitate with a soft wheel brush, getting into the spokes and around the lug nuts. Scrub the tire sidewalls with a stiffer brush to lift old dressing and road film. Rinse thoroughly before moving to the next wheel. Use dedicated brushes and mitts for wheels only, and never use them on paint.
Never spray cold water or cleaner onto hot brakes or wheels. After a drive, let them cool for at least 15 to 20 minutes. If you notice thin brake pads while scrubbing, our guide to brake pad wear indicators explains what to look for.
Pre-Rinse the Whole Car from Top to Bottom
Before anything touches the paint, use the hose to knock off loose dirt, sand, and mud. Start at the roof and work down, letting water carry debris toward the ground. Pay extra attention to the lower panels, the bumpers, the area behind the wheels, and the grille, where grit builds up. Use a moderate spray, not a hard jet. This step removes a surprising amount of abrasive material and is the single biggest scratch-reduction step in the process.
Wash Panel by Panel, Top to Bottom
Dunk your mitt in the soap bucket, then wash one section at a time: roof first, then the glass, the hood and trunk, the upper half of the doors, and finally the lower doors, bumpers, and rocker panels. Use straight, light strokes in the direction of airflow rather than circles. Circular scrubbing creates the swirl marks you see under sunlight. Do not press hard; let the suds and the mitt do the work. After every panel, rinse the mitt in the clean bucket, wring out the grit, and reload with soap. If you drop the mitt, stop using it until it has been thoroughly washed, because it has picked up gravel.
Work in small zones so soap never dries on the surface. For stubborn bug splatter, soak the spot with a bug remover or a warm, wet microfiber towel for a minute, then wipe gently. Bird droppings should be softened with water, never scraped. If you are curious how sun exposure compounds paint damage, our article on how to protect car paint from sun damage covers the topic.
Do this
- Straight strokes with a loaded mitt
- Rinse the mitt after every panel
- Wash lower panels last
Avoid this
- Circular scrubbing motions
- Pressing hard on stuck dirt
- Reusing a mitt that touched the ground
Rinse Thoroughly Before the Soap Dries
Rinse each section as you finish it, or the whole car every few panels if you are moving quickly. Start at the roof and let the water sheet downward. For the final rinse, remove the spray nozzle and let water flow gently from the open hose over the panels. This “sheeting” technique pulls water off in a big sheet instead of beads, leaving less to dry. Look carefully at the seams around the doors, mirrors, badges, and the base of the windshield, where soap hides and runs later as ugly streaks.
Dry the Car with Clean Microfiber
Do not let the car air-dry, because even filtered water leaves mineral spots. Use a large, clean microfiber drying towel and either blot or gently drag it across the panel with minimal pressure. Start with the roof and glass, then work down. Fold the towel into quarters so you always have a fresh side. Swap to a dry towel when the first becomes saturated. Use a smaller towel or a blower for mirrors, grilles, door jambs, and badges. Open the doors and trunk and wipe the jambs so dirty water does not drip out later.
Clean the Glass, Dress the Trim, and Add Protection
Now finish the details. Spray glass cleaner onto a clean, dry microfiber towel (not directly onto the glass, which can drip onto paint and trim) and wipe the outside in a vertical direction and the inside in a horizontal direction. When you see a streak, you will know instantly which side it is on. Then apply a spray wax, sealant, or coating to the paint following the product label, usually a light mist and a gentle wipe with a clean towel. Finish with tire dressing and a plastic trim restorer if you like, applying with a foam applicator to avoid slinging product onto the paint. Step back and walk around the car to check for missed spots.
Open the doors, trunk, and fuel door to wipe the jambs. Check mirrors, door handles, and the license plate area for leftover film. Our note on license plate obstruction fines is a good reminder that a clean, clearly readable plate is also a legal requirement in many places.
That is the whole method. The first time through, it will feel like a lot of steps. By your third wash, it becomes a rhythm, and you will find that the fussy parts (the two buckets, the top-to-bottom order, the straight-line strokes) are what turn an ordinary wash into one that actually keeps your paint looking new.
Washing Methods Compared: Hand Wash, Pressure Washer, Waterless, and Automatic
The two-bucket hand wash is the gold standard, but it is not the only way to get a clean car, and it is not always the right choice. Maybe you live in an apartment without a hose, maybe your area restricts water use, or maybe you simply have twenty minutes and a dusty car. Here is how the main methods compare, so you can pick the best one for each situation.
| Method | Best For | Water Used | Paint Safety | Time |
|---|---|---|---|---|
| Two-bucket hand wash | Regular maintenance washes at home | Moderate | Excellent when done correctly | 45 to 75 minutes |
| Pressure washer with foam | Heavy dirt, mud, and winter grime | Moderate, with efficient flow | Very good with correct distance and nozzle | 30 to 60 minutes |
| Rinseless wash | Light to moderate dirt, restricted water | 1 to 2 gallons | Very good with plenty of clean towels | 30 to 45 minutes |
| Waterless spray wash | Light dust between full washes | None | Good on light dust only | 15 to 25 minutes |
| Touchless automatic | Quick clean on a busy week | Provided by the facility | Good, but harsh chemicals can strip protection | 5 to 10 minutes |
| Brush or cloth automatic | Convenience when nothing else is possible | Provided by the facility | Fair; worn brushes can cause swirl marks | 5 to 10 minutes |
Pressure washer and foam cannon
A pressure washer makes rinsing faster and, with a foam cannon, coats the car in thick suds that soften dirt before you touch it. The key is restraint. Use a wide-angle nozzle (the 25 or 40 degree tip), keep the wand at least a foot or two away from the paint, and never aim directly at loose trim, cracked paint, or badges. It is an excellent upgrade for anyone who washes often, and it pairs nicely with the two-bucket method as a pre-rinse and pre-soak.
Pros
- Fast, powerful rinsing
- Foam loosens heavy dirt
- Great for wheel wells and undercarriage
Cons
- Upfront cost
- Needs power and storage space
- Risk of damage if used too close
Rinseless and waterless washes
A rinseless wash uses a concentrated solution mixed into a single bucket of water. You soak a plush towel in the solution, wipe a panel gently, then dry with a clean towel, with no hose needed. A waterless wash is a ready-to-use spray you mist on and wipe off, ideal for light dust. Both methods shine when water is scarce or when you wash in a garage or parking space. They are not designed for heavy mud, thick road film, or salt, because wiping heavy grit across paint, even with lubrication, risks scratches.
Automatic car washes
Automatic washes are better than leaving a car dirty, particularly in winter when you need to rinse salt off, but they come with trade-offs. Brush systems can hold grit from earlier cars, and some use harsh detergents that wear down wax and sealants. Touchless systems avoid contact but rely on stronger chemicals. If you must use one, choose a well-maintained facility, fold in your mirrors, and consider a hand-wash day every few weeks to balance things out. Always follow the facility’s guidance if your car has a roof rack, an unusual antenna, or aftermarket accessories.
Many owners use a simple rhythm: a proper hand wash once a month, a rinseless or touchless wash in between, and a quick undercarriage rinse in winter. You do not have to pick one method forever.
Washing Wheels, Tires, and Wheel Wells in More Detail
Step 3 covered the basics, but wheels deserve a closer look. They take the harshest abuse on the car: brake dust that is literally tiny metal particles, road tar, salt, and heat cycles that bake everything on. A good wheel routine keeps them looking sharp and lets you inspect the brakes and tires while you work.
Know your wheel finish
Not all wheels are the same, and not all cleaners are safe on all finishes. Clear-coated alloy wheels, which are the most common, tolerate most pH-balanced wheel cleaners. Polished aluminum, uncoated chrome, matte, and powder-coated finishes can be more sensitive to acidic or strongly alkaline cleaners. Check your owner’s manual or the wheel manufacturer’s care guidance, and test any cleaner on a small hidden spot before using it widely. When in doubt, use plain car shampoo and a soft brush, which is slower but safe on any finish.
The right tools for each area
- Soft barrel brush: a long, flexible brush that reaches the inside of the wheel behind the spokes.
- Small detail brush: cleans around lug nuts, valve stems, and center caps.
- Stiff tire brush: scrubs rubber sidewalls, where old dressing and dirt cling.
- Dedicated wheel mitt or sponge: never share this with paint tools.
Do not forget the wheel wells
The inner fender area collects mud, snow, salt, and road debris that can hold moisture against metal. Spray the wheel wells with your hose or pressure washer, loosen stubborn buildup with a long-handled brush and diluted cleaner, and rinse until the water runs clear. This is also an easy place to spot rust starting, damaged splash shields, or fluid leaks. If you notice an oily film or a colored residue near a wheel or under the engine bay, take it seriously. Our guide to coolant leak detection explains how to tell what you are looking at.
Tires: dressing and inspection
While you are down at tire level, run your hand across the tread and sidewall to check for bulges, cracks, embedded nails, or uneven wear. Look at the tread depth and the sidewall condition. Uneven wear may point to alignment or pressure problems. If your car has a tire pressure monitoring system and a warning light pops up, our guide to TPMS sensor replacement can help you understand what is going on. After washing, a water-based tire dressing gives a clean, satin look. Avoid sling-prone, greasy products if you want to keep your paint clean on the first drive.
If you switch between warm- and cold-weather tires, cleaning them before storage helps them last longer. Our article on how to store summer tires covers the details, and the comparison of summer tires and all-season tires may help you decide what is right for your climate.
| Wheel Type | Recommended Cleaner | Brush Type | Caution |
|---|---|---|---|
| Clear-coated alloy | pH-balanced wheel cleaner | Soft bristle or microfiber | Avoid hot wheels and aggressive acids |
| Polished aluminum | Dedicated polished-wheel cleaner | Very soft mitt or sponge | Can stain or cloud with harsh chemicals |
| Painted or powder-coated | Mild shampoo or gentle wheel cleaner | Soft brush | Do not scrub aggressively |
| Chrome | Chrome-safe cleaner | Microfiber | Avoid abrasives that dull the shine |
| Steel wheels with covers | Car shampoo | Medium brush | Remove covers occasionally to rinse behind them |
Cleaning Glass, Mirrors, Lights, and Sensors for Safer Driving
This is the part of washing that most directly affects how safely you drive. You can have gleaming paint and still have a windshield that glares in low sun, mirrors that hide a motorcycle in your blind spot, and a front camera that cannot read the lane lines. Take a few extra minutes here, and your next night drive will feel noticeably better.
Exterior glass
Road film, wiper smears, and bug residue all build up on a windshield and cause haze in bright light. Use a clean, dry microfiber towel with an ammonia-free glass cleaner. Wipe in vertical strokes on the outside, then use a second dry towel to buff away streaks. For stubborn spots, a clay bar or glass-specific polish can remove baked-on contamination. Do not forget the top edge of the windshield and the area where the wipers rest, where grime tends to collect.
Clear glass is also half of the answer to glare. Combined with the advice in our article on sun glare and visor solutions and a quality pair of polarized driving sunglasses, a clean windshield makes low-angle sun far more manageable.
Interior glass
Interior windows fog and haze from the vinyl off-gassing in your dashboard and from your own breath. Wipe horizontally with a clean towel, and use a smaller towel or a slim glass tool to reach the lower corners of the windshield. If your car has tinted windows, always choose an ammonia-free cleaner, which can damage tint film. Check your local rules on tinting as well, since limits differ by state; our guide to window tint darkness limits gives an overview.
Wipers and washer fluid
While you are at the windshield, clean the wiper blades with a damp microfiber towel and a little glass cleaner. A dirty blade smears even on perfectly clean glass. Check the rubber for cracks, splitting, or stiffness, since worn blades are a safety issue in heavy rain. Top up washer fluid while you are there. If you want a refresher on why visibility matters so much in storms, read our guide to driving safely in heavy rain.
Mirrors, lights, and cameras
- Side mirrors: clean the glass and housing, and check any blind spot indicators for dirt.
- Headlights and taillights: wipe lenses until they are clear; cloudy lenses may need a restoration kit, and cracked ones should be replaced.
- Backup camera: gently wipe the lens with a damp microfiber towel. A single fingerprint can blur the whole image.
- Radar and parking sensors: wipe the small circular sensors and the badge area, where radar often sits, without scratching.
- Dash cam lens: clean both the camera and the windshield area in front of it.
If you drive a car with advanced driver-assistance features, you can learn more about the technology in our guide to blind spot monitoring systems. If you are considering adding or upgrading a rear camera, see how to choose a backup camera.
Never use a hard brush, pressure washer jet, or abrasive polish on radar covers, parking sensors, or camera lenses. A soft damp microfiber towel is all they need.
Drying, Waxing, and Protecting Paint So the Shine Lasts
A fresh wash is the best moment to add protection. The paint is clean, the surface is smooth, and any wax or coating you apply will bond better than on dirty paint. Protection also makes future washes easier, since dirt releases more readily from a slick surface.
Drying like a pro
The cleanest drying technique is gentle: lay a large, plush towel on a panel and drag it toward you with light pressure, or blot in place. A drying aid, which is a quick-detailer-style spray misted on the wet panel, adds lubrication and a bit of extra gloss. A leaf blower or dedicated car dryer is great for blasting water from mirrors, lights, grilles, and trim gaps. Resist the urge to buff hard with a towel. That is how scratches happen.
Protection options compared
| Option | How Long It Lasts | Application | Look | Best For |
|---|---|---|---|---|
| Spray wax | Weeks | Mist and wipe | Warm shine | Quick top-up after a wash |
| Paste or liquid wax | 1 to 3 months | Apply, haze, buff | Deep, warm gloss | Enthusiasts who enjoy the process |
| Paint sealant | 3 to 6 months | Wipe on, wipe off | Sharp, glassy shine | Daily drivers |
| Spray ceramic coating | Several months | Mist and wipe | Slick, water-beading | Easy upgrade over a sealant |
| Professional ceramic coating | Years | Professionally applied | Hard, glossy, very slick | Long-term protection |
If you are deciding between wax and a coating, our comparison of ceramic and wax car coatings goes into much more detail. For most people, a spray sealant applied after every second or third wash is the sweet spot between effort and results.
How to apply a spray protectant
- Work on a clean, dry, cool panel in the shade.
- Lightly mist one panel at a time, about two to three sprays per section.
- Spread evenly with a clean microfiber applicator or towel.
- Flip to a dry, clean towel and gently buff to a clear shine.
- Repeat on each panel, then check for streaks in angled light.
Trim, rubber, and plastic
Faded black trim makes a car look older than it is. A UV-protective trim dressing restores the color and slows further fading. Apply sparingly to a foam pad, wipe it onto the trim, and buff off the extra. Rubber door seals benefit from a light rubber conditioner, which helps them stay flexible in cold weather and prevents doors from freezing shut. Keep products off the paint, glass, and brake rotors.
Think about sun protection too
Protection is not just about wax. Parking in the shade, using a windshield sunshade, and covering the dash help keep the interior from cracking and fading. Our guide to sunshade UV protection ratings explains how to choose one that actually works.
Interior Basics After the Exterior Wash
A clean exterior with a cluttered, dusty interior is only half a job. You spend your time inside the car, and a tidy cabin is nicer to drive in and safer too, since loose items can roll under pedals or become projectiles in a hard stop. You do not need to deep-clean the interior every time you wash the outside, but a quick routine after each wash keeps things from getting out of hand.
The ten-minute interior reset
- Remove trash and clutter. Empty door pockets, cup holders, and the center console. A dedicated bin keeps things tidy; see our roundup of the best car trash cans for options.
- Pull out floor mats. Shake them out, vacuum them, and wash rubber mats with soap and water. Let them dry before putting them back.
- Vacuum the carpet and seats. Work from top to bottom: seats, then carpet, then trunk. A crevice tool is your friend. If you want a dedicated tool, we compared the best car vacuum cleaners.
- Wipe hard surfaces. Use a damp microfiber towel and a mild interior cleaner on the dashboard, door panels, and center console. Use a soft brush for vents and seams.
- Clean the screen and gauge cluster. Use a dry or very slightly damp microfiber towel, and never spray directly onto a screen.
- Wipe the steering wheel and shifter. These are the highest-touch surfaces in the car.
Seats: fabric, leather, and vinyl
Fabric seats trap dust and spills, so vacuum first and then spot-clean with an upholstery cleaner, blotting rather than rubbing. Leather needs a gentle leather cleaner followed by a conditioner to prevent drying and cracking. Vinyl is the easiest and wipes clean with a damp towel. For a closer look at the techniques, our guide on how to clean car seats walks through each material.
Pet hair, kids, and messes
Pet hair weaves itself into carpet and fabric. A rubber squeegee or a pet-hair brush loosens it so you can vacuum it up. For kids, keep wipes and a small trash bag in the glove box and wash car seat covers according to the manufacturer’s instructions. If you carry a child seat, our child car seat guide covers installation and care. A cargo liner is also a great investment if your trunk sees lots of use, and our overview of cargo liner material types can help you pick one.
Do not forget the air
If the cabin smells musty even after cleaning, the culprit is often the cabin air filter. A clogged filter traps odors and reduces airflow to the vents and defroster. Replacing it is usually a ten-minute job with no tools, and our DIY cabin air filter replacement guide shows how.
A small collapsible bin, a pack of wipes, and a mini hand vacuum in the trunk will keep the interior in decent shape between deeper cleans.
Seasonal Washing Guide: Winter Salt, Summer Sun, Spring Pollen, and Fall Leaves
Every season brings its own cleaning challenges, and a good routine adapts to what the weather throws at your car. Here is what to watch for throughout the year, and how to adjust your washing habits.
| Season | Main Threat | Wash Frequency | Key Focus |
|---|---|---|---|
| Winter | Road salt, brine, slush | Every 1 to 2 weeks when salt is present | Undercarriage, wheel wells, door jambs |
| Spring | Pollen, rain spots, bird activity | Every 2 weeks | Glass, wipers, cabin air filter |
| Summer | UV, bugs, sap, heat | Every 1 to 2 weeks | Wash in shade, add UV protection |
| Fall | Leaves, wet debris, early frost | Every 2 to 3 weeks | Clear drains, cowl, and wiper area |
Winter: fight the salt
Salt is the most damaging thing your car will encounter all year. It collects on the underbody, in the wheel wells, inside door jambs, and along the lower rocker panels. Wash as often as you can when roads are salted, even if it is just a quick rinse at a self-serve bay with an undercarriage spray. Try to wash above freezing, since water can freeze in door seals and locks. After washing, open and close doors a few times, and wipe the rubber seals dry so they do not freeze shut. If you drive through lots of snow, our tips for driving in winter and our winter car emergency kit checklist are good companions to your wash routine.
Spring: pollen and rain
Pollen is fine, sticky, and abundant. It coats everything in yellow-green dust and clogs cabin filters. Rinse pollen off with plenty of water before wiping, since dry wiping pushes the particles across the paint. Spring rain also leaves mineral spots, so dry the car after showers when you can. The cowl area under the windshield collects pollen and leaves that can clog drains, so give it a quick clearing. Wet weather also reminds us how important grip and visibility are, and our guide on driving in heavy rain is worth a read.
Summer: sun, bugs, and sap
Heat bakes bugs, bird droppings, and tree sap into the paint, so clean them quickly. Keep a bottle of quick detailer and a clean microfiber towel in the trunk to spot-clean droppings before they etch. Wash in the early morning or evening, never in midday sun. This is also the season to add UV protection to both paint and trim. And remember that heat is hard on your car in other ways too; our article on how long car batteries last notes that hot weather shortens battery life more than most people expect.
Fall: leaves and early frost
Wet leaves stain paint and clog drains. Clear them from the cowl, trunk gutters, and sunroof drains regularly. If you park under trees, keep an eye out for sap and berries, which stain. As temperatures drop, a fresh coat of sealant before winter gives the paint a head start against salt and slush.
Flood and storm cleanup
If your car has been exposed to flood water, mud, or saltwater, this is a different kind of cleanup and needs more than a regular wash. Mud and salt trapped in the undercarriage and electrical connectors cause long-term damage. Read our guide on flash flood vehicle safety and have the car inspected before relying on it.
Common Car Washing Mistakes and How to Avoid Them
Even careful owners fall into a few predictable traps. The good news is that most of them are easy to fix once you know about them. Here are the mistakes we see most often, with the better habit to replace each one.
| Mistake | What Goes Wrong | Better Habit |
|---|---|---|
| Washing in direct sun | Soap dries, leaving spots and film | Wash in shade or at cooler times of day |
| Using dish soap | Strips wax and dries out trim | Use pH-balanced car shampoo |
| Using one bucket | Dirt returns to the paint | Two buckets with grit guards |
| Using old sponges or bath towels | Scratches and lint | Plush microfiber mitts and towels |
| Washing wheels last | Splashes brake dust on clean paint | Wash wheels first with separate tools |
| Scrubbing in circles | Creates swirl marks | Use straight, light strokes |
| Letting the car air-dry | Mineral water spots | Dry promptly with microfiber |
| Dropping a mitt and reusing it | Picks up gravel and scratches paint | Wash the mitt thoroughly or swap to a clean one |
| Spraying cleaner on hot surfaces | Streaks, staining, or warped brake parts | Cool surfaces first |
| Skipping protection | Paint gets dull and is harder to clean | Add spray sealant after washing |
Other pitfalls worth mentioning
Using high pressure too close. A pressure washer held too close to paint, rubber seals, or trim can peel clear coat, lift loose paint, or force water into places it should not go. Keep your distance and use a wide tip.
Washing the engine bay carelessly. Rinsing the engine bay can be fine on many cars, but electrical connectors, the alternator, and air intakes do not like direct blasts. If you want to clean it, cover sensitive parts, use a gentle spray, and let the engine cool first. If you are not sure, wipe the accessible areas by hand with a damp towel instead.
Forgetting to dry door jambs and trunk edges. Water trapped there drips out on your clean car as soon as you drive off, leaving streaks. A quick wipe prevents it.
Using one towel for everything. A towel that cleaned your wheels belongs only on wheels. Keep separate towels for paint, glass, interior, and wheels, and wash them without fabric softener, which clogs microfiber and leaves streaks.
Ignoring the small stuff. Many drivers wash the car and then drive away with a filthy license plate, smeared mirrors, and grimy lights. Spend two more minutes on those items. They matter for safety and legality.
Good habits
- Cool panels before washing
- Dedicated tools for wheels
- Separate towels by task
- Rinse often, dry promptly
Habits to retire
- Midday sun washing
- Dish soap
- One towel for everything
- Letting soap dry on paint
Care for your towels and tools
Your tools only work if they are clean. After each wash, rinse mitts and brushes thoroughly, then machine-wash microfiber towels separately with a microfiber-safe detergent and no fabric softener. Dry them on low heat or air-dry. Store everything in a clean bin so dust and grit do not settle on them. A clean towel is worth far more than an expensive product.
Building a Simple Washing Schedule and Maintenance Routine
Knowing how to wash a car is useful, but making it a habit is what actually protects your investment. The best schedule is one you will stick to, so keep it simple and tie it to the way you use your car.
How often should you wash?
For most drivers, every two weeks is a sensible baseline. Adjust up or down depending on conditions: wash more often in winter if roads are salted, in summer if bugs and sap are a problem, or if you park outside under trees. Wash less often if your car lives in a garage and sees light use. The rule of thumb is that the longer dirt sits on paint, the more damage it does, so aggressive contaminants like bird droppings should be handled within a day or two whenever possible.
| Frequency | Task | Time Needed |
|---|---|---|
| As needed | Spot-clean bird droppings, bugs, and sap with quick detailer | 2 to 5 minutes |
| Weekly | Wipe mirrors, lights, and camera lenses; quick interior tidy | 10 minutes |
| Every 2 weeks | Full two-bucket wash and dry | 45 to 75 minutes |
| Monthly | Add spray sealant, clean glass inside and out, vacuum interior | 30 to 45 minutes |
| Every 3 to 4 months | Apply wax or sealant, treat trim, deep-clean wheels and wheel wells | 1 to 2 hours |
| Twice a year | Replace wipers, check cabin air filter, deep-clean interior | 1 to 2 hours |
Combine washing with a quick safety check
Every wash is an opportunity to look over the car. Here is a simple checklist to run through while you work:
- Check tire pressure and tread, and look for nails or bulges.
- Test every exterior light, including brake lights and turn signals.
- Inspect wiper blades and top up washer fluid.
- Look for new chips, dents, or rust bubbles on the paint.
- Glance under the car for fresh fluid spots when you move it.
- Make sure emergency gear is in the trunk. If not, see our car emergency kit checklist and the roundup of the best car safety tools.
If you are heading out on a long drive afterward, a freshly washed car is a great time to run through the steps in our article on how to prepare your car for a road trip. For a broader view of the gear that keeps you safe, browse our guide to car safety accessories.
Make it enjoyable
The easiest way to stay consistent is to make the wash something you enjoy. Put on a podcast, wash with a friend or family member, and treat it as time away from screens. If you have kids, give them a small mitt and a bucket of their own. Many owners find that the satisfaction of stepping back and seeing a gleaming car is a reward in itself.
And if you simply do not have the time or space, there is no shame in using a good automatic wash or a mobile detailing service for some of your washes. Consistent, imperfect cleaning is far better than occasional perfect cleaning. The best routine is the one you actually follow.
Frequently Asked Questions About Washing Your Car
How often should I wash my car?
Every two weeks works well for most drivers. Wash weekly in winter when roads are salted, or when you park under trees or near birds. If your car stays in a garage and sees light use, every three to four weeks is usually enough. Remove bird droppings, tree sap, and bug splatter as soon as you see them, since they damage paint quickly.
What is the best way to wash a car without scratching it?
Use the two-bucket method with grit guards, a plush microfiber mitt, and pH-balanced car shampoo. Rinse the car well first, wash from the roof down, use straight strokes, and rinse the mitt after every panel. Dry with a clean microfiber towel instead of letting the car air-dry, and keep wheels and paint tools separate.
Can I use dish soap to wash my car?
It is better not to. Dish soap is made to strip grease, so it also strips wax, sealants, and oils from trim. An occasional use will not ruin your paint, but regular use leaves it exposed and dull. Car shampoo is gentler, offers better lubrication, and is inexpensive because you dilute it heavily.
Should I wash my car in the sun or the shade?
Shade, whenever possible. Direct sun heats panels and makes soap and water dry before you can rinse or towel them, leaving spots and film. If you cannot avoid sun, wash and rinse one panel at a time, or choose early morning or evening when the metal is cool to the touch.
Is it better to hand wash or use an automatic car wash?
A careful hand wash is gentler on paint and gives you a chance to inspect the car. Automatic washes are faster and convenient, especially for rinsing off winter salt. Touchless washes avoid contact but use stronger chemicals, and brush washes can cause swirl marks if poorly maintained. A mix of both is perfectly reasonable.
How do I remove bird droppings and bug splatter safely?
Soften them first. Lay a wet microfiber towel or spray a quick detailer or bug remover over the spot and let it sit for a minute or two, then wipe gently. Never scrape or scrub dry residue, because the hard bits act like sandpaper. Handle bird droppings quickly since they are acidic and can etch clear coat.
How do I wash a car without a hose?
Use a rinseless wash or a waterless spray. Rinseless products need one bucket of water mixed with a concentrate, plus several clean microfiber towels. Waterless sprays work for light dust. Both are ideal for apartments or places with water restrictions, but they are not meant for heavy mud or salt, which need a proper rinse.
What should I wash first on a car, the wheels or the body?
Wheels and tires first. They are the dirtiest part of the car, and washing them last would splash brake dust and grime onto the clean paint. Use separate brushes and mitts for them, let the wheels cool before spraying, and rinse before moving on to the body.
Do I need to wax my car after every wash?
No. A traditional wax lasts one to three months, a sealant lasts longer, and spray products can be topped up every few washes. Apply a spray sealant after every second or third wash, and do a more thorough wax or sealant every few months. Our guide to ceramic and wax coatings compares the options.
Can a pressure washer damage my car?
It can if used carelessly. Keep the nozzle at least a foot or two from the paint, use a wide-angle tip, and avoid aiming at seals, trim edges, chipped paint, or sensors. Used correctly, a pressure washer is an excellent way to rinse and pre-soak the car. See our look at the best pressure washers for options.
Is it okay to wash my car in winter?
Yes, and you should if roads are salted. Wash when temperatures are above freezing if you can, focus on the undercarriage and wheel wells, and dry the door seals so they do not freeze shut. At a self-serve bay, a quick rinse with an undercarriage spray still helps a lot.
How do I get streak-free windows?
Use an ammonia-free glass cleaner sprayed onto a clean microfiber towel, not directly onto the glass. Wipe the outside vertically and the inside horizontally so you can tell which side a streak is on, then buff with a second dry towel. Clean wiper blades too, since dirty rubber smears even clean glass.
Conclusion: A Clean Car Is a Safer, Longer-Lasting Car
Washing a car well is not complicated, but it does reward a little care. Choose the right time and place, use two buckets and a plush mitt, start with the wheels, rinse from the top down, wash in straight lines, and dry with clean microfiber. Add a layer of protection, give the glass and sensors some attention, and you will have a car that looks great, protects its own paint, and gives you a clearer view of the road.
The same routine that keeps your finish glossy also keeps you safer. Clear glass, clean mirrors, bright lights, and working sensors all help you see and be seen. A regular wash is also a regular inspection, a chance to catch a low tire, a chip, or a leak before it becomes a bigger problem. Start with one good wash this weekend, build the habit, and enjoy the difference every time you walk up to your car.
Ready to get started? Pick up the essentials below, and when you finish, browse our other guides for more ways to keep your car and everyone in it safe.
DriveSafeGuide is a participant in the Amazon Services LLC Associates Program, an affiliate advertising program designed to provide a means for sites to earn advertising fees by advertising and linking to Amazon.com. As an Amazon Associate we earn from qualifying purchases at no extra cost to you. The cleaning advice here is general guidance, so always follow the product labels and your vehicle owner’s manual.