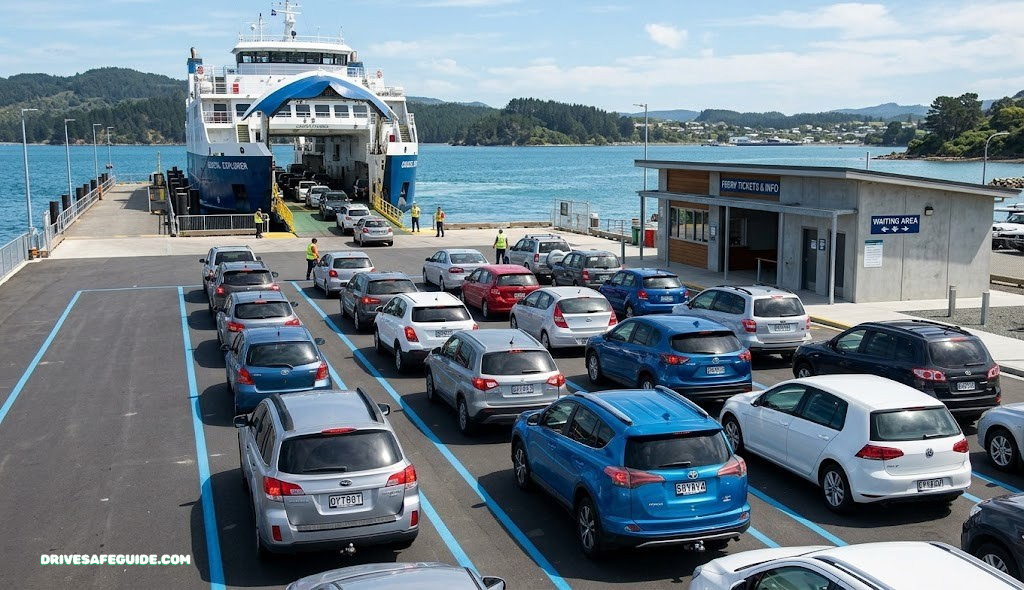
Mastering the Car Ferry Loading Procedure for a Stress-Free Road Trip
Everything a driver needs to know about arriving, staging, boarding, securing, and disembarking a vehicle ferry — without the confusion, the honking, or the last-minute scramble.
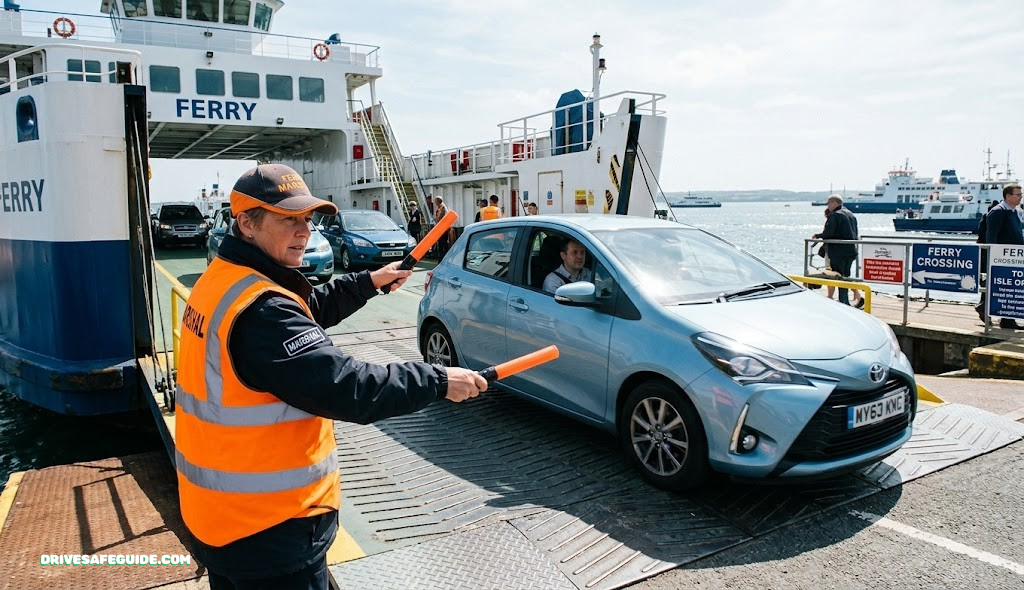
A marshal’s raised hand or paddle is the only signal that matters once you’re in the staging lane.
Why the Loading Procedure Matters More Than You Think
Most drivers picture a ferry crossing as the relaxing part of a road trip: engine off, windows down, watching the coastline slide by. The part nobody warns you about is the twenty to sixty minutes before that moment, when you’re funneled through a terminal, sorted into a lane, and asked to trust a stranger in a reflective vest to tell you exactly when to move. Get that sequence wrong and you can miss a sailing entirely, get rerouted to a much later crossing, or hold up an entire lane of vehicles behind you while a deckhand walks over to sort things out.
A car ferry loading procedure is really a choreography problem. Terminal operators are trying to pack dozens or hundreds of vehicles of wildly different lengths, heights, and turning radii onto a fixed deck footprint, then reverse that entire process at the other end, often with a turnaround window measured in minutes. Every rule you’ll read below exists to make that choreography work, not to make your life difficult.
Understanding the procedure ahead of time changes the experience completely. Instead of reacting to hand signals you don’t understand, you already know why they’re being given. If you’re building out a broader road trip essentials checklist, the ferry leg deserves its own line item, because it’s one of the few points in a drive where you hand partial control of your vehicle’s timing to someone else’s schedule.
There’s also a safety dimension that’s easy to overlook because it doesn’t feel like “driving” in the usual sense. A vehicle deck combines close quarters, moving machinery, sloped ramps, and a mix of drivers with wildly different levels of experience with the process — some doing it for the hundredth time, others for the first. The same attentiveness that keeps you safe in unfamiliar traffic applies here, just compressed into a much smaller physical space and a much shorter window of time.
This guide walks through the entire sequence in order, from the moment you leave home with your documents in hand to the moment you merge back onto the road at your destination port. Read it once before your first crossing and you’ll recognize every stage as it happens, rather than guessing your way through it in real time.
Before You Arrive: Documents, Reservations, and Timing
The loading procedure effectively starts the night before you leave, not when you pull into the terminal parking lot. Ferry operators build their staging lanes around reservation windows and check-in cutoffs, and missing either one can bump you to standby or a later sailing regardless of how early you show up.
Reservations and confirmation numbers
If your route offers reservations, treat the confirmation number the way you’d treat a boarding pass. Print it or screenshot it; terminal wifi and cell coverage near ports is notoriously unreliable, and a booth attendant cannot manually look up a booking during a busy loading window without slowing the entire lane. Keep it somewhere you can hand over without unlocking your phone, digging through email, or waking a sleeping passenger to find it.
Arrival windows
Most operators publish a required arrival time — commonly 30 to 60 minutes before departure for standard vehicles, and longer for oversized vehicles, trailers, or vehicles carrying hazardous materials like propane tanks. Arriving after that cutoff doesn’t just risk a late boarding; on a fully booked sailing it can forfeit your space to a standby vehicle entirely. Build the arrival window into your pre-trip vehicle safety checks rather than treating it as a separate afterthought.
Fuel, height, and weight declarations
Some ferries — particularly those with enclosed vehicle decks — ask drivers to declare vehicle height, weight, and sometimes fuel type at booking or check-in. Roof boxes, bike racks, and kayak carriers all count toward height, and underestimating it is one of the most common causes of a vehicle being redirected to a different deck at the last second. If you’re running a rooftop cargo carrier, measure your total height with it mounted, not your vehicle’s factory spec sheet number.

A compact tape measure kept in the glovebox settles height disputes at the booth in seconds — no app, no signal required.
Check Price on AmazonReading Terminal Signage and Lane Systems
Every ferry terminal uses some combination of overhead signage, painted lane markings, and staff with paddles or flags to sort incoming traffic. The specific symbols vary by operator, but the underlying logic is consistent enough that once you recognize the pattern, an unfamiliar terminal stops feeling chaotic.
Common lane categories
- Vehicle class lanes: Separate queues for standard cars, oversized vehicles, motorcycles, and commercial trucks, since each loads in a different order and location on the deck.
- Reservation vs. standby lanes: Confirmed bookings and walk-up standby traffic are almost always split apart well before the booth, so the standby line doesn’t block confirmed passengers.
- Foot passenger drop-off: A short-stay lane for dropping walk-on passengers before parking, separate from the main queue.
Color and symbol conventions
Amber or yellow lane markers typically mean “proceed with caution, prepare to stop,” while a solid red paddle or light means a full stop regardless of the vehicle ahead of you moving. Green generally clears you to advance. These conventions echo standard traffic signal logic deliberately, since terminal staff are managing driver behavior under similar stakes — a rear-end collision in a staging lane is rare, but a vehicle rolling forward into deck machinery or a ramp gap is a real hazard.
If you already practice strong defensive driving habits on the road, the same instinct — reading the environment before reacting — carries directly into a ferry lane. Watch the vehicle two ahead of you, not just the one directly in front, since staging often moves in short bursts rather than a steady crawl.
| Signal / Marking | Typical Meaning | Driver Action |
|---|---|---|
| Solid red paddle or light | Full stop, hold position | Stop completely, wait for next signal |
| Amber flashing light | Prepare to move, stay alert | Cover the brake, watch the marshal |
| Green light or waved paddle | Clear to proceed | Advance smoothly, no sudden acceleration |
| Crossed arms / raised palm | Immediate stop, often mid-maneuver | Stop instantly, do not finish the turn |
| Circular hand motion | Continue turning / tighten the turn | Keep steering input, don’t straighten early |
The Check-In Booth Procedure
The booth is the single narrowest point in the entire process, and it’s where most of the avoidable delays happen. A well-prepared driver clears a booth in under a minute; an unprepared one can hold up a dozen vehicles behind them.
- Have documents ready before you stop. Confirmation number, ID, and any required vehicle permits should be in hand, window already down, before you reach the window — not fished out after you’ve stopped.
- State your vehicle type clearly if asked. Booth staff sometimes verify declared height and length verbally; a clear, honest answer avoids a manual re-measurement that stalls the lane.
- Receive your lane assignment or boarding card. Many terminals hand over a numbered card, sticker, or verbal lane number — this determines exactly where you queue next, so repeat it back if you’re unsure.
- Ask any logistics questions now, not in the staging lane. Restroom locations, deck restrictions, or pet policies are all fair questions at the booth; staging lane marshals are focused purely on traffic flow and have little bandwidth for questions once boarding begins.
If you’re managing any kind of medical or comfort consideration — for example if you experience motion sickness as a driver — this is also the right moment to ask staff whether a specific deck level tends to feel more stable, since larger vessels often have noticeably less motion on lower, centered decks.
Staging Lanes and How You’re Called Forward
Once through the booth, you’ll be directed into a staging lane — sometimes called a marshaling yard — where vehicles wait in a specific order until the vessel is ready to load. This is the stage most drivers find the most tedious, but it’s also the stage where the entire loading plan is actually assembled.
Why order matters so much
Ferries load and unload in reverse order on many routes, meaning the last vehicle on is often the first one off. Staff use the staging lane to sequence vehicles by destination, size, and sometimes weight distribution, so the vessel loads evenly and unloads efficiently at each stop. This is why you may see vehicles that arrived after you get waved forward first — they’re being slotted into a different part of the loading sequence, not jumping the line.
What to do while you wait
- Keep the engine running only if instructed; many terminals ask drivers to shut off engines during extended holds to reduce emissions in an enclosed queuing area.
- Keep your hands off the wheel and foot near the brake rather than the accelerator during long holds — sudden nudges forward are a common cause of minor bumper contact in tightly packed lanes.
- Use this window to run through your own pre-departure risk checklist for the next driving leg after you disembark, since you likely won’t get another quiet moment once you’re back on the road.
The Boarding Sequence: Following Marshaling Crew Instructions
When the vessel is ready, marshaling crew begin waving lanes forward in a specific order, usually largest or most maneuverability-constrained vehicles first, since a truck or trailer that needs to reverse-park is far easier to position on an empty deck than a full one.
- Move only when directly signaled to you. A wave to the lane ahead is not a wave to you — creeping forward on someone else’s signal is one of the most common staging-lane mistakes.
- Maintain a slow, steady speed onto the ramp. Ramps can shift slightly with tide and loading weight; sudden acceleration or braking on an inclined or moving ramp surface reduces control exactly when precision matters most.
- Follow the marshal’s hand position, not just their face. Crew often communicate turning direction and stop points purely through hand and arm position while looking elsewhere to track the next vehicle — watch the signal, not the person.
- Fold in mirrors if instructed on tight decks. On smaller vessels or fully booked crossings, crew may ask drivers to fold side mirrors to shave inches of clearance between rows.
This sequencing discipline is the same underlying skill set that makes for good zipper-merge etiquette on the highway — reading a system that only works if everyone respects the same signal set, rather than optimizing individually.

Add-on convex mirrors widen your view of tight deck rows and ramp edges without needing to fold your factory mirrors first.
Check Price on AmazonParking On Board: Deck Assignment and Positioning
Once on the vehicle deck, crew will direct you to a specific row and position, frequently with very tight lateral clearance between rows — sometimes just a few inches on each side. This is intentional: maximizing the number of vehicles per crossing keeps fares lower and reduces the number of sailings needed to clear demand.
Positioning technique
Pull forward exactly as far as directed, no farther. Overshooting a stop point on a packed deck can leave insufficient clearance for the vehicle behind you, or block a designated walkway used by foot passengers and crew during the crossing. If you’re unsure whether you’ve stopped in the right spot, wait for the marshal’s explicit stop signal rather than guessing based on the vehicle ahead.
Handling low clearance and tight rows
Fold mirrors if requested, and if you’re driving a taller vehicle, watch overhead clearance markers near the deck ceiling and structural beams — these are usually painted in high-contrast colors for visibility. A vehicle equipped with a rear or 360-degree camera makes this stage noticeably less stressful; if you’re shopping around, our guide to choosing a backup camera covers the field-of-view differences that matter most in exactly this kind of tight-clearance parking.
Helps On Deck
- Rear or 360° camera for tight row parking
- Slow, deliberate steering inputs
- Watching overhead clearance paint markers
- Waiting for the marshal’s exact stop signal
Hurts On Deck
- Guessing your stop point without a signal
- Leaving mirrors extended when asked to fold
- Rolling forward “just a bit more” unprompted
- Blocking a marked walkway to save a few feet
Securing Your Vehicle for the Crossing
Once parked, securing the vehicle properly matters more than it might seem, especially on longer or rougher crossings where the vessel can pitch and roll noticeably.
- Set the parking brake fully. Even on a flat deck, vessel motion can be enough to let a vehicle in neutral creep, and an unset parking brake is one of the few things crew will specifically check for on rough-water routes.
- Leave the transmission in park (or in gear for manuals) with the parking brake as the primary hold. Relying on “Park” alone on a pitching deck is not the redundancy you want.
- Turn off all lights and accessories. Headlights, hazards, and interior lights left on are a common source of dead batteries discovered only after disembarking, and a genuine annoyance to vehicles parked nearby.
- Confirm windows are up and doors are locked before heading to the passenger decks, particularly on open or partially exposed vehicle decks where sea spray is possible.
If your crossing includes an especially exposed or open-air deck, treat this the same way you’d treat protecting stored equipment from moisture — anything left loose in an open truck bed or roof box should be strapped down or brought inside the cabin.

A compact rubber wheel chock set packs flat in a trunk and adds real peace of mind on a rolling vehicle deck.
Check Price on AmazonDuring the Crossing: What to Do and What Not to Do
Most ferry operators require passengers to leave the vehicle deck entirely once loading is complete, both for safety and fire regulation reasons, but the rules for accessing your vehicle mid-crossing vary by route and vessel size.
Vehicle deck access rules
On many enclosed vehicle decks, returning to your car during the crossing is prohibited outright once the deck doors are sealed, for fire-safety and stability reasons tied to maritime regulation. Shorter open-deck ferries are often more relaxed, sometimes allowing brief returns for forgotten items. Always confirm this at check-in rather than assuming, especially if you’re traveling with a pet that needs mid-crossing attention — see the special considerations section below for pet-specific guidance.
What to bring topside
- Medications, phone chargers, and anything you’ll need during the crossing — assume you cannot return to the car.
- Snacks and drinks if the vessel’s amenities are limited, particularly on longer crossings.
- Layers, since open passenger decks are often significantly colder and windier than expected, even in mild weather.
Motion and comfort
If you or a passenger is prone to seasickness, choosing a seat toward the center of the vessel, at a lower deck level, and facing forward toward the horizon generally reduces symptoms more than a seat near the stern or on an upper open deck. This mirrors the same horizon-fixing technique often recommended for motion sickness while driving.
Disembarking: Sequence and Etiquette
Disembarking has its own choreography, and it’s usually faster-paced than boarding, since the vessel is on a turnaround schedule and crew want the deck cleared quickly for the next loading cycle.
- Return to your vehicle promptly when the announcement is made. Lingering topside after the “return to vehicles” call is one of the most common causes of disembarking delays.
- Start the engine only when directed, or when the row ahead is visibly moving. Idling exhaust builds up quickly in an enclosed deck if everyone starts engines the moment they sit down.
- Follow row-by-row release, not a free-for-all. Crew release rows in a specific order tied to how the vessel was loaded; cutting across to your row before it’s called can block the row that’s actually being released.
- Exit at a measured pace down the ramp. The same caution about ramp incline and surface grip applies leaving the vessel as it did boarding it.
Once you’re back on dry land and merging into port traffic, treat the first few minutes like any unfamiliar merge — the same instincts covered in our guide to highway merging apply directly to the often-congested roads just outside a ferry terminal.
Special Considerations: RVs, Trailers, Motorcycles, and Pets
RVs and trailers
Oversized vehicles typically board first or last depending on the operator, and are directed by a dedicated marshal rather than the general lane crew, since positioning a trailer often requires a reverse maneuver crew will guide by hand. If you’re new to trailer travel, reviewing trailer hitch classes before your trip ensures your rig is correctly rated and reduces the chance of a last-minute weight or coupling issue at check-in.
Motorcycles
Motorcycles are usually staged in their own short lane and boarded early, often positioned along a wall or rail where crew can help secure them with tie-downs, since a bike on its kickstand alone is not considered stable enough for open water.
Traveling with pets
Because many vehicle decks are off-limits during the crossing, pets left in a vehicle need a real ventilation and temperature plan, and some operators require pets to be either taken to a designated pet area topside or, on some routes, kept in the car with prior approval and periodic crew checks. Confirm the specific route’s pet policy at booking, not at the booth. A properly rated crash-tested pet restraint is worth having regardless, since it keeps a pet secure both on the ramp and for the driving legs before and after the crossing.

A crash-tested harness keeps pets secure through ramp inclines, deck stops, and the drive on either side of the crossing.
Check Price on AmazonTypes of Vehicle Ferries and Why the Loading Procedure Changes
Not every ferry loads the same way, and knowing which category your route falls into helps you predict what the staging lane and deck will actually look like before you arrive. The industry broadly splits into a handful of vessel types, and each one changes the loading rhythm in a specific, predictable way.
Roll-on/roll-off (Ro-Ro) ferries
This is the vessel type most road trippers picture: a large, boxy hull with bow and stern ramps that let vehicles drive straight on and straight off without reversing. Ro-Ro vessels are common on longer, higher-capacity routes and tend to have the most formal staging-lane systems, since they’re moving the highest vehicle volume per crossing.
Cable and chain ferries
Used on short, narrow crossings — rivers, inlets, and channels — these smaller vessels are guided by a cable or chain anchored to both shores rather than navigating freely. Loading is far more informal, often just a single lane and a single crew member waving vehicles on, but the margin for driver error is smaller too, since the vessel itself is compact and the ramp gap can be more pronounced on a rising or falling tide.
High-speed catamarans
Increasingly common on medium-distance routes, these twin-hulled vessels trade vehicle capacity for speed. Their loading decks are usually narrower and their staging procedures stricter about declared vehicle dimensions, since there’s less margin to improvise a fit once boarding begins.
Passenger-only vessels with vehicle barges
On some routes, passengers board one vessel while vehicles are loaded separately onto a towed or self-propelled barge. If your route uses this model, your own boarding procedure and your vehicle’s loading procedure happen in entirely different locations and timeframes — worth confirming at booking so you’re not waiting at the wrong gate.
| Ferry Type | Typical Crossing Length | Loading Formality | Best For |
|---|---|---|---|
| Roll-on/roll-off (Ro-Ro) | 1–8+ hours | High — formal lanes, marshals, staged rows | Long-distance, high-volume routes |
| Cable / chain ferry | Under 15 minutes | Low — single lane, minimal staging | River and narrow-channel crossings |
| High-speed catamaran | 30 minutes–2 hours | Moderate–high — strict on declared size | Faster medium-distance island or coastal routes |
| Passenger/vehicle barge split | Varies | Split process — separate boarding points | Routes with heavy passenger foot traffic |
Whichever type you’re booked on, the underlying discipline is the same: know your vehicle’s true dimensions, arrive within the window, and follow the crew’s signal rather than the vehicle ahead of you. If your route is part of a scenic island itinerary, our Oahu driving and ferry-adjacent itinerary guide is a useful example of how a single crossing fits into a tightly timed day of driving.
Weather and Seasonal Changes to the Loading Procedure
Loading procedures aren’t static year-round. Wind, tide, and seasonal passenger volume all change how a terminal runs, sometimes in ways that catch even experienced ferry travelers off guard.
High wind and rough water
Strong crosswinds change how crew position high-profile vehicles like vans, RVs, and anything towing a trailer, sometimes shifting them toward the center of the deck rather than along an outer rail. On especially rough days, smaller vessels may reduce total vehicle capacity to preserve stability, which can push walk-up standby vehicles to a later sailing even if they arrived early. If your trip runs through exposed coastal stretches before the terminal, review our guide to driving safely in high winds so the approach to the terminal is as controlled as the crossing itself.
Tidal ramp angles
On routes where the terminal ramp connects directly to a tidal shoreline, the ramp’s incline changes throughout the day as the water rises and falls. A steep ramp angle at low tide calls for a slower, more deliberate approach speed than the same ramp at high tide, and crew will often adjust their stop-and-go signal timing accordingly. Trust the signal over your own sense of the ramp’s angle — it’s easy to misjudge incline through a windshield.
Peak season crowding
During high-travel periods, terminals frequently run at or near full capacity, and standby lanes can fill hours before a sailing. If you’re planning a peak-season crossing as part of a longer route, treat a reservation as close to mandatory, and build your road trip essentials checklist around the assumption that the ferry leg is the least flexible part of your entire itinerary, not the most.
Cold weather considerations
In colder climates, idling engines in an enclosed staging area gets restricted even more strictly, and crew may ask drivers to wait with engines off for longer stretches. Dress for the wait, not just the destination — a few extra minutes standing outside a booth in freezing temperatures is a common, avoidable discomfort. Packing a winter car emergency kit is worth doing regardless of the ferry leg, since cold-weather breakdowns before a terminal are far more disruptive to a schedule than almost any other single risk.
Reservation vs. Standby: A Closer Look
Choosing between booking ahead and taking your chances as a walk-up vehicle is one of the first decisions that shapes your entire loading experience, and the right choice depends heavily on your route’s typical demand and your own schedule flexibility.
Reservation: Pros
- Guaranteed space on a specific sailing
- Predictable check-in and arrival window
- Priority staging ahead of standby vehicles
- Easier to plan connecting legs of a longer trip
Reservation: Cons
- Less flexible if your schedule shifts
- Some routes charge a change or cancellation fee
- Still requires meeting the arrival cutoff
Standby: Pros
- No commitment to a specific sailing time
- Works well for flexible, spontaneous routes
- Sometimes the only option on unreservable routes
Standby: Cons
- No guarantee of boarding a given sailing
- Can mean waiting through several sailings during peak periods
- Harder to plan the rest of a tightly scheduled day
A practical middle ground many experienced road trippers use: reserve the crossings that anchor a tight itinerary — the ones with limited daily sailings or a hard connection to another leg — and leave more flexible routes as standby. This mirrors the same layered planning approach covered in our road trip essentials by scenario guide, where the level of preparation scales with how much a single delay would actually cost you.
International and Border-Crossing Ferry Routes
Ferry routes that cross an international boundary add a documentation layer on top of the standard loading procedure, and it’s worth separating clearly in your mind from the terminal’s own boarding rules.
Documentation to have ready
Beyond your standard identification, international ferry routes commonly require a valid passport, proof of vehicle registration and insurance valid in the destination country, and in some cases an international driving permit. Have all of these accessible in the same place as your ferry confirmation, since booth staff on an international route are often verifying both boarding eligibility and basic customs readiness in the same short interaction.
Customs and inspection staging
Many international ferry terminals route vehicles through a customs or border inspection lane either before the standard check-in booth or immediately after disembarking on the other side. This adds its own queue and its own signage system, distinct from the ferry operator’s own lanes. Treat it as a separate step in your timeline, similar in spirit to how you’d prepare for a standard land border vehicle inspection, since agents may ask you to open trunks, glove compartments, or roof cargo for a visual check.
Currency and payment
Some international routes charge port or terminal fees separately from the ticket price, occasionally in a different currency or payment method than the one used for the original booking. Confirm accepted payment types in advance rather than discovering a cash-only fee at the booth with a lane of vehicles waiting behind you.
If your international leg is part of a broader overland trip, our cross-country driving checklist and general car safety kit guide are both worth revisiting before you leave, since replacing a forgotten item becomes considerably harder once you’re on the far side of a border.
Budgeting for the Ferry Leg of Your Trip
Ferry fares are usually priced by a combination of vehicle length, passenger count, and sometimes vehicle weight, which makes them a genuinely variable cost rather than a flat toll. Factoring this into your overall trip budget early avoids an unpleasant surprise at the booth, especially on routes where a longer vehicle or an attached trailer pushes you into a noticeably higher fare bracket.
What typically affects the fare
- Overall vehicle length, including any attached trailer — measured bumper to bumper, not just the cab.
- Number of passengers, since many operators charge per person in addition to the vehicle fare.
- Time of booking, with many routes offering lower advance-purchase fares than walk-up or last-minute rates.
- Seasonal demand, where peak-season fares can run noticeably higher than off-peak pricing on the same route.
Hidden costs to plan for
Beyond the base fare, budget for optional cabin or lounge upgrades on longer crossings, on-board food if the vessel’s amenities are limited, and any terminal parking fees if you’re arriving well ahead of your window and need somewhere to wait. None of these are large individually, but they add up meaningfully on a multi-leg trip with several crossings booked back to back.
If your itinerary includes several ferry legs, it’s worth tracking fares the same way you’d track fuel costs in a broader road trip essentials checklist — as a planned, line-itemed expense rather than an afterthought discovered at each terminal.
Common Mistakes That Cause Delays or Damage
| Mistake | Why It Happens | How to Avoid It |
|---|---|---|
| Arriving after the check-in cutoff | Underestimating terminal traffic or check-in queue length | Build in a 30–60 minute buffer beyond the stated arrival window |
| Undeclared roof cargo height | Measuring the vehicle alone, not the loaded height | Measure with all cargo mounted before you leave home |
| Creeping forward on the wrong signal | Reacting to the vehicle ahead instead of your own marshal | Watch only the crew member signaling directly to your lane |
| Forgetting the parking brake | Habit from flat, stationary home parking | Make the parking brake the last physical action before leaving the seat |
| Leaving lights on | Rushing to get topside after parking | Do a 3-second lights-off scan before locking the doors |
| Lingering after the return-to-vehicle call | Not hearing or noticing the announcement | Set a phone timer near the estimated arrival time |
Most of these mistakes share a common root cause: treating the ferry terminal like a normal parking lot instead of a tightly timed, staffed process with its own rules. The same mindset shift that helps with navigating national park vehicle pass systems — reading the specific system in front of you rather than assuming a generic default — applies just as well here.
It’s also worth remembering that terminal staff process this exact sequence dozens or hundreds of times a day, every day. Nothing about a hesitant first-timer surprises them, and a polite, clear question at the booth almost always gets a faster, friendlier answer than guessing and getting it wrong in the staging lane. If you do make a mistake — missing a signal, stopping short, misjudging a turn — staying calm and waiting for the next instruction resolves it far faster than trying to self-correct without guidance.
Planning the Road Trip Around Your Ferry Leg
A ferry crossing rarely stands alone; it’s usually one leg of a longer route. Building slack into your schedule on both sides of the crossing protects you from missing a sailing due to traffic, and protects your next stop from a late arrival if the crossing itself runs behind. If your route includes scenic byway planning, treat the ferry terminal’s arrival window as a hard checkpoint the rest of your route has to respect, not a flexible estimate.
It’s also worth pairing your ferry leg with a broader look at roadside attraction stops nearby — many ferry terminals sit in genuinely scenic areas, and arriving with a buffer window means you can actually enjoy the area instead of white-knuckling the last few miles to the booth.
Finally, if this leg is part of a longer multi-day drive, revisit your cross-country driving checklist the night before, specifically the sections on fuel planning and rest stops, since a ferry terminal’s arrival cutoff doesn’t move regardless of how the rest of your day went.

A compact jump starter and roadside kit in the trunk means one unexpected issue before the terminal doesn’t cost you the sailing.
Check Price on AmazonFrequently Asked Questions
How early should I arrive for a car ferry?
Most operators recommend arriving 30 to 60 minutes before departure for a standard passenger vehicle, and longer for oversized vehicles, trailers, or first-time travelers on an unfamiliar route. Check your specific operator’s published arrival window, since it varies by route and season.
Can I stay in my car during the ferry crossing?
On most enclosed vehicle decks, no — regulations typically require passengers to move to passenger areas once the deck is sealed. Some smaller, open-deck ferries on short routes are more flexible. Always confirm the specific rule at check-in rather than assuming.
What happens if I miss the check-in cutoff?
Depending on the operator and how full the sailing is, you may be moved to standby for the same sailing, rebooked onto a later one, or, on a fully booked departure, lose your reserved space entirely. Arriving with a buffer well before the stated cutoff is the safest approach.
Do I need to turn off my engine while waiting in the staging lane?
Many terminals ask drivers to shut off engines during extended holds in enclosed or covered staging areas to reduce exhaust buildup. Follow posted signage or staff instructions, since the rule varies by terminal design.
How is the boarding order decided?
Order is generally set by vehicle size, type, and destination, since larger or less maneuverable vehicles are often positioned first for easier deck placement, and vehicles are frequently sequenced so the loading order supports an efficient unloading order at each stop.
Should I fold in my side mirrors before boarding?
Only if instructed by staff. On tightly packed crossings, crew may ask drivers to fold mirrors to maximize row clearance; on lighter sailings it’s often unnecessary. Watch for the instruction rather than doing it preemptively and potentially misjudging your own clearance.
Is it safe to leave a pet in the car during the crossing?
This depends entirely on the operator’s policy and the length of the crossing, since many enclosed decks are inaccessible mid-voyage. Confirm the specific route’s pet policy at booking, and use a well-ventilated, temperature-appropriate setup with a crash-tested restraint regardless.
What’s the difference between a reservation lane and a standby lane?
Reservation lanes are for vehicles with a confirmed booking and are typically loaded first up to capacity. Standby lanes hold vehicles without a reservation, who board only if space remains after all confirmed vehicles have loaded.
Can motorcycles book the same way as cars?
Most operators allow motorcycle reservations, often at a different rate and with a separate staging lane, since motorcycles are usually boarded and secured differently than four-wheeled vehicles.
What should I do if I’m redirected to a different lane after check-in?
Follow the redirection without hesitation — it’s typically related to vehicle sizing, destination sequencing, or a last-minute capacity adjustment on the crew’s end, not an error on your part. Asking a nearby staff member for clarification is fine once you’re safely repositioned.
Do I need to declare a roof box or bike rack at check-in?
Yes, if it changes your vehicle’s overall height or length beyond factory dimensions. Height is one of the most common reasons a vehicle gets redirected to a different deck, so declaring accurately in advance avoids a last-minute reshuffle.
What’s the biggest mistake first-time ferry travelers make?
Treating the terminal like a normal parking lot rather than a staffed, tightly sequenced process. Watching only your own signal, following instructions immediately rather than waiting to see what nearby vehicles do, and building in extra arrival time all prevent the most common delays.
Ready for a Smoother Crossing
The car ferry loading procedure feels intimidating exactly once. After you’ve watched a marshal wave you forward, followed a lane through staging, parked in a row with a few inches of clearance on either side, and set your parking brake before heading topside, the whole sequence becomes second nature. The drivers who move through it smoothly aren’t lucky — they simply know what to expect and prepare their documents, timing, and vehicle accordingly.
Before your next crossing, run through your road trip essentials checklist one more time, double-check your arrival window against the terminal’s published cutoff, and pack the small items — a tape measure, a compact jump starter, a set of wheel chocks — that turn a stressful unknown into a routine stop on the way to somewhere better.
Build Your Full Road Trip Checklist🚗 Recommended for Drivers
Drive Safer Every Day
Explore our top picks for car safety gear — from dashcams to emergency kits — all hand-picked to help you stay safe on the road.
🚗 Shop Car Safety EssentialsAffiliate link — we earn a small commission that keeps DriveSafeGuide running. Thank you!