A Comprehensive Backup Camera Installation Guide
Everything you need to mount, wire, and calibrate a backup camera yourself — wired or wireless — without paying shop labor rates.
Reversing blind spots cause thousands of low-speed collisions every year, and a surprising number of them involve driveways, parking lots, and garages rather than open roads. A backup camera closes that gap in a way that mirrors alone never can, giving you a direct, wide-angle view of exactly what is behind the bumper before you touch the accelerator. The good news is that installing one yourself is a weekend-afternoon project, not a trip to the dealership. Most kits cost a fraction of what a shop charges for labor, and the actual wiring is far more approachable than it looks once it is broken into steps.
This guide walks through the entire process from start to finish: choosing between a wired or wireless system, gathering the right tools, mounting the camera itself, routing cable through the vehicle, tapping into the reverse light circuit for power, mounting a display, and testing everything before you trust it in traffic. Whether you are working on a sedan, a pickup, or an SUV, the underlying steps are the same, even if the exact routing path through your particular vehicle varies. If you have not yet picked a camera, our guide to choosing a backup camera covers resolution, field of view, and night vision considerations before you buy.
There is no single “correct” way to route a wire through every vehicle on the road, and part of what makes this project approachable is that you do not need to get it perfect on the first attempt. Trim panels are designed to come off and go back on repeatedly, and a cable run that ends up slightly different from what a factory technician might choose still works exactly the same as long as it is secure, protected from moving parts, and properly sealed at both ends. Treat the steps below as a dependable framework, then adapt the exact path to whatever your particular dashboard, trunk liner, and body panels present.
Why Install a Backup Camera
Rear visibility is one of the most persistently compromised sightlines in any vehicle. Headrests, thick C-pillars, cargo, and simple bumper height all combine to create a blind zone directly behind the car that can be large enough to hide a child, a pet, or a low obstacle entirely. A backup camera mounted near the license plate or tailgate handle sits low and points down, giving a view that no mirror angle can replicate.
Beyond the obvious safety case, a camera also makes everyday driving easier. Parallel parking, hitching a trailer, and backing into a tight garage all become far less stressful when you can see the curb, the hitch ball, or the wall in real time instead of guessing from mirror reflections. Pairing a rear camera with good defensive driving habits closes off one of the more common causes of low-speed fender benders.
If you already run a dash cam for forward-facing coverage, a rear camera rounds out your visual record of a drive, which is useful for insurance claims after a parking-lot bump. Systems like the Vantrue N4 Pro even combine a forward dash cam with a rear-facing channel, so it is worth deciding early whether you want a dedicated backup camera, a dash cam with a rear channel, or both working together.
Wired vs. Wireless Systems
Every backup camera kit falls into one of two broad categories, and the choice affects how much of the vehicle you will need to route cable through. A wired system sends both power and video down physical cables from the camera to the monitor, which means a longer, more involved install but a rock-solid, lag-free video feed. A wireless system uses a small transmitter at the camera and a receiver near the dash, cutting the amount of cable you need to route through the cabin dramatically, at the cost of occasional interference in electrically noisy environments.
| Factor | Wired System | Wireless System |
|---|---|---|
| Installation time | 90–150 minutes | 45–75 minutes |
| Video reliability | Excellent, no signal drop | Good, occasional interference |
| Latency | Near-instant | Slight delay (typically under 0.3s) |
| Cable routing through cabin | Required | Minimal to none |
| Typical cost | $35–$120 | $40–$150 |
| Best for | Permanent installs, trucks, trailers | Renters, leased vehicles, quick installs |
Wired Pros
- No signal interference or dropout
- No batteries or transmitter to maintain
- Cleanest long-term reliability
Wired Cons
- Longer install, more cable routing
- Harder to remove if you lease your vehicle
Wireless Pros
- Much faster install
- Easy to remove or transfer to another vehicle
Wireless Cons
- Possible interference from other 2.4GHz devices
- Minor video latency
Trailer owners and truck drivers often lean wired, or a hybrid approach, since a dedicated trailer hitch class setup benefits from a permanent, interference-free camera that stays aligned with a hitch ball. Renters or anyone who swaps vehicles frequently tend to prefer wireless for the quick teardown.
Resolution, Field of View & Night Vision
Once you have settled on wired or wireless, the next decision that actually affects daily usability is image quality. Resolution, field of view, and low-light performance vary widely between budget and premium kits, and the differences show up most when you need the camera most: backing out of a dark driveway or judging distance to a low obstacle at dusk.
Resolution and Sharpness
Entry-level kits typically ship with a 480p or 720p sensor, which is perfectly usable for basic obstacle avoidance but shows visible softness at the edges of the frame. Mid-range and premium kits step up to 1080p, rendering license plates, curb edges, and small objects with noticeably more clarity, especially once the image is stretched across a larger monitor. If you already run a dash cam and are comparing sensor quality, our breakdown of 4K vs. 1080p dash cam footage covers the same underlying resolution tradeoffs that apply to backup cameras.
Field of View
Most backup cameras advertise a field of view between 120 and 170 degrees. A wider angle captures more of the area directly behind the bumper, which is useful for spotting children or pets close to the vehicle, but it also introduces more lens distortion at the edges of the frame. A moderate 130–150 degree field of view tends to strike the best balance for most drivers, showing enough width without excessive fisheye warping near the corners.
Night Vision Performance
Because reversing often happens in shadowed driveways, garages, or after dark, low-light performance matters more for a backup camera than it might for many other pieces of car electronics. Look for a camera with a stated low-lux rating or built-in infrared LEDs, since a sensor that performs well in daylight can still produce a nearly unusable black frame at night. This is one area where paying slightly more for a name-brand sensor genuinely pays off in real-world usability.
| Tier | Typical Resolution | Field of View | Night Performance |
|---|---|---|---|
| Budget | 480p–720p | 120°–140° | Basic, grainy in low light |
| Mid-range | 1080p | 130°–150° | Good with standard IR LEDs |
| Premium | 1080p–1440p | 140°–170° | Strong low-lux sensor, minimal noise |

A stronger low-light sensor makes evening and early-morning reversing far less of a guessing game.
Check Price on AmazonLegal & Compliance Notes
Backup cameras are legal to install aftermarket in all fifty states, and newer vehicles have shipped with them as standard equipment for years. The regulatory considerations that do matter are narrower: where the camera is mounted, how the monitor is positioned, and whether any wiring interferes with existing safety systems like brake lights or turn signals.
Mount the monitor so it does not obstruct your forward view through the windshield the way an improperly placed hanging accessory can trigger a ticket. Most dash-mounted or suction-cup monitors sit low enough to avoid this, but double check local windshield-obstruction rules if you plan to mount a larger screen. If your vehicle already has a factory infotainment screen, a camera kit that feeds directly into that screen sidesteps the issue entirely.
Tapping into the reverse light circuit is standard practice and does not alter the function of the light itself; you are simply pulling a switched power signal, not rerouting the bulb. Still, use proper connectors rather than twisting bare wires together, both for reliability and to avoid an intermittent short that could affect your check engine light or other electrical systems.
If your vehicle is leased, it is worth a quick read of your lease agreement or a call to the leasing company before drilling any permanent mounting hole. A plate-frame camera sidesteps this concern entirely since it leaves no lasting modification, which makes it the safer default choice for anyone who does not yet own the vehicle outright.
Tools & Materials Needed
Gathering everything before you start prevents the most common source of installation delays: discovering halfway through that you are missing a drill bit or a specific connector size. Beyond the camera kit itself, most installs draw on a similar core toolkit.
| Item | Purpose |
|---|---|
| Drill with step bit or hole saw | Cutting the camera mounting hole |
| Trim removal tool / plastic pry bar | Popping interior panels without cracking clips |
| Fish tape or coat hanger wire | Guiding cable through body cavities |
| Wire strippers & crimping tool | Splicing into the reverse light circuit |
| Butt connectors or scotch-lock taps | Clean, insulated wire splices |
| Electrical tape & heat-shrink tubing | Weatherproofing outdoor connections |
| Multimeter or test light | Confirming reverse-light power before splicing |
| Zip ties or cable clips | Securing loose cable runs |
| Silicone sealant | Sealing the camera mounting hole against water |
A quality multimeter earns its keep well beyond this one project; if you do not already own one, it pairs naturally with the diagnostic tools covered in our OBD2 scan tool guide. Keep a basic car safety kit on hand as well, since this job often happens in a driveway rather than a shop bay.

Confirms reverse-light polarity and continuity before you make a single splice.
Check Price on AmazonDIY vs. Professional Installation Cost
One of the biggest draws of installing a backup camera yourself is the gap between parts cost and shop labor. A camera kit itself, whether wired or wireless, typically runs somewhere between thirty and one hundred fifty dollars depending on resolution and features. A shop installation of the same kit, by contrast, often adds another hundred fifty to three hundred dollars in labor, since the routing and reverse-light splice take a technician roughly the same hour or two it takes an attentive DIYer.
| Approach | Parts Cost | Labor Cost | Total Estimate |
|---|---|---|---|
| DIY wireless kit | $40–$150 | $0 | $40–$150 |
| DIY wired kit | $35–$120 | $0 | $35–$120 |
| Shop-installed wireless kit | $40–$150 | $100–$200 | $140–$350 |
| Shop-installed wired kit | $35–$120 | $150–$300 | $185–$420 |
The math tends to favor DIY strongly for anyone comfortable with basic hand tools, since the labor savings alone often exceed the price of the entire camera kit. The main scenario where a shop install still makes sense is a factory head-unit integration that requires proprietary programming tools to unlock a hidden camera input, which is common on certain newer vehicles with locked-down infotainment systems.
If you are budgeting for this project alongside other upgrades, it is worth planning a broader session around your vehicle’s electronics rather than tackling one accessory at a time; our guide to essential car safety accessories is a useful starting point for prioritizing what to add next.
Planning the Installation
Spend ten minutes planning your cable route before you pick up a drill. Sit in the driver’s seat and trace, by eye, the physical path a wire would need to travel from your chosen monitor location, along the door sills or headliner, into the trunk or cargo area, and finally out to the camera location near the license plate or tailgate handle. Most sedans route along the driver’s side sill panel and up through the trunk hinge area; most SUVs and hatchbacks route along the roofline or D-pillar down into the liftgate.
Choosing the Camera Location
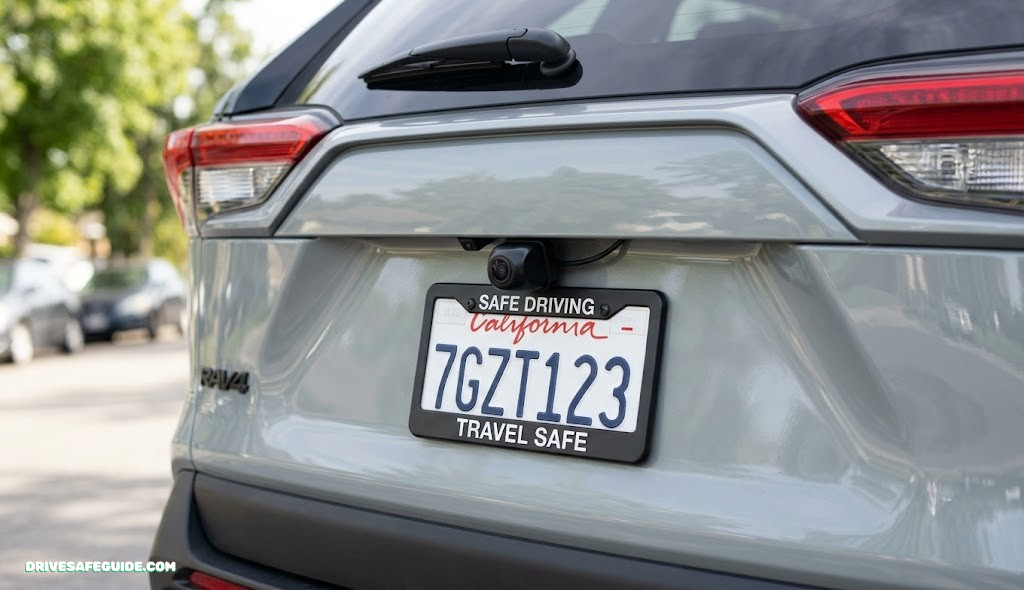
The two most common mounting spots are directly above the license plate, using a plate-frame camera that clips over the existing plate, and a flush-mounted hole drilled just above or beside the plate recess. A plate-frame camera is fully reversible and involves no drilling at all, which makes it the lower-risk option if you are new to this kind of project. A flush-mounted camera looks cleaner and integrates with the factory design, but it is permanent once drilled.
Choosing the Monitor Location
A dedicated monitor typically mounts on the dash near the windshield base, on top of the dash pad with an adhesive stand, or replaces the rearview mirror with a mirror-monitor combo. If your vehicle has a factory touchscreen with an auxiliary video input, feeding the camera into that screen avoids adding any new hardware to the dash at all. Check your factory head unit’s manual or search your model for an “AUX video in” or “rear camera retrofit” input before buying a standalone monitor.
Take a moment to also plan where excess cable will live once everything is connected. A neat coil tucked behind the dash or under a seat, secured with a zip tie, is far more durable over time than cable left loose to rattle against other components every time the vehicle hits a bump.
Wired Installation, Step by Step
The following six steps cover a full hardwired install, from mounting the camera to powering on a dedicated monitor. Work through them in order; each step assumes the previous one is complete.
1 Mark and Prepare the Camera Mounting Point
Hold the camera against your chosen spot and trace the outline of its mounting hole with a pencil or grease marker. Use painter’s tape around the marked area to prevent the drill bit from skating across the paint.
2 Drill the Mounting Hole and Feed the Camera Wire
Using a step bit or hole saw sized to your camera’s cable grommet, drill slowly and check your progress often. Once through, deburr the edge, feed the camera cable through from outside, and press the camera’s grommet into place. Apply a bead of silicone sealant around the grommet before it seats fully.
3 Route the Cable Through the Trunk to the Cabin
From behind the panel, run the cable along an existing wiring harness or the trunk’s inner sill, using zip ties every 8–10 inches to keep it away from moving parts like the trunk hinge or latch mechanism. Pass it through the trunk’s rubber grommet (the same one your factory wiring already uses) rather than drilling a new hole through the body.
4 Tap the Reverse Light for Power
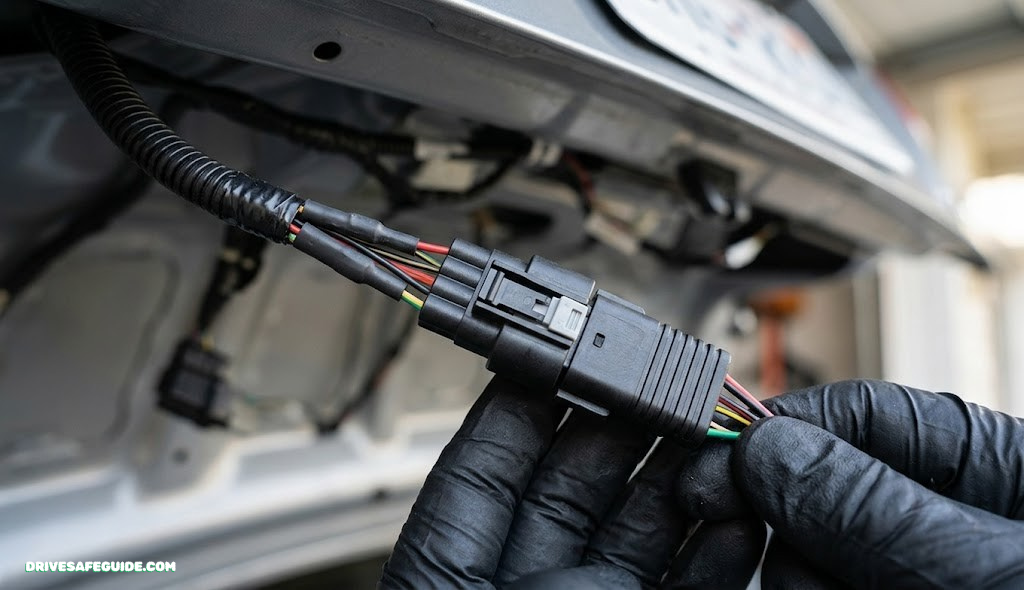
Locate the reverse light’s power wire behind the tail light housing, confirm it with a test light while a helper shifts into reverse, then splice in your camera’s power lead using a butt connector or scotch-lock tap. Full detail on this step is covered in its own section below, since it is the part most people want to get exactly right.
5 Run the Cable to the Monitor Location
Working forward from the trunk, tuck the cable under door sill trim, along the A-pillar or headliner edge, and down to your chosen monitor spot near the windshield. Most trim panels pop off with a plastic pry tool, and factory wiring looms already run through the same channels, giving you a ready-made path to follow.
6 Mount, Connect, Seal, and Test
Secure the monitor with its included adhesive mount or bracket, connect the video and power leads, then double-check every trim panel is snapped back into place. Run a bead of silicone around the exterior camera grommet if you have not already, and confirm the picture appears when you shift into reverse before considering the job finished.

A complete hardwired kit with camera, cable, and dash monitor for a permanent install.
Check Price on AmazonWireless Installation, Step by Step
A wireless system trims the process down to four core steps, since there is no long video cable to route through the cabin. The camera still needs power, but the video feed travels over a short-range radio link to a receiver near the dash.
1 Mount the Wireless Camera Unit
Mount the camera the same way as a wired unit, either as a license-plate-frame camera or a flush-mounted unit, following the marking and drilling guidance above. Wireless cameras integrate a small transmitter directly into the housing, so no separate module needs to be hidden nearby.
2 Power the Camera from the Reverse Light
Even wireless cameras need power, and the cleanest source is still the reverse light circuit so the camera turns on and off automatically with the gear selector. Some wireless kits include a battery pack option for a fully drill-free, splice-free install, at the cost of periodic recharging.
3 Mount the Wireless Receiver or Monitor
Position the receiver box or monitor within line of sight of the rear of the vehicle where possible; metal roof pillars and heavily tinted rear glass can reduce range slightly. Most dash or windshield mounts work well, and many wireless kits power the receiver directly from a 12V accessory socket, avoiding any additional splicing inside the cabin.
4 Pair the Transmitter and Receiver, Then Tidy Cable
Power on both units; most wireless kits pair automatically on first boot, or use a small sync button on each unit. Shift into reverse to confirm a stable picture, then tuck any short power leads out of sight with zip ties or adhesive clips so nothing dangles near the pedals or driver’s footwell.

Skips the long cable run with a stable digital signal between camera and monitor.
Check Price on AmazonWiring to the Reverse Light
The reverse light circuit is the standard power source for a backup camera because it is only live when the gear selector is in reverse, which automatically turns your camera on and off without any extra switch. Finding the correct wire takes a few careful minutes and saves you from a miswired camera that stays on constantly or never activates at all.
Finding the Right Wire
Open the trunk or tailgate and locate the tail light assembly, which usually comes out with two or three screws or clips. Behind it, you will find a wiring harness with several colored wires; consult your vehicle’s wiring diagram if possible, since colors vary by manufacturer, but the reverse light wire is almost always paired directly with the reverse light bulb socket.
Confirming Polarity Before You Splice
Turn the ignition to the “on” position without starting the engine, have a helper shift into reverse, and touch a test light or multimeter’s probes to the suspected wire and a known ground point. A reading of roughly 12 volts only while in reverse confirms you have found the correct wire. Skipping this check is the single most common cause of a camera that behaves unpredictably.
Making the Splice
Strip a small section of insulation from the reverse wire, twist your camera’s power lead around the exposed section, and crimp on a butt connector rather than relying on tape alone. Wrap the connection with electrical tape and, for any splice outside the watertight cabin, add heat-shrink tubing for a fully sealed joint.
Mounting the Monitor or Display
Your display options fall into three general categories, and the right one depends on your vehicle and budget. A dedicated dash monitor is the most flexible, working with any vehicle regardless of factory equipment. A mirror-monitor combo replaces your rearview mirror housing with one that includes a built-in screen, keeping the dash uncluttered. A head-unit integration feeds the camera signal into an existing touchscreen, which is the cleanest look if your factory system supports an auxiliary video input.
If you are also considering a broader electronics upgrade, it is worth reviewing options like a wireless CarPlay adapter or a heads-up display at the same time, since some aftermarket head units bundle camera inputs alongside these features and can save you from installing multiple separate screens.
Testing and Calibration
Before you consider the job finished, run through a full functional check with the vehicle safely parked in an open area. Shift into reverse and confirm the picture appears within a second or two, then shift back to park or drive and confirm the screen either goes blank or reverts to its default display, depending on your kit.
Checking the Field of View
Walk around the rear of the vehicle while a helper watches the screen, confirming the camera captures the full width of the bumper and picks up low obstacles like a curb or a child’s bicycle. Adjust the camera’s mounting angle slightly if the horizon line sits too high or too low in the frame.
Checking Guidelines and Distance Markers
Many camera systems overlay dynamic or static guidelines on the screen to estimate distance to obstacles. Back toward a cone or box at a measured distance and confirm the overlay lines up reasonably closely with reality; some monitors include a menu setting to calibrate these lines to your specific bumper height.
A Short Road Test
Once the static checks look good, take the vehicle on a short drive that includes at least one real parking maneuver, whether that is backing into a driveway, a garage, or a standard parking space. Real-world conditions, including afternoon sun glare on the lens and a bit of road vibration, sometimes reveal a loose connector or a slightly misaligned camera angle that a stationary test in the driveway would not have caught.
Finally, give the whole system a week of ordinary use before considering it fully proven. A connection that survives the first week of daily driveway reversing, temperature swings, and door-panel flexing is very likely to keep working reliably for years, which is exactly the outcome a careful, methodical install is meant to produce.

A simple, repeatable way to verify camera distance markers before trusting them in daily driving.
Check Price on AmazonCommon Mistakes to Avoid
Most backup camera installs that go wrong fail in one of a small number of predictable ways. Knowing these ahead of time is often enough to sidestep them entirely.
Skipping the Polarity Test
Splicing into the first wire that looks promising, without confirming it is actually the switched reverse-light wire, is the single most common mistake. A wrong splice does not usually damage anything, but it does mean pulling the panel back off and redoing the connection, which is far more annoying than the two extra minutes a proper test light check would have taken.
Rushing the Weatherproofing
A camera hole without a full silicone seal, or a splice without heat-shrink tubing, will eventually let moisture in. This rarely causes an immediate failure; instead, it shows up months later as a flickering picture or a fogged lens, by which point tracing the cause back to the original seal takes longer than doing it right the first time would have.
Pinching Cable in a Hinge or Latch
Routing cable across the trunk hinge or tailgate latch without enough slack is a classic mistake that only reveals itself after repeated opening and closing eventually severs the internal wire. Always leave a small service loop of extra cable at any point where the body flexes or opens, mirroring how the factory wiring harness is looped at the same spot.
Choosing the Wrong Camera for the Vehicle
A camera designed for a flush-mount hole will not clip onto a plate frame, and a plate-frame camera can look oversized on a vehicle with a recessed plate pocket. Double-check your specific kit is designed for your mounting style before drilling anything, since return policies on already-installed electronics are inconsistent at best.
Troubleshooting Common Issues
Most backup camera problems trace back to one of a handful of causes, and working through them systematically usually finds the fix within a few minutes. Rather than guessing, start at the power source and work your way toward the monitor, checking each connection point along the way; this mirrors how a technician would diagnose the same issue and avoids the frustration of randomly swapping parts that were never the problem in the first place.
Before assuming a component has failed outright, reseat every connector you touched during installation. Vibration over the first few weeks of driving often loosens a connection that seemed solid on install day, and a firm push back into place resolves a surprising share of “dead camera” complaints without any further troubleshooting.
| Symptom | Likely Cause | Fix |
|---|---|---|
| No picture at all | Loose power connector or blown fuse | Recheck splice and inline fuse |
| Picture flickers | Loose video connector or chafed cable | Reseat connector, inspect cable for pinch points |
| Camera stays on constantly | Spliced into the wrong wire | Re-test polarity and re-splice into true reverse wire |
| Wireless signal drops out | Interference or range limit | Reposition receiver, switch channel if kit supports it |
| Image is mirrored incorrectly | Camera orientation setting | Toggle mirror-image setting in monitor menu |
| Water fogs the camera lens | Incomplete seal around mounting hole | Remove, reseal with silicone, reinstall |
If the issue seems electrical rather than mechanical, a basic OBD2 tool can sometimes help rule out a broader wiring fault; our OBD2 scan tool comparison covers affordable options worth having in the glovebox regardless.
Backup Camera vs. Parking Sensors
A question that comes up often once the camera is planned out is whether it is worth adding ultrasonic parking sensors alongside it, or instead of it. The two technologies solve slightly different problems and work well together rather than competing directly.
A camera gives you a direct visual of what is behind the vehicle, which is invaluable for identifying exactly what an obstacle is, whether it is a low curb, a bicycle, or a pet. Ultrasonic sensors, mounted in the bumper itself, cannot tell you what an object is, but they are excellent at giving an audible distance warning that increases in urgency as you close in on something, even something outside the camera’s exact field of view, like a post at the very corner of the bumper.
Installing both is a reasonable weekend project once you already have the bumper trim off for the camera, since the wiring principles are nearly identical: locate a switched power source, route a signal cable to the cabin, and mount a small display or buzzer. Many combination kits bundle a camera and a sensor array together specifically for this reason, sharing a single monitor for both the video feed and the distance readout.
Camera Strengths
- Shows exactly what the obstacle is
- Wide field of view captures the full rear area
- Doubles as a reversing aid and a general rear-view tool
Sensor Strengths
- Audible alerts do not require looking at a screen
- Detects narrow objects a wide camera lens can distort or miss
- Works well as a redundant backup to the camera
Long-Term Maintenance
A backup camera needs very little upkeep once properly sealed and wired, but a few habits extend its life meaningfully. Wipe the lens periodically, especially after driving on wet or muddy roads, since road grime accumulates low on the bumper faster than anywhere else on the vehicle. Check the mounting screws or adhesive after the first month, since vibration can loosen a fresh install before everything settles.
Inspect the reverse-light splice once or twice a year for corrosion, particularly if you live somewhere with road salt or heavy humidity; this pairs well with the seasonal checks in our pre-road-trip safety checklist. If you are also running a dash cam, keeping both systems on a shared maintenance schedule makes it easier to remember to check either one.
For wireless setups, keep an eye on the receiver’s power source too, since a loose 12V accessory plug is a common culprit behind a picture that intermittently disappears. If your kit runs on a small internal battery rather than a hardwired connection, mark a recurring reminder to recharge it, since a dead battery has a way of surfacing at the exact moment you need the camera most.
Seasonal temperature swings are worth watching as well. Extreme cold can make some adhesive monitor mounts brittle, while extreme heat softens the same adhesive enough to let a screen slowly droop out of position over a hot summer. A quick check every few months, similar to the routine outlined in our car emergency kit checklist, keeps small issues from turning into a full reinstall.

A thin coat on splices resists corrosion from moisture and road salt over the long run.
Check Price on AmazonFrequently Asked Questions
No advanced electrical skill is required. Basic comfort with hand tools, a bit of patience routing cable, and a willingness to test a wire before splicing it are enough for the vast majority of vehicles.
A wireless kit usually takes 45 to 75 minutes, while a fully wired kit with a long cable run to a dash monitor takes closer to 90 to 150 minutes for a first-time installer.
Yes. License-plate-frame cameras clip over your existing plate and require no drilling at all, making them a fully reversible option for renters or leased vehicles.
No, as long as you splice in cleanly with proper connectors rather than bare-wire twists. You are only drawing a small additional power signal, not altering the reverse light’s own function.
A wired camera sends video over a physical cable for a lag-free, interference-free feed, while a wireless camera transmits over radio to a receiver, cutting install time at the cost of occasional interference and slight latency.
Many factory head units include an auxiliary video input built for exactly this purpose. Check your owner’s manual or search your specific model for a rear-camera retrofit input before buying a standalone monitor.
This almost always means the power lead was spliced into a constant-power wire instead of the switched reverse-light wire. Re-test the wire with the ignition on and the vehicle shifted into reverse before re-splicing.
Most modern wireless kits use a stable digital signal that resists common interference well, though dense urban areas with many competing wireless devices can occasionally cause brief dropouts.
Yes, many trucks include a factory-molded camera pocket in the tailgate handle designed for exactly this kind of retrofit, which simplifies mounting significantly compared to drilling a new hole.
A complete silicone seal around the mounting hole is the key step. Most fogging issues come from an incomplete seal that lets moisture creep behind the lens over time.
They complement each other rather than compete. A camera shows exactly what is behind the vehicle, while sensors add audible distance alerts for objects at the edges of the frame, so combining both gives the most complete picture.
It is a good habit before making any permanent splice, even on a low-risk circuit like the reverse light. Disconnecting the negative terminal for a few minutes eliminates any chance of a stray short while you work.
Final Thoughts
A backup camera is one of the more satisfying weekend upgrades you can make to a vehicle, closing off a real blind spot with a project that costs a fraction of a shop install once you have the right tools laid out. Whether you land on a fully wired setup for maximum reliability or a wireless kit for speed and flexibility, the core sequence stays the same: plan your route, mount the camera, power it from the reverse light, connect a display, and test everything thoroughly before trusting it in daily driving.
Once your camera is in and calibrated, round out your rear-visibility setup with a look at blind spot monitoring systems or blind spot mirrors for trucks and SUVs, and keep your broader electrical toolkit stocked with the essentials from our car safety accessories roundup.
Take the same careful, test-before-you-splice approach into any future electrical project on the vehicle, and this install will end up paying dividends well beyond the camera itself: a cleaner reverse-light circuit, a better understanding of where your vehicle’s harnesses actually run, and the confidence to tackle the next upgrade without hesitation. Reversing safely is a habit built from good visibility and good judgment together, and a properly installed camera is one of the more reliable ways to strengthen the visibility half of that equation for years of driving ahead.
📷 Recommended Gear
Protect Yourself With a Quality Dashcam
A dashcam can be the only proof you need after an accident. Get one of the top-rated dashcams on Amazon and drive with confidence.
📷 Shop Top-Rated DashcamsAffiliate link — we earn a small commission that keeps DriveSafeGuide running. Thank you!