Confidence behind the wheel starts with understanding what the car is actually doing beneath you.
01Why Parallel Parking Still Trips Up Confident Drivers
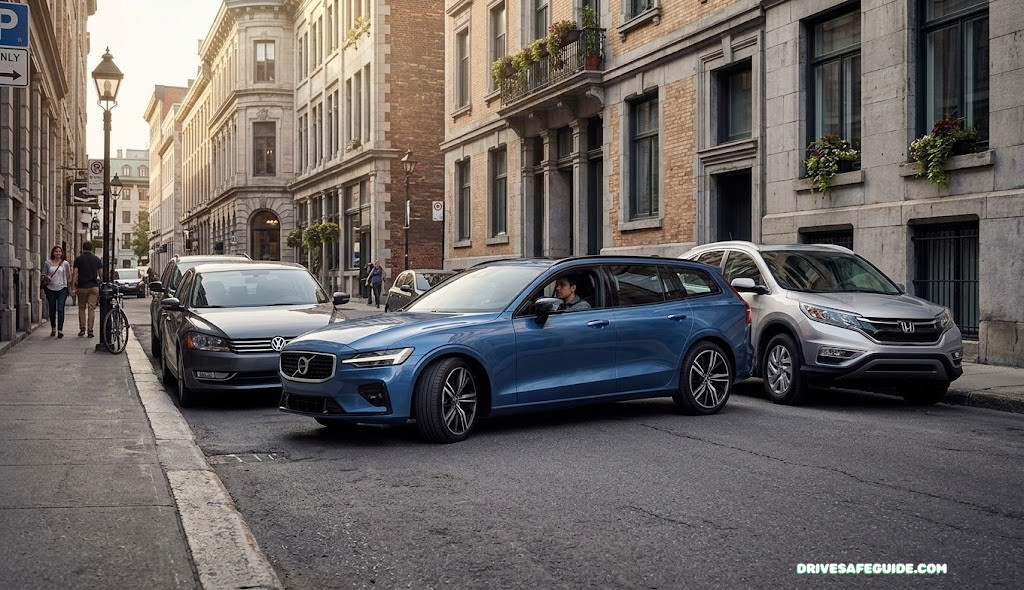
Ask a room full of licensed drivers what maneuver they still dread, and parallel parking wins almost every time. It isn’t that the physics are especially complicated — it’s that the maneuver asks you to do several unfamiliar things at once: drive in reverse, judge distances you can’t directly see, and trust a mental model of where your rear wheels are tracking rather than where your eyes are pointed. Most driving happens facing forward with wide sightlines. Parallel parking flips that script, and the brain doesn’t get nearly enough practice time with it to build real confidence.
There’s also a social pressure element that has nothing to do with skill. Pulling up next to a gap on a busy street with pedestrians and other drivers watching triggers the same performance anxiety as speaking in public. That stress narrows attention, which is exactly the wrong response when the maneuver actually rewards slow, deliberate movements and small wheel corrections. A driver who feels rushed will oversteer, stop too early, or bail out entirely and circle the block again.
The good news is that parallel parking is one of the most teachable skills in driving precisely because it’s mechanical. Once you understand the reference points your car gives you — mirror lines, window edges, the angle of the adjacent car — the maneuver becomes a repeatable sequence rather than a guessing game. This guide breaks that sequence into its component parts, the same way flight instructors break a landing into distinct phases, so each phase can be practiced and corrected on its own before you chain them together.
If you’re a parent coaching a new driver through this exact anxiety, our guide on teaching teen drivers without turning practice into a fight covers how to keep these early sessions calm and productive.
Part of the difficulty is also cultural. Many drivers grew up in suburban or rural areas where perpendicular parking lots are the norm, and their first real exposure to curbside parallel parking happens on a busy downtown street with cars stacked bumper to bumper. Without a gradual on-ramp — an empty lot, a quiet side street, a patient instructor — the first attempt at the real thing tends to happen under exactly the conditions least forgiving of a learning curve. That mismatch between where the skill is usually needed and where it’s usually practiced is a big part of why so many otherwise capable drivers avoid parallel spots entirely and circle the block looking for an easier pull-in space instead.
It’s also worth naming the emotional side of this honestly. Feeling nervous before a parallel parking attempt doesn’t mean something is wrong with your driving ability; it means your nervous system is responding normally to an unfamiliar, socially visible task. Drivers who treat the nerves as information — “I’m rushing, so let me slow down” — tend to improve far faster than drivers who try to white-knuckle through the anxiety and end up making rushed, imprecise wheel inputs as a result.
02The Geometry Behind a Perfect Parallel Park
Every car pivots around its rear axle when reversing, which means the front of the car swings out in a wider arc than the back. That single fact explains almost every parallel parking rule you’ve ever been taught. When you turn the wheel while backing up, the rear of the car moves toward the curb along a tighter curve, while the nose swings away from the curb in the opposite direction. Understanding this pivot point is the difference between “following steps” and actually understanding why the steps work.
The other geometric reality worth internalizing is spot length. Most parking research and driver’s manuals suggest a comfortable parallel spot needs to be roughly one and a half car lengths for an average sedan, though skilled drivers can work with less. Anything shorter than one full car length beyond your own vehicle usually isn’t a legal or safe attempt, no matter how good your technique is — recognizing an unworkable spot before you commit to it saves you from a frustrating, half-finished maneuver in traffic.
Finally, consider the “pivot points” your car offers you as a driver: your rearview mirror line, the point where your side mirror aligns with the rear bumper of the car ahead of the spot, and the angle at which the adjacent car’s rear window appears in your own rear window. These become your instruments. Just as pilots trust altimeters over their gut feeling of altitude, parallel parkers should trust these visual reference points over a vague sense of “that looks about right.”
It also helps to understand why the 45-degree angle shows up so consistently across driving curricula. At roughly 45 degrees, your car’s rear corner has swung close enough to the curb that continuing to reverse in a straight line will carry it the rest of the way in without the front end needing to travel through an awkward secondary arc. Angles much shallower than 45 degrees leave your rear end too far from the curb when you straighten out; angles much steeper risk your front bumper clipping the car ahead before you’ve cleared it. The number isn’t arbitrary — it’s close to the geometric sweet spot for a typical passenger car’s turning radius relative to an average spot length.
Wheelbase length changes this math slightly but not the underlying principle. A car with a longer wheelbase, like a full-size sedan or a three-row SUV, has a wider turning circle, which means the same steering input produces a gentler arc. Drivers moving between very different vehicle sizes often notice that their old timing “feels off” in the new car — that’s not a coincidence, it’s physics, and it’s exactly why the reference-point method (based on what you see, not a memorized count of seconds) transfers so much better between vehicles than a rigid, one-size-fits-all script.
03Pre-Parking Checklist: Setting Yourself Up for Success
Most failed parallel parking attempts are decided before the car ever starts reversing. A rushed approach, a bad starting position, or an unchecked mirror creates problems that no amount of mid-maneuver correction can fully fix. Run through this short checklist every time:
| Checklist Item | Why It Matters |
|---|---|
| Signal your intent early | Gives following traffic time to react instead of braking suddenly behind you |
| Confirm the spot is legal and long enough | Avoids fines and prevents an impossible maneuver from the start |
| Check mirrors and blind spot before slowing | Prevents rear-end collisions from traffic that didn’t expect you to stop |
| Position parallel to the car ahead of the spot, about two feet out | Establishes the exact starting geometry the rest of the maneuver depends on |
| Shift to reverse only once fully stopped | Protects the transmission and gives you a clean, controlled start point |
Drivers who skip the “confirm the spot is legal and long enough” step are also the ones most likely to end up parked too close to a fire hydrant or crosswalk without realizing it. If you want a broader refresher on positioning fundamentals before you specialize in this one maneuver, our core safe driving habits guide is a useful companion read.
It’s also worth building a habit of scanning for hazards specific to the block you’re on, not just the spot itself. A driveway a few feet behind the gap, a bus stop sign partially hidden behind foliage, or a slight downhill grade toward an intersection can all turn an otherwise textbook parking spot into a poor choice. Spend the extra five seconds looking at the full context of the curb, not just the two cars bracketing the gap, before you commit to the approach.
Finally, resist the urge to slow down gradually as you approach the spot from a distance. A long, creeping approach actually confuses following traffic more than a normal speed followed by a clean, decisive stop alongside the car ahead of the gap. Drive at a normal, confident pace until you reach your starting alignment point, signal clearly, and then slow deliberately for the maneuver itself.

Add a Parking Sensor Kit for Extra Confidence
Audible distance alerts take the guesswork out of judging how close you are to the car behind you while you learn.
Check Prices on Amazon04Step-by-Step: The Classic Parallel Parking Method
This is the sequence taught in most driving schools because it relies on visual reference points rather than exact measurements, which makes it work across different cars and different-sized gaps. Go slowly through each phase the first several times you practice — speed comes naturally once the sequence is automatic.
Treat each step below as a discrete checkpoint rather than part of one continuous motion. Experienced instructors often have students pause briefly at the end of each phase during early practice — literally stopping the car — specifically to build the habit of confirming one reference point before moving to the next, rather than trying to steer and self-correct simultaneously. Once the sequence feels familiar, those pauses naturally shrink and the whole maneuver flows together smoothly.
Step 1 — Pull Alongside and Align
Stop parallel to the car in front of the empty spot, leaving about two feet of space between your doors and theirs. Your rear bumper should sit roughly even with theirs. This starting alignment sets up every reference point you’ll use later, so don’t rush it. If you’re too far away, later reference points won’t line up correctly; if you’re too close, you risk your side mirrors clipping the other vehicle as you pass.
Step 2 — Check Traffic and Shift into Reverse
Check your mirrors and glance over your shoulder for cyclists or pedestrians approaching from behind. Once clear, shift into reverse and settle your hands at a relaxed position on the wheel — the classic 9-and-3 grip gives you the smoothest control for the small corrections coming up. A relaxed grip also makes it easier to feel small amounts of resistance in the wheel, which is useful feedback on tight or uneven pavement.
Step 3 — Begin Reversing and Turn the Wheel Toward the Curb
Ease backward slowly. As soon as your rear bumper passes roughly even with the rear bumper of the car ahead, turn the steering wheel a full turn toward the curb. This starts the pivot that angles your car into the spot at roughly 45 degrees. Turning too early here is the single most common cause of a rear tire striking the curb later in the maneuver, so wait for the actual reference point rather than guessing by feel.
Step 4 — Straighten the Wheel Once at the 45-Degree Point
When your car reaches roughly a 45-degree angle to the curb — and your front passenger side mirror lines up with the rear bumper of the car ahead — straighten your wheels and continue reversing in a straight line. This carries your rear end further into the spot without over-rotating. Take a quick glance forward here too, confirming your nose still has clearance from the car ahead before continuing to reverse.
Step 5 — Turn the Wheel Away from the Curb to Straighten the Car
Once your front bumper has cleared the rear bumper of the car ahead, turn the wheel fully in the opposite direction. This swings your front end in toward the curb, straightening your car parallel within the spot. Continue reversing slowly and check both mirrors continuously. This is the phase where most of the remaining risk sits, since your front end is now swinging toward the car ahead even as your rear end moves toward the curb.
Step 6 — Center the Car and Confirm Distance from the Curb
Straighten the wheel completely and make small forward-and-back adjustments to center your car between the two vehicles. Aim for six to twelve inches from the curb — close enough to be legal in most areas, far enough that a tire won’t scrape. Shift into park, engage the parking brake on a hill, and confirm your wheels are angled correctly if you’re on a slope. Don’t skip this centering step even if the car already looks parked — a few small adjustments here are what separate a technically finished attempt from a genuinely well-executed one.
Chain these six phases together slowly a few times and the timing becomes intuitive. If you stall at any point in a manual transmission car, our guide to fixing manual transmission stalling walks through the clutch control that keeps a stall from turning into a panic.
05Reading Your Mirrors and Blind Spots Like a Pro
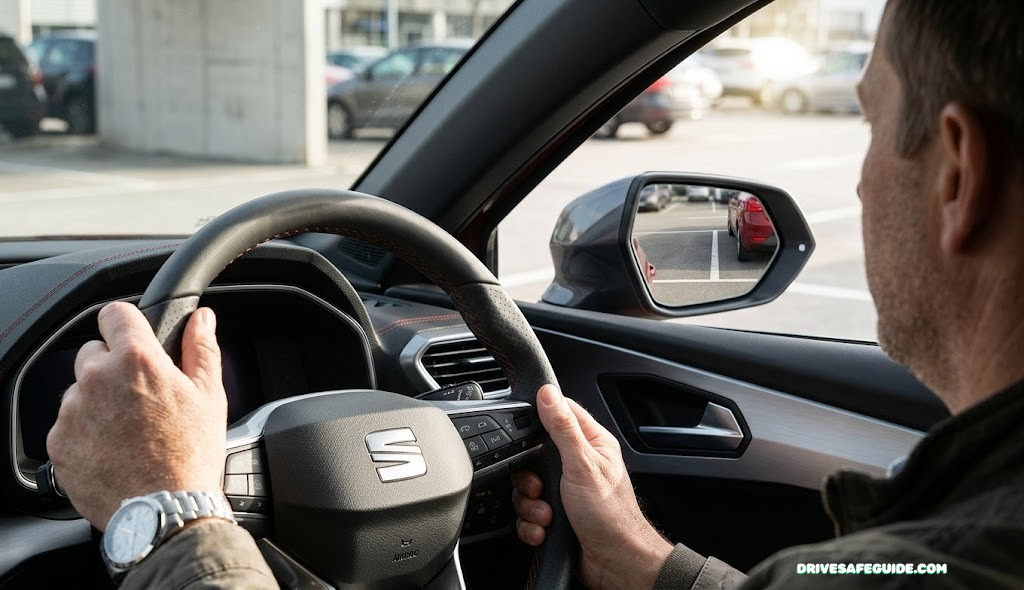
Mirrors are doing more work in parallel parking than in almost any other driving scenario, and drivers who rely on them poorly are the ones who scrape curbs or misjudge the car behind them. Your side mirrors should be angled slightly downward and outward during a parking maneuver — many drivers keep them set for highway driving, which shows too much sky and too little curb.
Your rearview mirror tells you about traffic and cyclists approaching from behind, while a quick shoulder check confirms what the mirror can’t show in the blind spot directly behind your rear pillar. Because parking maneuvers happen at low speed, a two-second glance costs you almost nothing but prevents the most common parking-lot collision: backing into a pedestrian or cyclist who wasn’t visible in the mirror.
If you drive a taller vehicle like an SUV or pickup, blind spots behind and beside the vehicle are considerably larger, and mirrors alone often aren’t enough. Our breakdown of blind spot mirrors for trucks and SUVs covers add-on options that meaningfully shrink that unseen zone.
A practical habit worth building is the “triangle scan” — a repeating loop between your rearview mirror, your side mirror on the curb side, and a quick forward glance to confirm nose clearance, repeated every few seconds throughout the maneuver rather than checked once at the start. This keeps your situational picture current as your car’s angle changes, instead of relying on an initial assessment that may no longer be accurate a few seconds into the reverse.
06Common Mistakes That Ruin an Otherwise Good Attempt
Most parallel parking failures trace back to one of a handful of repeatable errors. Recognizing them in the moment is often enough to self-correct before the attempt falls apart.
Mistakes to Watch For
- Starting too far or too close to the car ahead of the spot
- Turning the wheel too early, before reaching the reference point
- Reversing too fast to make small corrections
- Forgetting to check the front swing of the vehicle’s nose
- Giving up and re-pulling forward without resetting the starting position
Fixes That Actually Work
- Reset to the starting position rather than trying to “fix it” mid-maneuver
- Use mirror alignment points, not guesswork, to time your wheel turns
- Keep speed at a slow idle-roll pace throughout
- Glance forward periodically to confirm nose clearance
- Treat a restart as normal — even experienced drivers reset once in a while
One frequently overlooked mistake is misjudging a spot that simply isn’t long enough, then blaming technique for what was really a spatial problem. If you’re unsure whether a maneuver ever went instant-fail territory on an actual test, our article on instant-fail driving test mistakes lists the exact errors examiners are trained to flag.
It’s worth adding that watching for these mistakes isn’t about achieving a flawless first attempt — it’s about building a mental checklist that catches errors early enough to correct them mid-maneuver instead of discovering them only after the car is already stopped in a bad position. A driver who notices “I’m turning too early” halfway through Step 3 and eases off the wheel is demonstrating exactly the kind of self-correction that separates a developing skill from a stuck one.
Another subtle mistake worth naming is task-stacking under pressure — trying to check mirrors, manage pedal pressure, and steer precisely all at once while a line of cars waits behind you. Skilled drivers sequence these tasks rather than trying to do them simultaneously: check, then move; glance, then adjust. Breaking the maneuver into discrete micro-tasks, the same way this guide breaks it into six macro-steps, reduces the cognitive load enough that each individual action gets done properly instead of half-attended.
Finally, plenty of otherwise good attempts fall apart in the last few seconds simply because the driver stops checking once the car “looks” parked, without confirming the final position is actually centered and appropriately close to the curb. Treat the centering adjustment in Step 6 as a required part of the sequence, not an optional polish step — it’s often the difference between a technically legal park and one that leaves your car awkwardly angled or too far from the curb.

Shrink Your Blind Spot Before Your Next Attempt
Small convex mirrors mounted on your existing side mirrors widen your field of view without replacing anything.
Check Prices on Amazon07Parking Different Vehicle Types
The classic method scales to almost any vehicle, but the reference points and required space shift depending on what you’re driving. Longer wheelbases need a longer spot; taller vehicles change your sightlines; wider vehicles reduce your margin of error against the curb.
| Vehicle Type | Typical Spot Length Needed | Key Adjustment |
|---|---|---|
| Compact Sedan | ~1.3x car length | Standard classic method works with minimal adjustment |
| Midsize SUV | ~1.5x car length | Higher seating position changes mirror alignment timing slightly |
| Pickup Truck | ~1.6–1.8x car length | Longer bed means the rear swing timing happens later than expected |
| Electric Sedan/Crossover | ~1.3–1.5x car length | Instant torque means smaller throttle inputs; many models add automatic parking sensors as standard |
Drivers moving from a compact car to a larger SUV or truck often say the hardest adjustment isn’t the parking maneuver itself but recalibrating a mental sense of where the vehicle’s corners actually are. Spending a few sessions in an empty lot with cones, described later in this guide, resolves that faster than reading about it.
If range anxiety in an EV is adding extra stress to your driving in general, our guide to managing EV range anxiety can help you separate that concern from the parking maneuver itself.
Trailers and towed vehicles deserve a special note here: parallel parking with anything attached behind your vehicle essentially requires abandoning the standard reverse-and-pivot method altogether, since the trailer’s own pivot point sits behind your rear axle rather than at it. Most drivers towing anything larger than a small utility trailer are better served finding a pull-through spot or an end-of-block space that doesn’t require a true parallel reverse. If towing is a regular part of your driving, our explainer on trailer hitch classes is a useful complement to this guide, since hitch type also affects how predictably a trailer tracks at low speed.
08Sensors, Cameras, and Assist Technology
Modern parking technology ranges from simple audible sensors to fully automated self-parking systems. None of it replaces understanding the underlying maneuver, but it meaningfully reduces the margin for error while you’re building confidence — or on a genuinely tight spot even experienced drivers find stressful.
Advantages of Parking Assist Tech
- Reduces curb strikes and low-speed collisions during learning
- Backup cameras remove almost all rear blind spot guesswork
- Some systems can fully automate steering while you control the pedals
- Sensor beeping reinforces spatial awareness over time, building better instincts
Limitations to Keep in Mind
- Sensors can miss thin objects like bike racks or low bollards
- Over-reliance can slow the development of manual spatial judgment
- Automated parking systems still require you to judge if the spot is legal and safe
- Aftermarket sensor kits vary widely in accuracy and installation quality
A well-installed backup camera is one of the highest-value additions for new drivers specifically because it addresses the single biggest blind spot in the entire maneuver. If your vehicle doesn’t have one built in, our backup camera installation guide and our comparison on how to choose the right backup camera both walk through the options in detail.
Dash cams with wide-angle rear coverage can double as informal parking aids in low-light conditions too — see our roundup of the best 4K dash cams for night driving for models with strong low-light sensors.
Cost and installation complexity vary widely across this category, and it’s worth matching the tool to the actual problem rather than buying the most feature-rich option available. A driver who mainly struggles with judging distance to the car behind them gets most of the benefit from a simple sensor kit at a fraction of the cost and installation time of a full camera and monitor system. Conversely, a driver who has trouble with the entire spatial picture — not just distance, but angle and alignment — tends to benefit more from a camera that shows an actual image rather than just a beeping proximity warning. Being honest about which specific part of the maneuver feels hardest helps avoid overspending on capability you won’t use.
It’s also worth noting that many mid-range and newer vehicles already include some level of parking assistance from the factory, ranging from basic rear sensors to semi-automated steering systems that handle the wheel while the driver controls speed. If your vehicle already has this built in, it’s worth spending a low-stakes session in an empty lot specifically learning how the system behaves — its limitations, its typical error margins, and situations where it hands control back to you — rather than discovering those details for the first time in a real parking situation.
09Parallel Parking in Difficult Conditions
The classic method assumes flat, dry pavement and daylight. Real-world parking is rarely that cooperative, and each added variable — rain, darkness, a hill, or a tighter-than-usual gap — asks for a small adjustment to the base technique rather than an entirely different approach. The underlying sequence of steps doesn’t change; what changes is your margin for error and how much you should slow down to compensate for it.
A useful general rule across all of the conditions below: whenever visibility, traction, or space is reduced, slow the entire maneuver down rather than trying to adjust the steering technique itself. Speed is the one variable you have full control over at every stage, and it’s almost always the safest lever to pull when conditions get harder.
Parking on a Hill
Gravity changes how your car responds during a low-speed reverse. On an uphill spot facing away from the curb, expect slightly more roll-back before the brakes catch; feather them earlier than you would on flat ground. Once parked, turn your wheels toward the curb on a downhill grade and away from the curb on an uphill grade so a failed parking brake would roll the car into the curb rather than into traffic.
Parking at Night
Reduced visibility makes your mirror reference points harder to read precisely, and other drivers may not see your brake lights as clearly through a rain-streaked or foggy rear window. Slow down further than you would in daylight and rely more heavily on a backup camera if you have one. Our night driving safety checklist covers headlight and visibility habits that carry over directly into low-light parking.
Parking in Rain
Wet pavement doesn’t change the geometry of the maneuver, but it does reduce tire grip and can make gentle braking feel less predictable. Reduce your reversing speed even further and give yourself a slightly larger buffer from the curb and the surrounding cars. See our guide on rain driving safety for related habits, and if temperatures are near freezing, our black ice survival guide is worth reviewing before you park at all.
Tight Urban Spots and High Wind
In dense downtown areas, spots often sit right at the minimum legal length, leaving very little room for error and even less room to reset if an attempt goes wrong. In these situations, a slower, more deliberate version of the classic method — with extra pauses to confirm each reference point before continuing — outperforms a faster attempt every time. Don’t hesitate to wave a following driver around you if you need extra time; most drivers understand and appreciate the signal rather than reading it as rudeness.
High wind, particularly with a tall vehicle like an SUV or a car with a roof-mounted cargo carrier, can push the vehicle slightly off its intended arc mid-maneuver. This is rarely dramatic at the low speeds involved in parking, but it’s worth a small steering correction rather than ignoring the drift and hoping the final position works out. If you’re managing a loaded roof rack regularly, our guide on rooftop cargo carrier safety covers handling considerations that extend beyond parking alone.

See What Your Mirrors Can’t
A wireless backup camera kit installs in under an hour and removes almost all of the rear blind spot guesswork.
Check Prices on Amazon10Practicing at Home: Drills and Cone Setups
You don’t need a driving instructor or a busy street to build real parallel parking skill. An empty parking lot on a weekend morning, two traffic cones (or two stacked cardboard boxes), and twenty minutes are enough to build the muscle memory that street practice alone often can’t, simply because there’s no traffic pressure forcing you to rush.
The Two-Cone Drill
Set two cones roughly one and a half car lengths apart to simulate a parking spot. Practice the full six-step sequence from this guide repeatedly, resetting to the starting position each time rather than trying to fix a bad attempt mid-maneuver. Gradually shrink the gap between cones as your accuracy improves, down to a realistic one-car-length-plus-buffer distance.
The Reference Point Drill
Without any cones at all, park next to a painted line or curb edge repeatedly, focusing only on identifying your mirror alignment points — the exact moment the adjacent car’s bumper appears in your side mirror. This builds the visual pattern recognition that makes the full maneuver feel automatic rather than counted-out step by step.
The Timed Reset Drill
Once the basic sequence feels comfortable, add a light time pressure element by having a friend count down from thirty seconds as you complete a full attempt from the starting position to a centered, straightened final position. This isn’t about rushing the steps — it’s about building comfort with the mild social pressure of a “real” parking scenario without the added stakes of actual traffic or an examiner watching. Most drivers find that once they can complete a clean attempt under light time pressure in an empty lot, the real-world version feels significantly less intimidating.
Consider keeping a short log after each practice session — noting which step felt shaky, whether you turned the wheel too early or too late, and how close your final position ended up to the curb. Reviewing that log after four or five sessions usually reveals a single recurring weak point, which is far more useful to focus on than trying to improve everything at once.
New drivers benefit enormously from combining this kind of deliberate practice with a broader curriculum. If you’re comparing structured options, our review of online driver’s ed programs and our set of permit test practice questions both pair well with hands-on cone drills.
11Parallel Parking on the Driving Test: What Examiners Look For
Examiners generally aren’t grading for a perfectly centered, curb-hugging park on the first attempt — they’re grading for control, awareness, and safety margins. A slightly wide or slightly close final position often still passes if the driver demonstrated good mirror checks, smooth speed control, and no contact with either vehicle or the curb.
| Examiner Priority | What Counts Against You |
|---|---|
| Traffic awareness | Failing to signal or check mirrors before starting the maneuver |
| Vehicle control | Excessive speed, harsh braking, or repeated stalling |
| Contact avoidance | Touching the curb or either adjacent vehicle, even lightly |
| Final position | Being too far from the curb (often over 18 inches) or at a noticeable angle |
| Number of attempts | Most jurisdictions allow a limited number of corrections before it counts against the score |
It’s worth remembering that examiners see hundreds of nervous first attempts and are trained to distinguish “still learning” from “unsafe.” A calm, correctable mistake reads very differently than a rushed one. For a full picture of what tends to fail a test outright, our instant-fail mistakes guide is worth reading alongside this one, and if test-day nerves are the bigger obstacle than the maneuver itself, our piece on managing driving anxiety addresses that directly.
One detail many test-takers overlook is that examiners are usually watching your mirror and shoulder checks just as closely as your final position. A technically perfect park that skipped an observable safety check often scores worse than a slightly imperfect one where every check was visibly performed. Narrating your checks silently to yourself — mentally noting “mirror, shoulder, clear” — helps ensure they happen in the moment rather than being skipped under stress, and it also happens to make those checks more visible to an observing examiner.
If your test route is known to include a specific parallel parking zone, it’s worth practicing in a visually similar setting beforehand — similar curb height, similar street width — so the actual test spot doesn’t introduce any unfamiliar variables on top of the pressure of being evaluated. Familiarity with the general environment frees up mental bandwidth for the maneuver itself.
12Tools and Accessories That Make Parking Easier
Beyond built-in vehicle technology, a handful of low-cost accessories consistently make a real difference for drivers who are still building parallel parking confidence.
| Accessory | Best For | Rough Price Range |
|---|---|---|
| Aftermarket rear parking sensors | Any vehicle without factory sensors | $ |
| Convex blind spot mirrors | SUVs, trucks, and any vehicle with large rear pillars | $ |
| Wireless backup camera kit | Older vehicles or those without a built-in screen | $$ |
| Dash cam with rear channel | Documenting close calls and adding a secondary rear view | $$ |
If you’re outfitting a car for a new driver in the household, our broader roundup of car safety accessories and our gift guide for new car owners both include several items that pair naturally with a parking-focused setup.
Beyond electronics, a few low-tech accessories are worth mentioning because they solve real, common problems for less money than any sensor kit. A set of bright, collapsible traffic cones makes home practice sessions dramatically more realistic than improvised markers like water bottles, which are too small to register as a reliable visual reference from the driver’s seat. A small tape measure or marked stick kept in the glove box also lets new drivers confirm, at least during early practice, exactly how far their final position actually sits from the curb — building an accurate internal sense of distance that eventually replaces the need to measure at all.
For families managing multiple new drivers in the household at once, it’s often more cost-effective to invest in one shared set of practice equipment — cones, a portable tire gauge, a basic sensor kit that can be moved between cars — rather than duplicating gear for every vehicle. Our practical gifts for teen drivers guide has additional ideas along these lines if you’re building out a first-car kit from scratch.

Add a Rear-Facing Dash Cam
A dual-channel dash cam gives you a recorded rear view during practice sessions and everyday driving alike.
Check Prices on AmazonFAQFrequently Asked Questions
How many inches from the curb should I park?
Most jurisdictions consider anything under 18 inches acceptable, though 6 to 12 inches is a common practical target. Check local rules, since some cities specify an exact maximum distance.
Is it okay to take more than one attempt?
Yes. Resetting to your starting position and trying again is normal driving behavior and, on most driving tests, doesn’t automatically fail you as long as it’s done safely and without excessive attempts.
Why does my car’s front end swing out so much?
Because the car pivots around its rear axle in reverse, the front end travels a wider arc than the back. This is normal and is exactly why checking your front clearance during the maneuver matters.
What’s the minimum spot length I need?
A gap of roughly one and a half times your car’s length gives comfortable room for most drivers. Shorter gaps are possible with practice but leave much less margin for error.
Should I use my mirrors or turn around and look?
Both. Mirrors give you a continuous view of distance and angle, while a shoulder check covers the blind spot directly behind your rear pillar that mirrors can’t show.
Does parallel parking work the same way in an automatic and a manual car?
The steering sequence is identical. The main difference is pedal control — manual drivers need to manage the clutch carefully to avoid stalling mid-maneuver, especially on a hill.
Are self-parking systems reliable enough to trust completely?
They’re generally reliable in ideal conditions but still require the driver to judge whether a spot is legal, safe, and appropriately sized. Treat them as an assist, not a replacement for attention.
Why do I keep hitting the curb with my rear tire?
This usually means the wheel was turned toward the curb too early or too sharply in Step 3. Practicing the mirror alignment reference point helps time that turn more precisely.
Is parallel parking harder in an SUV or truck than a sedan?
It requires a larger spot and slightly different timing due to a longer wheelbase and higher seating position, but the underlying technique is the same.
How can I practice without risking hitting a real car?
Use cones, boxes, or painted lines in an empty lot to simulate the spot dimensions before practicing on an actual street with parked vehicles.
What should I do if I can’t complete the maneuver at all?
Pull forward, reset to your original starting position next to the car ahead of the spot, and begin again slowly. Rushing a failed attempt almost always makes it worse.
Do parking sensors replace the need to learn the manual technique?
No. Sensors and cameras reduce risk while you’re building skill, but understanding the underlying geometry is what lets you park confidently in a spot without any assist technology at all.
Parallel Parking Is a Sequence, Not a Talent
The drivers who parallel park smoothly aren’t naturally gifted with better spatial reasoning — they’ve simply run the sequence enough times that the reference points became automatic. Break the maneuver into its six phases, practice them slowly and deliberately, and give yourself permission to reset when an attempt goes sideways. That’s the entire skill.
For more habits that make everyday driving calmer and more predictable, explore our full library of guides on defensive driving habits and core safe driving fundamentals.
Give yourself permission to be imperfect on the first several real attempts. A wide first try, a restart in front of traffic, a slightly crooked final position — none of that is a verdict on your ability behind the wheel. It’s simply the normal, unglamorous process of building a new physical skill, and it gets easier every single time you run through the sequence, whether that’s in an empty parking lot on a Sunday morning or on a crowded street downtown.
Shop Parking Assist Gear on Amazon🚗 Recommended for Drivers
Drive Safer Every Day
Explore our top picks for car safety gear — from dashcams to emergency kits — all hand-picked to help you stay safe on the road.
🚗 Shop Car Safety EssentialsAffiliate link — we earn a small commission that keeps DriveSafeGuide running. Thank you!