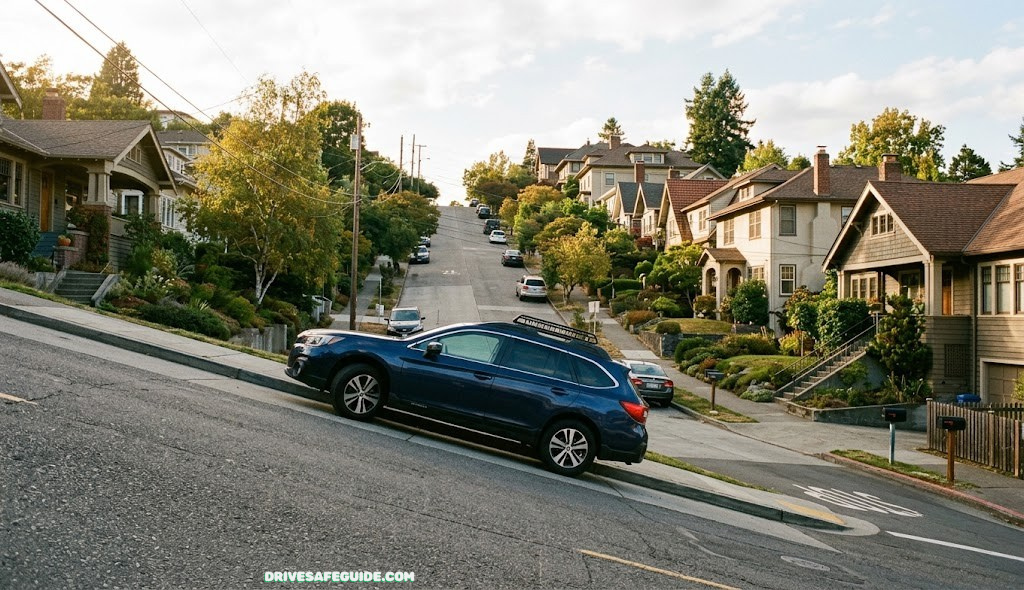
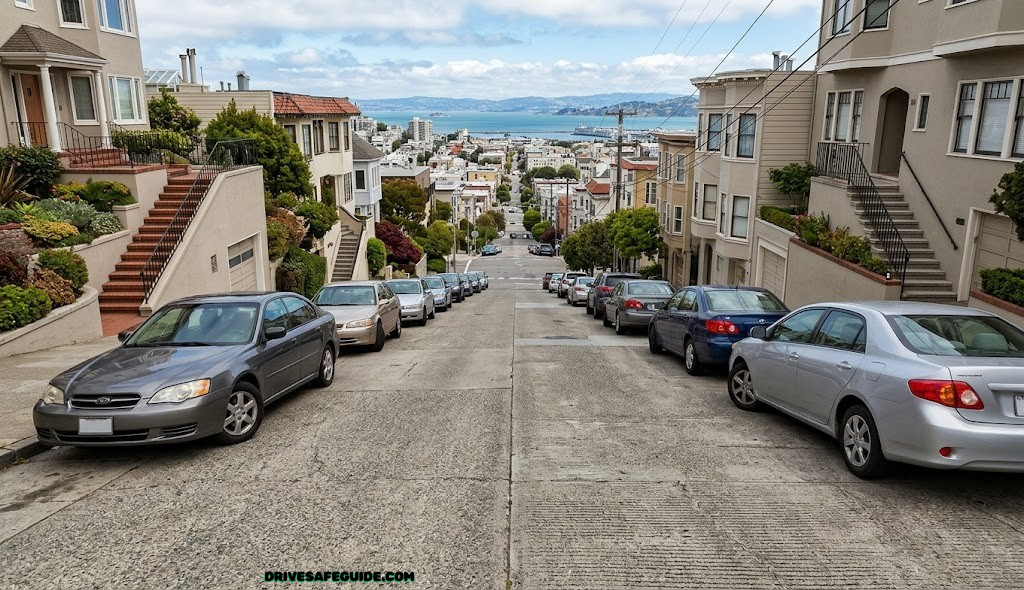
There’s a specific half-second every driver dreads: stopped on an incline, light turns green, and the car rolls backward before it rolls forward. It’s the moment hill starts are built around, and it’s almost entirely preventable once you understand what’s actually happening between your foot leaving the brake and the engine taking over.
This guide covers every method for eliminating that rollback — manual bite-point control, the classic handbrake launch, automatic transmission creep, and electronic hill-hold assist — along with the specific grades, loads, and weather conditions that change the technique.
What Rollback Actually Is
Rollback is the brief backward movement a vehicle makes on an incline in the gap between releasing the brake and the drivetrain producing enough forward force to overcome gravity. It isn’t a malfunction — it’s physics doing exactly what physics does whenever a force pulling the car downhill briefly exceeds the force pushing it forward. The goal of every technique in this guide is the same: shrink that gap to zero, or replace it with something other than gravity.
On a flat road, releasing the brake and applying the throttle happens in whatever order feels natural, because there’s no competing force to manage. On a grade, the sequence matters enormously. Release the brake a half-second too early, before the engine and clutch (or torque converter) have built enough force, and the car rolls back. Release it too late, holding the brake while trying to build power, and you stall a manual or lurch an automatic. The techniques below exist to remove that timing problem entirely.
If you’re working through a full road-test curriculum, this maneuver typically shows up alongside the three-point turn and parallel parking as one of the three low-speed control maneuvers examiners look for.
It’s worth being precise about what counts as rollback and what doesn’t. A car settling slightly as weight shifts when you release the footbrake — a small, momentary dip felt through the suspension — isn’t the same thing as the vehicle actually traveling backward. True rollback is measurable distance: the car moving several inches, sometimes more, in the wrong direction before forward motion takes over. That distinction matters both for self-assessment during practice and for understanding what a driving examiner is actually watching for, which is movement, not sensation.
Rollback also isn’t unique to any one type of vehicle or transmission. Automatics, manuals, front-wheel drive, rear-wheel drive, and all-wheel drive vehicles are all subject to the same basic physics — gravity doesn’t check what’s under the hood. What differs between them is which specific technique addresses the gap most naturally, which is exactly why this guide covers manual, automatic, handbrake, and electronic methods separately rather than treating hill starts as a single universal procedure.
The Physics: Gravity vs. Your Powertrain
Every incline exerts a backward force on a stationary vehicle proportional to its grade — the steepness, usually expressed as a percentage, where a 10% grade means the road rises 10 feet for every 100 feet traveled. A steeper grade means a larger backward force, which means your powertrain needs to produce proportionally more forward force in the same instant the brake releases.
Fig. 1 — Gravity pulls the vehicle downhill; the powertrain must exceed that force before the brake releases
Vehicle weight adds another variable. A heavier vehicle, or a lighter one carrying a full load or towing a trailer, has more mass for gravity to act on, which means more force is needed to counter it. This is part of why the same hill that’s a non-event in an empty sedan can produce a noticeable rollback in a loaded pickup or a van full of passengers — the grade hasn’t changed, but the force needed to beat it has gone up.
None of the techniques in this guide change the physics. What they change is how the driver manages the gap: some replace the brake’s holding force with something else before releasing it (the handbrake method, hill-hold assist), and some simply get the powertrain to peak force fast enough that the gap closes before gravity has time to act (the bite-point method).
It helps to think about the gap in terms of time rather than distance. On a moderate grade, the window where rollback can occur is typically well under a second — but a second is a surprisingly long time for a car in neutral-equivalent force balance to travel backward, especially on a steep incline where the backward acceleration is higher. That’s the entire reason technique matters here in a way it doesn’t on flat ground: you’re not avoiding a mistake so much as you’re managing a physical window that exists whether you’re prepared for it or not.
Road surface also factors into the practical force balance, separate from grade itself. A rough or gravel-strewn incline has more rolling resistance than smooth, well-maintained pavement, which very slightly reduces how easily the car rolls backward — not enough to change your technique, but enough that the same nominal grade can feel different depending on where you’re actually stopped. This is one more reason bite-point timing benefits from being a genuine feel rather than a memorized number of RPM or pedal position; the exact force needed shifts slightly with surface, tire condition, and vehicle load every time.

Confirm Your Hill-Hold Assist Is Working
If you suspect your vehicle’s electronic hill-hold system isn’t engaging, a basic OBD2 scanner can read the relevant sensor and fault codes in minutes.
Check Price on AmazonManual Technique: Finding the Bite Point
The bite point — also called the friction point or biting point — is the narrow range of clutch pedal travel where the clutch plates begin transferring engine power to the wheels, without being fully engaged. Finding it precisely, and holding it steady while adding throttle, is the core skill behind a rollback-free manual hill start.
Locate the Bite Point Stationary
With the parking brake on and the car in first gear, slowly release the clutch pedal while listening and feeling for the engine note to change slightly and the car to nudge forward against the brake. That point — not fully up, not fully down — is your bite point. Practice finding it repeatedly until it’s a feel, not a guess.
Hold the Bite Point While Adding Throttle
Once you feel the bite point, hold the clutch pedal steady at that exact position and begin gently adding gas with your right foot, raising the engine RPM slightly above idle. The car should start to strain forward against the footbrake or handbrake.
Release the Brake Only Once Forward Force Is Established
With the clutch held at the bite point and light throttle applied, release the brake. If the bite point and throttle are correctly balanced, the car moves forward immediately with no backward roll. Continue easing the clutch up smoothly as the car gains momentum.
Fig. 2 — The bite point occupies a narrow band within the full clutch pedal travel
This is a skill that genuinely improves with repetition, and stalling while learning it is normal — see the troubleshooting section below and our dedicated guide to fixing manual transmission stalling if it’s happening consistently rather than occasionally.
Every clutch has a slightly different bite point location and feel, which is why this technique resists being taught purely through numbers or verbal description — a driver switching between two different manual vehicles, even the same make and model, often needs a few minutes to recalibrate. Rather than memorizing “release to roughly this height,” build a habit of finding the bite point fresh at the start of every drive in an unfamiliar vehicle, the same way you’d adjust mirrors before pulling away.
A common refinement once the basic bite point is comfortable: adding a small amount of extra RPM on steeper grades before releasing the brake. A slightly higher idle — achieved through a bit more throttle while still holding the clutch at bite point — gives the engine more reserve force to draw on the instant the brake releases, which matters more as grade increases. On a gentle grade this extra throttle is unnecessary and can even cause a jerky launch; matching throttle to the actual steepness in front of you, rather than using the same input every time, is what separates a smooth hill start from a merely adequate one.
Automatic Transmission Technique
Automatic transmissions make hill starts meaningfully easier, but they don’t eliminate rollback automatically — the torque converter still needs a moment to build enough force, and on a steep enough grade an automatic can roll back too if the driver transitions from brake to throttle too slowly.
| Grade | Typical Automatic Behavior | Driver Action Needed |
|---|---|---|
| Under 5% | Idle creep alone often holds position briefly | Smooth brake-to-gas transition |
| 5–10% | Noticeable roll if brake is released before throttle is applied | Overlap brake release with gentle throttle |
| 10%+ | Rollback likely without deliberate technique | Use hill-hold assist or the handbrake method below |
The core automatic technique is an overlap, not a handoff: begin easing onto the accelerator while your other foot is still lightly on the brake, feel the car strain forward against the brake, then release the brake smoothly as you continue adding throttle. The two pedals should briefly share the job, rather than one cleanly replacing the other.
The Handbrake Launch Method
The handbrake — or parking brake — method is the traditional technique taught before hill-hold assist became common, and it still works on any vehicle with a manual parking brake, regardless of transmission type. It replaces the footbrake’s holding force with the parking brake’s, freeing your right foot to manage the accelerator without any overlap timing at all.
Set the Handbrake While Stopped
With the vehicle stopped on the incline and the footbrake still applied, pull the parking brake firmly. Confirm the car holds its position with the parking brake alone before releasing the footbrake.
Bring the Powertrain to Bite Point / Light Throttle
Manual: find the clutch bite point as described above. Automatic: apply light, steady throttle. In both cases, the parking brake — not your foot — is what’s holding the car in place during this step.
Release the Handbrake as Forward Force Builds
Once you feel the car straining forward against the parking brake, release it smoothly. The car should move forward immediately, since forward force was already established before the brake let go — there’s no gap for gravity to act in.
Electric parking brakes, now common in many newer vehicles, work slightly differently than a manual lever but follow the same underlying logic: engage it while stopped, build power, then release — usually by pressing the button again or, on many systems, simply by applying enough throttle, since the electric brake automatically releases once it detects sufficient forward force. Check your specific vehicle’s behavior, since some electric parking brake systems release automatically the moment you press the accelerator, which changes the sequence slightly compared to a manual lever that always requires a deliberate release action.

Better Pedal Feel, Better Bite-Point Control
Thin-soled, non-slip driving shoes make it noticeably easier to feel the clutch bite point precisely, especially while you’re still building the skill.
Check Price on AmazonHill-Hold Assist Explained
Most vehicles built in the last decade include some form of electronic hill-hold assist, which briefly holds the brakes engaged — typically for one to two seconds — after your foot leaves the brake pedal on a detected incline, giving the powertrain time to build force before the car can roll back at all.
| System | How It Works | Limitation |
|---|---|---|
| Hill-hold assist (electronic) | Uses an incline sensor and the ABS/stability system to hold brake pressure briefly after pedal release | Times out after 1–2 seconds; won’t help on a long red light |
| Auto hold / brake hold | Holds the vehicle stationary indefinitely at a stop, on any grade, until throttle is applied | Not available on all trims; typically must be manually enabled |
| Electronic parking brake with hold | Some systems auto-apply the electric parking brake at a stop and release it automatically with throttle | Behavior varies significantly by manufacturer |
Hill-hold assist is a safety net, not a replacement for technique. It’s designed to cover the same half-second gap the manual and handbrake methods address directly — but it typically disengages after a short window, and it isn’t present on every vehicle. Learning the underlying technique means you’re never dependent on the electronics working correctly.
If your vehicle’s hill-hold system seems inconsistent or isn’t engaging at all, that’s worth diagnosing rather than working around — see our guide to OBD2 scan tools for real-time sensor monitoring for how to check the relevant fault codes yourself before a shop visit.
It’s also worth understanding what hill-hold assist is not: it isn’t a parking brake substitute, and it isn’t designed to hold a vehicle stationary for an extended stop, like a long red light on a steep grade. The one-to-two second window exists specifically to bridge the brake-to-throttle transition, not to replace the parking brake’s ability to hold a vehicle indefinitely. Relying on hill-hold assist during a long wait — rather than shifting to park or engaging the parking brake — is a common misunderstanding that occasionally leads to exactly the rollback the system was meant to prevent, once the timeout is reached and the driver isn’t prepared for the brakes to release on their own.
Step-by-Step: Hill Start Without Rollback
Combining everything above into a single repeatable sequence, regardless of which specific method you’re using:
Assess the Grade Before You Need To
As you approach a stop on an incline, note the steepness and decide in advance which method you’ll use — bite point, handbrake, or relying on hill-hold assist — rather than deciding in the moment you’re already stopped.
Come to a Complete, Controlled Stop
Hold the footbrake firmly. If using the handbrake method, apply the parking brake now, while the footbrake is still doing the holding.
Build Forward Force Before Releasing Any Brake
Find the clutch bite point, or apply light steady throttle in an automatic, while the brake — foot or hand — is still holding the vehicle in place.
Release the Brake Only Once You Feel the Car Straining Forward
This is the entire technique in one sentence: don’t release the brake until the powertrain is already trying to move the car forward. Everything else in this guide exists to help you recognize and control that moment.
Ease Into Full Throttle and Full Clutch Release Smoothly
Once moving, continue the transition smoothly rather than snapping the clutch up or flooring the accelerator, both of which can cause a lurch or wheel spin on a steep or slick grade.
Common Mistakes That Cause Rollback
What Prevents Rollback
- Building forward force before releasing any brake
- Using the handbrake method on steep or unfamiliar grades
- Deciding on a method before you’re already stopped
- Smooth, gradual clutch and throttle transitions
- Treating hill-hold assist as a backup, not a plan
What Causes It
- Releasing the footbrake before adding any throttle
- Riding the clutch fully up without finding the bite point first
- Panicking and releasing the brake suddenly when a car is close behind
- Assuming hill-hold assist will engage without confirming it has
- Ignoring the grade until already stopped and rolling
One mistake deserves special mention: over-correcting out of nervousness about the car behind you. A driver who feels pressured by a close following vehicle often rushes the brake release, which is the single most common trigger for the exact rollback they’re trying to avoid. If a vehicle behind you is following too closely on an incline, that’s a following-distance problem on their part — see our guide on the safe following distance rule — not a reason to rush your own technique.
A second overlooked mistake: treating hill-hold assist as invisible insurance rather than an active system you should be able to feel working. Drivers who’ve never deliberately noticed the brief brake-hold sensation after releasing the pedal on an incline often don’t realize when the system fails to engage — a dead 12-volt battery backup, a disabled stability control system, or a simple sensor fault can all silently remove the feature. Get in the habit of noticing that brief hold on every hill stop, the same way you’d notice if your turn signal stopped clicking, so a missing hold registers immediately rather than as a surprise rollback.
Steep Grades, Loaded Vehicles & Trailers
Everything in this guide gets harder — not different, just harder — as grade and vehicle weight increase. A fully loaded pickup or a vehicle towing a trailer needs a noticeably wider force margin than an empty sedan, because there’s simply more mass for gravity to act on.
If steep-grade driving is a regular part of your routine — mountain commutes, towing, or rural delivery routes — it’s worth reviewing runaway truck ramp and steep-grade safety alongside this guide, and confirming your trailer hitch class is rated appropriately for the loads you’re carrying, since hitch capacity affects how the combined vehicle behaves on an incline.
Vehicle-specific factors compound the load issue further. A front-wheel-drive vehicle carrying most of its weight over the drive wheels can actually gain traction under load in some situations, while a rear-wheel-drive vehicle with a light rear end can lose traction more easily when heavily loaded at the front — towing a trailer, for instance. Neither factor changes the fundamental hill-start technique, but both are worth knowing before assuming a heavier vehicle simply behaves like a scaled-up version of an empty one; the weight distribution, not just the total weight, shapes how the vehicle responds.
For very long or repeated steep-grade stops — a multi-light hill climb in city traffic, for example — fatigue becomes a real factor in technique consistency. A driver who executes a clean hill start once can still get sloppy on the fifth attempt in ten minutes, simply from the repeated concentration required. If you know a route involves several consecutive graded stops, treat each one with the same deliberate attention as the first rather than assuming muscle memory alone will carry you through all of them.
Rain, Snow & Ice
Reduced traction changes hill starts in a specific way: it’s no longer just about timing the brake-to-throttle transition, it’s about doing that transition without breaking the tires loose. Too much throttle on a wet or icy incline spins the wheels instead of producing forward motion, which can actually make rollback worse, not better.
- In rain: Use less throttle than you would on dry pavement and expect the bite point to need slightly more patience. See rain driving safety fundamentals for related traction guidance.
- In snow: Second gear starts (on a manual) or a gentler throttle application (automatic) reduce wheel spin on an incline. Cross-reference driving in snow without chains and our broader winter driving safety guide.
- On ice: Avoid stopping on an icy incline at all if you have any choice in the matter. If you must, the handbrake method combined with minimal throttle is the safest approach — see black ice survival guidance.

Practice With a Safety Net
Rubber wheel chocks behind the rear tires let you practice hill starts on a real incline with a physical backup in case timing is still inconsistent.
Check Price on AmazonPracticing Safely
Find a quiet, gently graded street with no traffic behind you for your first attempts — a steep grade with cars queued behind you is the worst possible place to learn the timing. Increase the grade gradually as the technique becomes automatic rather than something you have to consciously think through.
Start on a Gentle Grade With No One Behind You
A driveway apron or a lightly sloped street removes the pressure of a following vehicle while you build the basic feel for bite point or handbrake timing.
Add a Passenger to Watch for Rollback
A second person outside or behind the vehicle can confirm whether any backward movement is happening — it’s often too subtle for the driver to feel clearly while still learning.
Progress to Steeper, Realistic Grades
Once the flat-grade technique feels automatic, move to steeper practice locations that better match where you’ll actually need this skill — a hilly neighborhood or a parking structure ramp, for instance.
This maneuver pairs naturally with a broader driving-skills routine — see our comparison of online drivers ed programs and our library of permit test practice questions if you’re preparing for a road test rather than simply building confidence for daily driving.

Review Your Own Hill Starts
A dash cam that also records the cabin view lets you play back your pedal timing after a practice session — genuinely useful for spotting rushed brake releases.
Check Price on AmazonTroubleshooting
Stalling Every Time You Try
Almost always means the clutch is being released past the bite point before enough throttle has been added. Slow the whole sequence down and focus on holding the bite point steady rather than continuing to ease the clutch up. See fixing manual transmission stalling for a full breakdown.
Consistent, Noticeable Rollback Even With Technique
Check the basics first: worn brake pads reduce the footbrake’s holding force during the transition, and a worn clutch can shrink or shift the bite point unpredictably. See brake pad wear indicators and causes of transmission slipping if the issue feels mechanical rather than technique-related.
Hill-Hold Assist Warning Light or Inconsistent Engagement
This usually points to a sensor or ABS-module issue rather than a transmission problem. An OBD2 scan can often identify the specific fault before you rely on a shop diagnosis alone — see our OBD2 scan tools guide.
Jerky or Lurching Launch
Usually too much throttle relative to clutch position, or releasing the clutch too quickly after the bite point rather than easing through it. Slow the clutch release specifically — throttle timing is rarely the actual cause of a lurch, even though it often gets blamed for it.
Rollback That Only Happens With Passengers or Cargo Aboard
This is a load, not a technique, problem — the extra weight raises the force threshold your bite point or throttle needs to clear. Rather than second-guessing a technique that works fine when driving alone, deliberately add slightly more throttle before releasing the brake whenever the vehicle is carrying meaningfully more weight than usual, and lean on the handbrake method on steeper grades under load.
Frequently Asked Questions
What exactly causes a car to roll back on a hill?
Rollback happens in the gap between releasing the brake and the engine and clutch (or torque converter) producing enough forward force to overcome gravity pulling the car downhill. Every hill-start technique exists to close or eliminate that gap.
Is the handbrake method better than the bite-point method?
Neither is universally better — the handbrake method removes timing pressure and works well on steep grades or for newer drivers, while the bite-point method is faster once mastered and doesn’t require an extra hand movement. Many experienced manual drivers use bite point for gentle grades and the handbrake method for steep ones.
Does hill-hold assist work on every vehicle?
No. It’s common on vehicles from roughly the last decade but isn’t universal, and even where present it typically only holds the brakes for one to two seconds after pedal release, not indefinitely.
Can automatic transmissions roll back on hills?
Yes, particularly on grades over roughly 10%. Idle creep alone often isn’t enough force on a steep incline, so the same brake-to-throttle overlap technique used in manuals still applies, just without a clutch to manage.
Why do I stall every time I try a hill start in a manual?
The most common cause is releasing the clutch past the bite point before adding enough throttle. Slow the sequence down and focus on holding the bite point steady while gas is added, rather than continuing to release the clutch.
Is it illegal to roll back slightly on a driving test?
Rules vary by state and examiner, but any noticeable rollback — even a few inches — is commonly scored as a deduction, and rolling back enough to approach a vehicle behind you can be an automatic failure. Check your specific state’s road test rubric.
How much does towing a trailer change hill start technique?
Significantly. The added mass increases the force needed to overcome gravity, which shrinks your margin for timing error substantially. The handbrake method or confirmed hill-hold assist is strongly recommended over bite-point timing alone when towing.
What’s the safest way to practice hill starts?
Start on a gentle grade with no traffic behind you, ideally with a passenger who can confirm whether any rollback is happening, and progress to steeper grades only once the technique feels automatic.
Should I use less throttle on a wet or icy hill start?
Yes. Excess throttle on a low-traction incline spins the tires instead of producing forward motion, which can make rollback worse rather than better. Use a gentler, more patient throttle application than you would on dry pavement.
What’s the difference between hill-hold assist and auto hold?
Hill-hold assist briefly holds the brakes for one to two seconds after pedal release on a detected incline. Auto hold (or brake hold) keeps the vehicle stationary indefinitely at any stop, on any grade, until the driver applies throttle — a more complete system, but not available on all vehicles.
Why does my hill-hold warning light come on sometimes?
It typically points to a sensor or ABS-module fault rather than a transmission issue. A basic OBD2 scan can usually identify the specific fault code before a shop visit.
Does a worn clutch make hill starts harder?
Yes. A worn clutch can shift or shrink the bite point unpredictably, making the same technique that used to work reliably feel inconsistent. If rollback or stalling has gotten noticeably worse over time rather than staying constant, a mechanical check is worth ruling out.
Bottom Line
A hill start without rollback comes down to one principle repeated in every method in this guide: never release a brake — foot or hand — until the powertrain is already producing enough forward force to hold the car in place on its own. Master that timing, choose the right method for the grade and conditions in front of you, and rollback stops being a source of anxiety and becomes a maneuver you don’t think about twice. Keep practicing on progressively steeper grades until the whole sequence feels automatic rather than deliberate, and it will.
For the rest of your low-speed maneuver practice, see our guides to the three-point turn and parallel parking, step by step.
Shop Driving Practice Essentials⚠️ Safety First
Know Before You Drive — Personal Breathalyzer
A personal breathalyzer gives you accurate BAC readings in seconds. Don’t guess — know for certain before you get behind the wheel.
📶 Shop Breathalyzers on AmazonAffiliate link — we earn a small commission that keeps DriveSafeGuide running. Thank you!