Protect Your Vehicle: The Best Rust-Proofing Methods for Your Undercarriage
A layer-by-layer breakdown of every real rust-proofing option — what each one actually does to bare steel, what it costs, and which one fits the roads you actually drive.
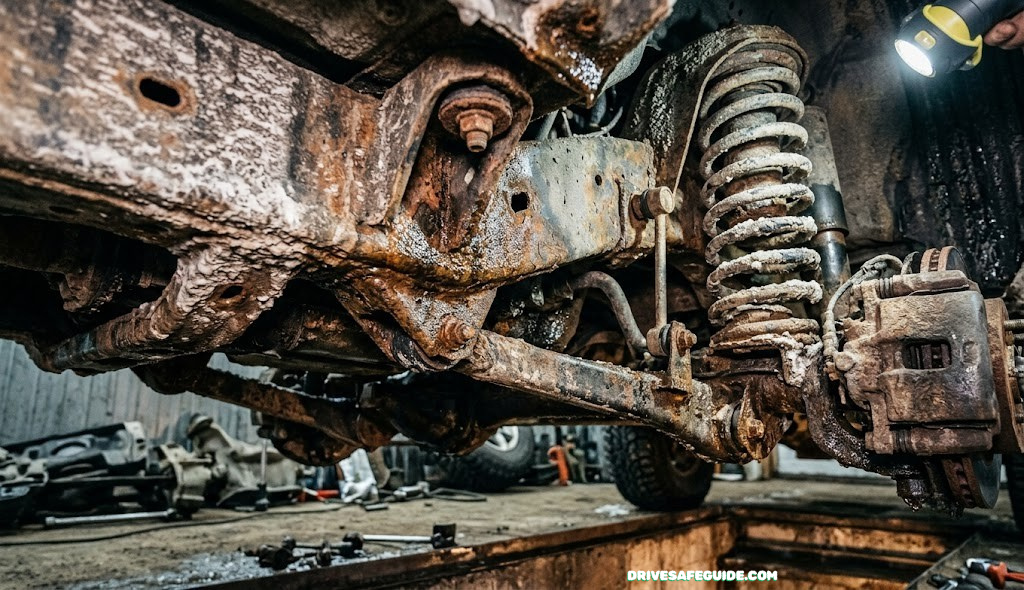
Rust doesn’t start on the hood or the door panels. It starts underneath, in the frame rails, the wheel wells, and the seams you never look at, where road salt, wet gravel, and trapped moisture sit against bare metal for months at a time. By the time a rust bubble shows up on a fender, the undercarriage has usually been losing the fight for years. This guide walks through every rust-proofing method sold today, in plain terms, so you can pick the one that actually matches your climate, your vehicle’s age, and your budget instead of whatever the dealer finance office is pushing that day.
What follows isn’t a ranked “number one pick.” It’s a field comparison, because the honest answer to “what’s the best rust-proofing method” depends on where you park at night, what the roads look like every February, and whether you’re protecting a car you’ll trade in next year or a truck you plan to drive for the next fifteen. Read through the method breakdowns, check the comparison table against your own situation, and use the maintenance checklist at the end regardless of which product you land on.
Why the Undercarriage Rusts First
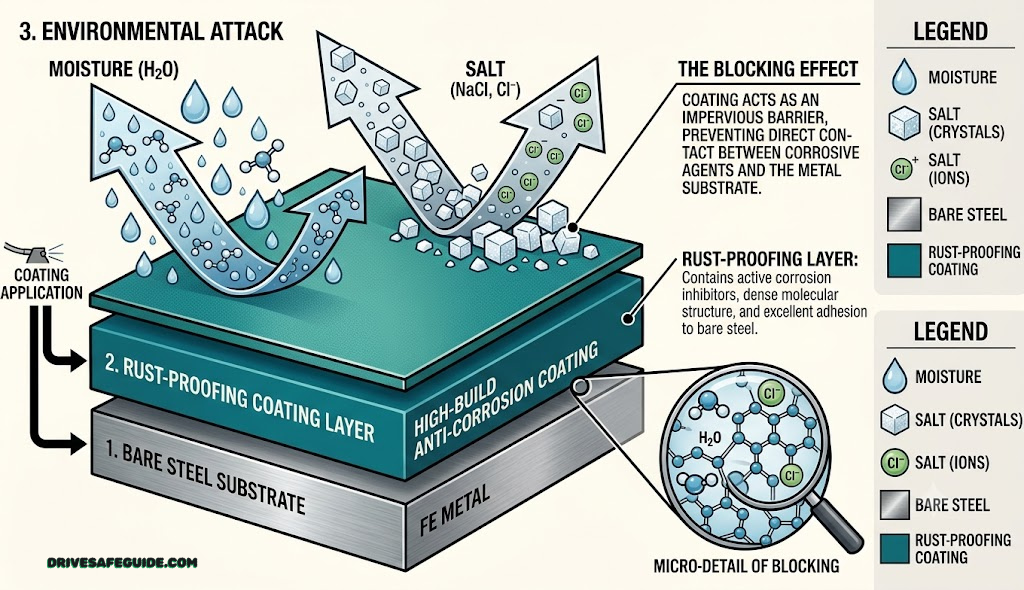
Rust is not random damage. It is a specific chemical reaction, and it only needs three ingredients to get going: iron, oxygen, and water. Steel body panels and frame rails are almost pure iron alloy, so the metal is never the missing piece. The undercarriage rusts before anywhere else on the vehicle because it’s the one place that reliably has the other two ingredients present at the same time, day after day.
Road spray delivers the water. Ambient air delivers the oxygen. And on winter roads, departments of transportation add a third accelerant: salt brine, a liquefied de-icer that can carry roughly a fifth of its volume in dissolved salt. That salt doesn’t cause rust on its own, but it turns ordinary water into a much more efficient electrolyte, the medium that lets electrons move freely between different points on the metal’s surface. A faster electron exchange means a faster reaction, which is why a car that spends a few winters on salted highways can develop more corrosion than an identical car that spent a decade in a dry climate.
This is also why rust rarely stays put once it starts. The reaction creates a small, localized battery: one spot on the metal acts as the anode, where iron atoms actually dissolve away, and a nearby spot acts as the cathode, where oxygen picks up the freed electrons. Once that pair is established, the process feeds itself as long as moisture is present, spreading outward from the original scratch or weld seam. That’s the mechanical reason a “small surface rust spot” so often turns into a hole a few seasons later if nothing interrupts the cycle.
There’s a second, less obvious version of this same reaction worth knowing about: galvanic corrosion between two different metals. When steel comes into direct contact with a more “noble” metal like the aluminum used in some subframes, control arms, or aftermarket brackets, the same moisture-and-electrolyte setup can cause one metal to corrode noticeably faster than it would on its own, with the less noble metal — usually the steel — acting as the sacrificial anode. This is why anti-seize compound and isolating washers or coatings matter at any bolted joint where dissimilar metals meet, and why an undercarriage with mixed materials sometimes shows rust concentrated at very specific hardware points rather than spread evenly across a panel.
It’s also worth understanding why the wheel wells and the area just behind each tire tend to go first. Spinning tires fling a concentrated, high-velocity mix of grit, moisture, and salt directly onto the inner fender and the frame section behind it, far more aggressively than the gentle spray the rest of the underbody receives while driving in a straight line. If you want a preview of where to check first on any vehicle, that’s it. For a broader look at what winter driving conditions do to a vehicle overall, our winter driving safety guide covers the handling side of the same salted-road conditions discussed here.
Is Rust-Proofing Actually Worth It?
This is the question every owner should answer honestly before spending a dollar, because the answer genuinely depends on the vehicle and the roads it sees, not on a universal rule. A car that spends its whole life in a dry, low-salt climate and gets traded in every three years has a very different risk profile than a truck that plows through slush all winter and gets kept for fifteen years.
Modern manufacturing has closed some of the gap that made aftermarket rust-proofing nearly mandatory decades ago. Galvanized steel, which is coated in a layer of zinc, resists oxidation because the zinc corrodes preferentially and protects the iron underneath even where the coating is scratched. Many exterior trim pieces and lower body components have also shifted to plastics and polycarbonates, materials that simply can’t participate in the anode-cathode reaction that produces rust. Those changes matter, but they’re concentrated on visible panels — the structural frame, subframe, brake and fuel lines, and suspension mounting points underneath are still overwhelmingly bare or thinly coated steel.
Rust-proofing tends to pay off when…
- You drive on salted or brined roads for at least part of the year
- You live near a coastline, where salt air alone accelerates corrosion
- You plan to keep the vehicle past the ten-year mark
- The vehicle already shows early surface rust on the frame or wheel wells
- Resale value on a rust-free undercarriage matters to you at trade-in time
It matters less when…
- You drive almost exclusively on dry, low-humidity roads
- You lease or trade in every two to three years
- The vehicle is largely garage-kept and washed regularly
- You’re comparing it against a “lifetime” package priced like a used engine
The honest financial case for rust-proofing isn’t about preventing every speck of surface rust — that’s cosmetic and mostly harmless. It’s about protecting structural and mechanical points: frame rails, control arm mounts, brake lines, and fuel lines. Corrosion in those areas doesn’t just look bad, it can compromise steering response and, in advanced cases, fail a state safety inspection outright. If you’re weighing this decision alongside other maintenance priorities, our pre-road-trip safety check guide covers the mechanical inspection points that overlap directly with rust-prone areas.
There’s also a resale-value argument that’s easy to underestimate until you’re on the other side of it. A prospective buyer — or a dealer’s appraiser — who gets underneath a used vehicle and finds a solid, intact frame will simply value that car higher than an equivalent one with visible frame scale or bubbling paint along the rockers. In regions where salted roads are the norm, a documented rust-proofing history can be a genuine selling point, the same way a full service record is. In regions where it’s rarely needed, spending on it mostly just costs money without moving the needle on what a buyer will pay.
Every Rust-Proofing Method, Compared at a Glance
Before going deep on any single method, it helps to see them side by side. Each one takes a different approach to the same problem — keeping water and oxygen away from bare steel — and each makes a different trade-off between penetration, durability, mess, and cost.
| Method | How it protects | Typical reapplication | Best suited for |
|---|---|---|---|
| Oil / lanolin spray | Stays soft, creeps into seams, displaces moisture | Annually | Salt-belt daily drivers, older vehicles |
| Rubberized / tar undercoating | Hardens into a sealed shell over the metal | 2–5 years, inspect yearly | Newer vehicles wanting noise reduction too |
| Wax / cavity coating | Dries to a firmer, tack-free film | 2–3 years | New, rust-free vehicles as preventive care |
| Electronic module | Weak current intended to disrupt the reaction | N/A — no physical layer | Debated; least evidence of the group |
| Ceramic coating / PPF | Chemical- and UV-resistant shell on paint | 2–5 years | Lower body panels and paint, not suspension |
Notice that these aren’t strictly competitors. A rust converter treats existing corrosion, a barrier coating seals clean metal, and an oil-based top-up maintains the seal over time — many experienced owners run two or three of these in combination rather than betting everything on one product. We’ll break down exactly how and why in the sections below.
As a quick way to use the table above: if you already see any rust on the frame or wheel wells, start with a converter, not a coating. If the vehicle is new or rust-free and you’re driving salted roads, an annual oil spray is the highest-value single step you can take. If you’re mainly trying to protect a vehicle you plan to keep spotless for resale, a wax-based cavity treatment plus ceramic coating on the lower panels covers both the structural and cosmetic sides of the problem.
Oil & Lanolin-Based Sprays
This is widely considered the most effective aftermarket rustproofing category, and it’s the one most corrosion specialists recommend first for vehicles that already see winter roads. Products in this family — the names that come up constantly in owner forums are lanolin-based sprays and mineral-oil-based sprays — never fully harden. They stay soft, tacky, and slightly oily for as long as they’re on the vehicle, which is the entire point.
Because the formula stays low-viscosity, it can creep by capillary action into places a brush or a rigid coating physically cannot reach: spot welds, folded seams, the inside of box-section frame rails, and door cavities. A professional application typically involves drilling a series of small, discreet access holes — often two dozen or more locations on a full treatment — specifically to get the wand into those interior cavities, not just the visible underbody.
Pros
- Best penetration into seams, welds, and hidden cavities
- Self-healing — re-flows slightly if the film is disturbed
- Actively displaces existing moisture rather than just blocking new moisture
- Doesn’t crack, so it can’t trap water behind a broken shell
Cons
- Needs reapplication roughly every year for full protection
- Stays slightly oily, which attracts dirt and can drip for a day or two after a fresh application
- Must be kept off rotors, brake pads, and exhaust components
- A full professional treatment runs a recurring annual cost rather than a one-time fee
One detail that surprises first-time buyers: lanolin, the base ingredient in several popular formulas, is a natural wax derived from sheep’s wool. It’s non-toxic and biodegradable compared to older petroleum-heavy formulations, which is part of why it’s become the default recommendation among shops that specialize exclusively in this kind of treatment. It also means it’s genuinely harmless if a small amount finds its way into the cabin’s ventilation system from an over-sprayed area, which used to be a real concern with some older tar-based products.
Lanolin / Oil-Based Rust Inhibitor Spray
A penetrating, non-hardening spray for seams, frame rails, and wheel wells — the category most salt-belt owners reach for first.
Check Price on AmazonRubberized & Tar-Based Undercoating
This is the classic black, tar-like spray most people picture when they hear “undercoating.” It was originally introduced decades ago primarily to quiet road noise, and rust resistance came along as a secondary benefit. The application process sprays a rubberized or asphalt-based compound onto the floor pans, wheel wells, and exposed underbody, where it dries into a solid, textured shell.
When it’s applied correctly to clean, dry metal, that shell does block moisture effectively, and it holds up for several years — often three to five — without needing a fresh coat. The catch is what happens when it doesn’t stay intact. Stone chips, off-road debris, and normal flexing of the vehicle over time can crack or chip the hardened surface. Because the surrounding coating is sealed, any moisture that slips through a breach has nowhere to evaporate to. It sits trapped against the metal, and the corrosion that starts underneath a crack can spread invisibly until the shell itself is the only thing hiding a much larger problem.
Pros
- Long-lasting single application — often 3 to 5 years
- Reduces road and gravel noise noticeably
- No drilled access holes required for the visible underbody
- Dry to the touch, so it doesn’t attract road grime the way an oil film does
Cons
- Can crack or chip, trapping moisture behind the breach
- Requires an annual visual inspection to catch damage early
- Doesn’t penetrate interior cavities the way an oil-based spray does
- Should never go directly over untreated existing rust
This category also tends to divide opinion the most sharply among longtime mechanics. Some swear by it for the noise reduction and the multi-year gap between applications; others avoid it entirely after seeing what a hidden breach looks like once a rocker panel is cut open. Both experiences are legitimate — the outcome depends almost entirely on surface prep quality and how well the vehicle is inspected afterward, not on whether the product itself is inherently good or bad.
If a shop offers this option, ask directly how they prep the surface first — degreasing and rust treatment before spraying matters more than the product itself. For the mechanical systems most exposed to this kind of hidden corrosion, it’s worth cross-checking symptoms separately; our guide to brake pad wear indicators and our coolant leak detection guide both cover components that sit close to the underbody and can be affected when corrosion spreads unseen.
Rust Converter & Metal Prep Treatment
Neutralizes existing surface rust and creates a paintable, corrosion-resistant base before any barrier coating goes on.
Check Price on AmazonWax-Based & Cavity Coatings
Sitting between the soft oil sprays and the fully rigid rubberized undercoating, wax-based cavity coatings dry to a firmer, tack-free finish while remaining more flexible than a tar-based shell. These products are frequently applied specifically inside body cavities — rocker panels, door bottoms, pillars — through small drilled access points, using a wand that mists the wax deep inside the structure rather than just coating the visible exterior surface.
Because they dry harder than a lanolin spray, cavity waxes don’t penetrate microscopic cracks quite as aggressively, but they also don’t attract dirt and grime the way a perpetually-soft oil film does, which some owners prefer for a cleaner-looking underbody. They’re a particularly strong fit for a new or nearly rust-free vehicle, where the goal is prevention rather than fighting existing corrosion.
Access-hole drilling understandably makes some owners nervous the first time they hear about it. In practice, a technician experienced with a specific make and model knows exactly where the factory already has small, often plugged, service openings, or where a discreet 3/8-inch hole in an inconspicuous spot won’t affect strength or appearance. Ask to see where the holes will go before the work starts, and confirm they’re plugged with grommets afterward to keep the treated cavity sealed from new debris.
Whichever coating category you choose for the body cavities, remember it’s only addressing the frame and sheet metal — not the paint above it. If exterior paint protection is also on your list, our comparison of ceramic coating versus traditional wax walks through that separate (but related) decision in detail.
Undercoating Spray Gun & Extension Wand
A compressor-fed wand attachment built to reach cavities, seams, and frame rails for a proper DIY application.
Check Price on AmazonElectronic Rust Inhibitors — Do They Really Work?
Electronic modules are usually offered as an upsell at the dealership, priced anywhere from several hundred to around a thousand dollars for a small device wired into the vehicle’s electrical system. The theory borrows from cathodic protection, an established engineering technique used on pipelines and ship hulls: run a weak current through the metal to make the whole structure act as a cathode rather than an anode, in principle slowing the electrochemical reaction that produces rust.
The problem is scale and geometry. Cathodic protection works reliably in controlled, submerged, or buried environments where the current can be distributed evenly across a relatively uniform structure. A vehicle’s underbody is a complicated, irregular network of panels, welds, and fasteners, and independent testing has produced mixed and inconsistent results for how well — or whether — these small aftermarket modules actually protect real-world vehicle geometry. Reviews from corrosion engineers and consumer publications alike tend to land somewhere between “unproven” and “skeptical,” rather than a confident endorsement.
This doesn’t mean the underlying physics of cathodic protection is fake — it’s a real, well-documented principle used successfully in other industries. It means the specific claims made for small aftermarket automotive units haven’t been demonstrated with the same consistency, and the price tag doesn’t leave much room for a method that might not deliver noticeable results.
If you’re specifically being offered one at the time of purchase, it’s worth treating it the same way you’d treat any other finance-office add-on: ask whether it can be removed from the deal entirely, and price out what a few years of a proven oil-based treatment would cost instead. In most cases, the barrier method covers more ground for less money and comes with a much longer, more consistent history of independent reviews behind it.
Ceramic Coatings, PPF, and Modern Factory Protection
Ceramic coatings and paint protection film (PPF) get mentioned constantly in rust-proofing discussions, but it’s worth being precise about what they’re actually protecting. A liquid-polymer ceramic coating bonds to painted surfaces and creates a hard, chemically resistant layer that fights UV damage and chemical etching — the kind of damage that leads to paint failure, which can eventually expose bare metal to the elements. PPF adds a physical, impact-resistant film on top of paint for the same underlying goal: keep the factory coating intact.
Where people sometimes overreach is applying — or paying for — a ceramic sealant on suspension components and bare undercarriage metal. Most modern factory suspension parts already arrive with a corrosion-resistant coated finish, and a ceramic sealant’s main strengths (gloss, hydrophobic behavior, UV resistance) aren’t especially relevant to parts that never see direct sunlight and aren’t judged on shine. The area where ceramic protection genuinely earns its cost, from a rust-prevention standpoint, is the lower body panels and rocker areas that take direct salt spray off the tires — protecting the paint there indirectly protects the metal underneath it.
Where it helps
- Lower doors, rocker panels, and wheel arch trim exposed to salt spray
- Slows paint chip and chemical etching that eventually exposes bare metal
- Long-lasting (multi-year) compared to a wax topcoat
Where it’s overkill
- Suspension components and undercarriage frame steel
- Any surface that’s already actively rusting — it doesn’t treat existing corrosion
- Vehicles where budget is better spent on a penetrating undercarriage spray first
Factory-side improvements also play a role here. Galvanized steel and the shift toward hard plastics on trim and lower panels have measurably reduced how quickly newer vehicles develop cosmetic rust compared to vehicles built decades ago. None of that changes the calculus for the structural underbody, though, which is why the methods earlier in this guide still matter even on a newer vehicle.
One myth worth retiring: applying an aftermarket rust-proofing product does not void a manufacturer’s factory warranty or its factory anti-corrosion warranty, provided the installer doesn’t damage anything in the process, such as pinching a wiring harness while drilling an access hole. What can create a problem is a low-quality installer who isn’t careful — which is exactly why the questions listed in the DIY-versus-professional section below are worth asking any shop before they get started.
Ceramic Coating Kit for Lower Body Panels
A durable, chemical-resistant sealant for rocker panels and lower doors — the paint areas that take the most salt spray.
Check Price on AmazonDIY vs. Professional Rust-Proofing: What You Actually Get
Cost comparisons for rust-proofing are everywhere, but the number alone hides what changes between tiers. The real differences are coverage depth, prep work, and warranty terms — not just the price on the invoice.
| Option | Typical cost | What’s included |
|---|---|---|
| DIY kit (driveway job) | Roughly $100–$150 | Spray product, basic wand, visible underbody only |
| Independent auto shop | Roughly $200–$500 | Degreasing prep, oil or wax spray, some cavity access |
| Dealership package | Roughly $500–$1,500+ | Rubberized or “lifetime” coating, often with a conditional warranty |
A quality professional application is defined by how many discreet access points the technician drills and treats — a thorough job might cover twenty-five or more distinct locations, including door interiors, hood, and trunk cavities, not just the parts you can see by looking under the car. A lower-cost shop that only sprays the visible underbody is doing a fraction of the job for a fraction of the coverage, even if the price looks similar to a more thorough competitor.
Read the fine print on any “lifetime” rust-through warranty carefully before treating it as a selling point. Many require a paid inspection at a specific interval, sometimes annually, and missing even one appointment by a few weeks can void the entire warranty — meaning the ongoing inspection fees, added up over the years you own the vehicle, may end up costing more than simply reapplying an oil-based spray on your own schedule would have.
Going the DIY route is entirely realistic for the oil-spray and wax-spray categories, especially with a basic wand attachment and a weekend of clean, dry weather. It won’t match a professional’s drilled-cavity coverage, but for owners who reapply annually anyway, a driveway application every fall can rival — or beat — a single expensive dealership package over several years. If you’re setting up a garage for this kind of maintenance work generally, our guide to dry storage locations covers moisture control that applies just as well to the tools and products used here.
Car Ramps & Jack Stand Set
Safe, stable underbody access for cleaning, inspecting, and applying rust-proofing yourself.
Check Price on AmazonHow the Application Process Actually Works
Whether it’s done in a professional bay or in a driveway, the sequence that determines whether a rust-proofing treatment succeeds or fails is the same, and it starts long before the spray gun comes out.
- Full undercarriage wash. A power wash removes loose dirt, old road salt, and any flaking surface rust scale. Skipping this step is the single biggest reason DIY treatments underperform — product sprayed over grime bonds to the grime, not the metal.
- Complete drying time. The vehicle needs to sit until the underbody is fully dry, not just surface-dry. Any trapped water gets sealed in right along with the coating if this step is rushed.
- Rust treatment on existing corrosion. Any active rust spots get wire-brushed or sanded back to sound metal and treated with a converter before anything else goes on. This step is non-negotiable if a hard or semi-hard coating is going over it.
- Shielding sensitive components. Brakes, rotors, exhaust piping, and electrical connectors get masked or avoided entirely — oil-based products in particular can affect braking performance if they reach the rotors or pads.
- Application in warm, dry conditions. Product flows and penetrates seams more evenly on warm metal, and dry ambient air means no moisture gets trapped inside cavities during the process. Late spring through early fall is typically the ideal window.
- Cure or set time before driving. Drip-style products need a day or two to stop dripping before the vehicle should be parked somewhere it won’t stain. Wax and rubberized coatings need enough dry time to properly set before exposure to rain or a car wash.
For the cleaning stage specifically, a proper undercarriage degreaser makes a bigger difference than most DIYers expect — plain water alone often isn’t enough to cut through baked-on road grime and old oil residue before a fresh treatment goes on.
A quick note on safety for anyone doing this at home: work in a well-ventilated space, wear safety glasses and nitrile gloves since these products are messy and can irritate skin with prolonged contact, and never work under a vehicle supported only by a jack — always use rated jack stands or ramps rated for the vehicle’s weight. It’s also worth double-checking that no product has drifted onto the exhaust heat shield before the first drive after application, since residue on a hot surface can smoke or smell for the first few miles.
Heavy-Duty Undercarriage Degreaser
Cuts through baked-on road grime and old residue so new rust-proofing product actually bonds to clean metal.
Check Price on AmazonClimate, Vehicle Age, and Timing
Not every vehicle in every location needs the same level of protection, and matching the method to the actual conditions is where owners get the most value for the least spend.
Cold, salted-road climates
This is the highest-risk category, full stop. Road brine’s roughly one-fifth salt content makes it more corrosive to a car’s undercarriage, exhaust, and fuel lines than dry rock salt or sand ever was, and it coats the underbody on nearly every drive throughout the season. Annual oil-based treatment is close to essential here, and a fall application timed before the first salted roads of the season offers the best protection window.
Coastal and humid climates
Salt air alone accelerates corrosion even without road brine in the picture, and rust formation generally speeds up once humidity climbs above the mid-50-percent range — a threshold coastal regions cross often, especially in spring and fall. Electronic modules are particularly weak choices here, since consistently high ambient humidity works against the entire premise of a current-based solution.
Dry, low-humidity climates
Vehicles here face the lowest baseline risk, and a wax-based preventive coating on a new vehicle, refreshed every few years, is often sufficient rather than an aggressive annual regimen.
New vehicle vs. used vehicle
A new vehicle is the ideal candidate for early treatment — the metal is pristine and a preventive coating can go on before any seam has a chance to start corroding. A used vehicle needs an inspection first; if advanced penetrating rust is already present in a structural area, welding or part replacement may need to happen before any rust-proofing treatment can do its job properly.
Trucks, SUVs, and off-road vehicles
Vehicles that regularly see gravel roads, trailheads, or towing duty face an accelerated version of the same wear pattern: more paint chipping from thrown debris, more moisture packed into wheel wells from mud and water crossings, and often a longer duty cycle before trade-in. A thicker, more wash-resistant product on the exposed underbody, paired with the standard interior-cavity treatment, tends to hold up better on these vehicles than a lighter formula chosen for a commuter sedan.
Owners who take road trips through varied climates in a single season — hot, dry stretches followed by mountain passes that get salted in shoulder-season storms — should treat for the harshest conditions they’ll actually encounter, not the average. Our road trip safety check guide and winter emergency kit checklist are both useful companions if your driving spans that kind of range.
Maintaining Your Rust-Proofing Investment
Whatever method you choose, none of them are truly “set and forget.” A short, consistent maintenance habit is what actually separates a vehicle that stays rust-free for fifteen years from one that needs frame repair at year eight.
- Wash the undercarriage weekly during salt season. A simple rinse of the wheel wells and underbody removes accumulated brine before it has time to sit against the metal for days at a stretch.
- Inspect wheel wells and the areas just behind each tire first. These take the most direct spray and are almost always the earliest place corrosion shows up.
- Repair paint chips promptly. Any break in the paint on lower panels exposes bare metal immediately — a small touch-up now is far cheaper than the alternative.
- Check rubberized or wax coatings annually for cracks. A hairline crack found early can be patched; one left for a full season can hide a season’s worth of trapped moisture underneath it.
- Reapply oil-based sprays on schedule, typically once a year, rather than waiting until the coating visibly thins out.
- Store in a dry, covered area when possible. Consistent exposure to damp air between drives adds up even when the vehicle isn’t on the road.
A flashlight and an inspection mirror are genuinely enough to catch most problems early — you don’t need a lift to check the areas that matter most. Pairing that quick visual check with your regular tire rotation or oil change schedule means it becomes routine instead of a separate chore you forget about.
If you want a simple seasonal rhythm to follow: apply or refresh an oil-based treatment in early fall, before the first salted storms of the season; do a thorough undercarriage wash and visual inspection in early spring, once road crews stop brining; and keep up the weekly rinse in between whenever the roads have been recently treated. That three-part rhythm covers the vast majority of what a salt-belt vehicle needs without turning rust prevention into a constant chore.
Telescoping Inspection Mirror & LED Flashlight
Quickly check wheel wells, frame rails, and coating condition without needing to jack up the vehicle.
Check Price on AmazonFrequently Asked Questions
How often should undercarriage rust-proofing be reapplied?
Oil and lanolin-based sprays are typically reapplied every twelve months because they stay soft and gradually wash away. Rubberized and wax-based coatings can last two to five years, but they should still be inspected annually for cracks or chips that let moisture underneath.
Is factory rust protection enough on its own?
Factory coatings and galvanized panels help, but manufacturing punches thousands of spot welds, bends, and drilled holes into the metal, which exposes bare steel that the factory layer never reached. Vehicles driven in salt, humidity, or gravel usually benefit from an added treatment.
Do electronic rust-proofing modules actually work?
Electronic modules use a weak current intended to slow the electrochemical reaction that forms rust, but independent reviews are mixed and many corrosion specialists remain skeptical, especially at the price dealerships charge. A physical barrier method has a more predictable track record.
Can rubberized undercoating make rust worse?
It can, if it cracks or chips and traps moisture behind the hardened shell. Because the surrounding coating is sealed, any water that gets in has nowhere to evaporate, which can hide accelerated corrosion until it becomes a structural problem.
What is the best rust-proofing method for a vehicle driven on salted roads?
A penetrating oil or lanolin-based spray applied annually is generally the most reliable choice for salt-belt driving, since its low viscosity lets it creep into seams and spot welds that harder coatings miss, and it re-heals itself when disturbed.
Can I rust-proof my car myself?
Yes. DIY kits with an oil or wax-based spray, a wand attachment, and basic degreasing supplies can cost a fraction of a professional visit. The trade-off is coverage: professional shops drill discreet access holes to reach interior cavities that a driveway job usually can’t.
Is ceramic coating good for the undercarriage?
Ceramic coating is designed for exterior paint and lower body panels exposed to road salt spray, not suspension components, which are usually already coated metal. It adds gloss and chemical resistance to painted surfaces but isn’t a substitute for a penetrating undercarriage treatment.
How much does professional undercarriage rust-proofing cost?
Independent shops typically charge somewhere in the low hundreds of dollars for an annual oil-based treatment, while dealership rubberized or “lifetime” packages often run several hundred to over a thousand dollars, frequently with fine print requiring paid annual inspections.
What time of year is best to apply rust-proofing?
Warm, dry weather is ideal because the product flows more evenly on warm metal and there’s little risk of trapping moisture inside seams. Many shops recommend treating before the first cold, salted season a vehicle will face.
Which areas of the undercarriage rust first?
Wheel wells, the areas just behind the front and rear wheels, frame rails, and rocker panels tend to rust first because they take the most direct spray of salt, gravel, and moisture kicked up by the tires.
The Bottom Line
There’s no single “best” rust-proofing method that wins for every vehicle — there’s only the method that matches your climate, your budget, and how long you plan to keep the car. A daily driver on salted winter roads gets the most protection per dollar from an annual oil or lanolin spray. A newer vehicle you want to keep looking clean benefits from a wax-based cavity treatment applied early. And a vehicle already showing surface rust needs that corrosion treated and converted before any coating goes on top of it, full stop. Skip the expensive electronic module unless you’ve seen convincing independent evidence for your specific situation, and treat ceramic coating as paint protection, not undercarriage protection.
The single habit that matters more than any product on this page is consistency: wash the salt off regularly, check the wheel wells with a flashlight a few times a season, and reapply on schedule instead of waiting until you can see a problem. That routine, more than any one spray or shell, is what keeps a frame solid for the long haul.
Shop Rust-Proofing Kits on Amazon🚗 Recommended for Drivers
Drive Safer Every Day
Explore our top picks for car safety gear — from dashcams to emergency kits — all hand-picked to help you stay safe on the road.
🚗 Shop Car Safety EssentialsAffiliate link — we earn a small commission that keeps DriveSafeGuide running. Thank you!